🦏
ETH Home Staking Collection
DVT Home Staking Curriculum
  • The DVT Home Staking Curriculum
  • Curriculum breakdown & timeline
  • Understanding ETH validators
    • Introduction to ETH Validators
    • Roles & Responsibilities of a node operator
    • Rewards and penalties
    • Importance of client diversity
    • Distributed Validator Technologies (DVTs)
    • Economics of using DVTs (WIP)
      • Diva Staking (WIP)
      • Obol (WIP)
      • SSV (WIP)
    • Bonded Validators
    • Economics of bonded validators (WIP)
  • Hardware & systems setup
    • Setup Overview
    • Hardware & system requirements
    • Procuring your hardware
    • Assemble your hardware
    • Practicing for free on Cloud VMs
      • Google Cloud
      • Alibaba Cloud
  • Linux OS, Networking, & Security
    • Install and prepare the OS
    • Networking & network security
    • Device level security setup
    • Verifying checksums
  • Installing & configuring your EL+CL clients
    • Set up and configure execution layer client
      • Nethermind
      • Besu
      • Geth
      • Erigon
      • Reth
    • Set up and configure consensus layer client
      • Teku BN
      • Nimbus BN
      • Lodestar BN
      • Lighthouse BN
      • Prysm BN
  • Keystore generation & MEV-Boost
    • Validator key generation
    • Set up and configure MEV-boost
  • Native Solo Staking Setup
    • Validator client setup
      • Teku VC
      • Nimbus VC
      • Lodestar VC
      • Lighthouse VC
      • Prysm VC
    • Depositing 32 ETH into your validator
    • Exiting your validator
  • Monitoring, Maintenance, and Updates
    • Set up monitoring suite
      • Installing & configuring Prometheus
      • Installing & configuring Node Exporter
      • Installing & configuring Grafana
      • Beaconcha.in App API
      • Client Uptime Check
    • Maintenance & Updates
      • Nethermind
      • Besu
      • Teku
      • Nimbus
      • Lodestar
      • Updating the monitoring suite
      • Preparing for Pectra
  • DVT Setup
    • Diva Staking
      • Diva Staking client setup
        • Default - All-in-one setup
        • Advanced - with standalone Lodestar VC
      • Registering your Diva node
      • Updating your Diva client
      • Monitoring your Diva Node
    • Obol
      • Techne Bronze Speedrun (Launchpad)
      • Obol + Bonded Validators (Techne Silver)
        • Obol + Lido CSM
    • SSV
      • SSV + Lido CSM (WIP)
      • SSV Operator
      • SSV Staker
  • Bonded Validators Setup
    • Lido CSM
      • Generating CSM keystores
      • Set Fee Recipient Address
        • Method 1: Configure on validator keys
        • Method 2: Configure on separate validator client
        • Verifying Fee Recipient Registered on MEV Relays
      • Upload/Remove/View validator keys
      • Rewards & bonds
      • Exiting CSM validators
        • "Lazy" exits (TESTNET ONLY)
        • Proper Exits
      • Role/Address management
      • Monitoring
      • Automations
        • CSM with ETHPillar
        • CSM with ETH Docker
        • CSM with Dappnode
    • Puffer
      • Non-Enclave: 2 ETH
    • Ether.fi
      • Receive distributed validator keyshares
    • Stader (WIP)
    • Rocketpool (WIP)
  • Liquid Staking Vaults
    • Stakewise V3
  • Mainnet
    • Mainnet Deployment
    • Heroglpyhs (WIP)
  • Best practices
    • Slashing prevention
    • Maximising uptime and performance
    • Optimising security
    • Managing your withdrawal wallet
  • Tips
    • Advanced networking
    • Downloading files from your node
  • Useful resources
    • General resources
    • Holesky Faucets
  • Automation/tools
    • ETHPillar
    • ETH Docker
    • Automated power on/off
      • Wake-on-LAN (WoL)
      • Network UPS Tools (NUT)
    • Validator Healthcheck Alerts
  • Solo Stakers Guild
    • Lido CSM+SSV+Obol (Testnet)
Powered by GitBook
On this page
  • Warnings
  • Whitelist your wallet with ETHStaker
  • Reviewing mandatory disclaimers
  • Making the deposit
  1. Native Solo Staking Setup

Depositing 32 ETH into your validator

PreviousPrysm VCNextExiting your validator

Last updated 1 year ago

Warnings

  • Follow the instructions of this section closely. We will be using Metamask to connect to the Ethereum Launchpad website to complete the deposit process

  • DO NOT TRANSFER ETH DIRECTLY INTO THE BEACON DEPOSIT CONTRACT ADDRESS

  • Spare no effort in checking (and double checking) all details before making the transaction - e.g. public keys of validator signing keys and the deposit data file matches, verify smart contract address of the deposit contract from multiple sources

  • Make sure both your execution and consensus layer clients are fully synced and running without errors before you make the deposit

Whitelist your wallet with ETHStaker

  1. First, go to to try mining the full 32 testnet ETH.

    • If successful, skip to the next section

    • If not, just mine a small amount and continue on the following steps.

  2. Join the discord server here -

  3. Join the #cheap-holesky-validator channel

  4. Type “/cheap-holeskysky-deposit <your ETH address> ” in the text box and press enter

  5. Click on the link generated (ie. the text shown below)

  6. Connect your Metamask wallet and sign the message

  7. Copy the URL and paste it in the Enter Signature box.

Reviewing mandatory disclaimers

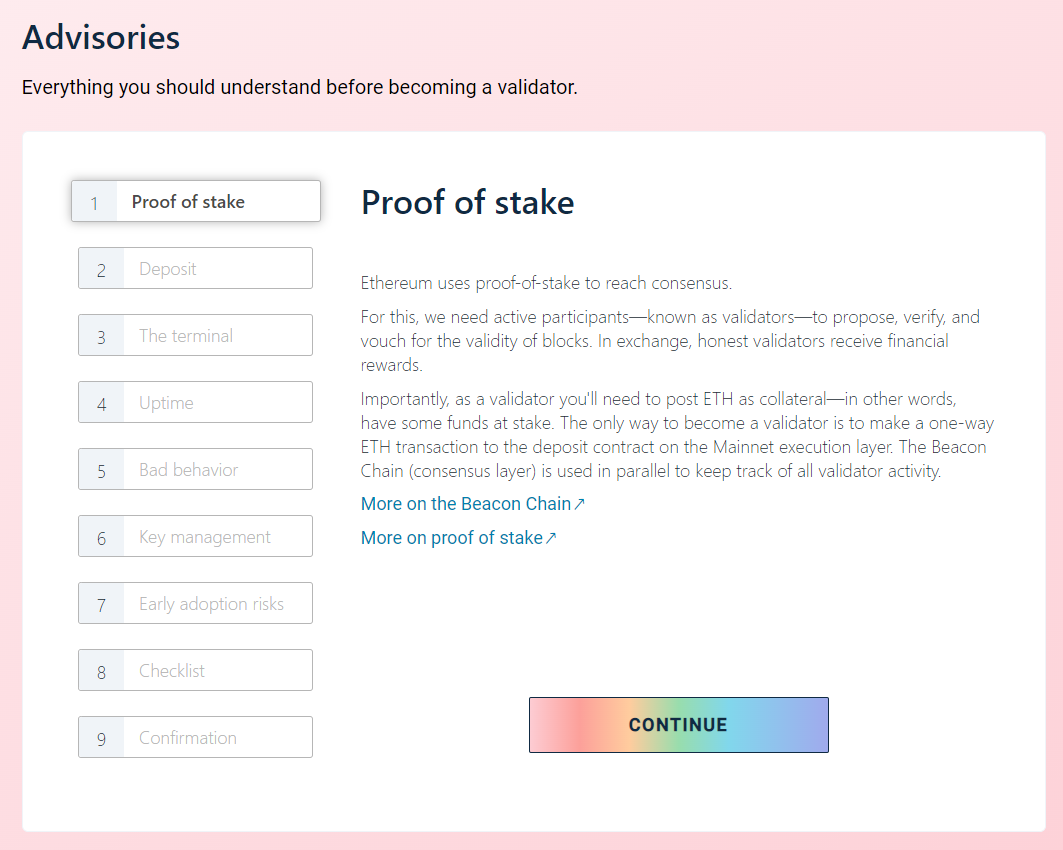
Click through and read all disclaimers carefully.

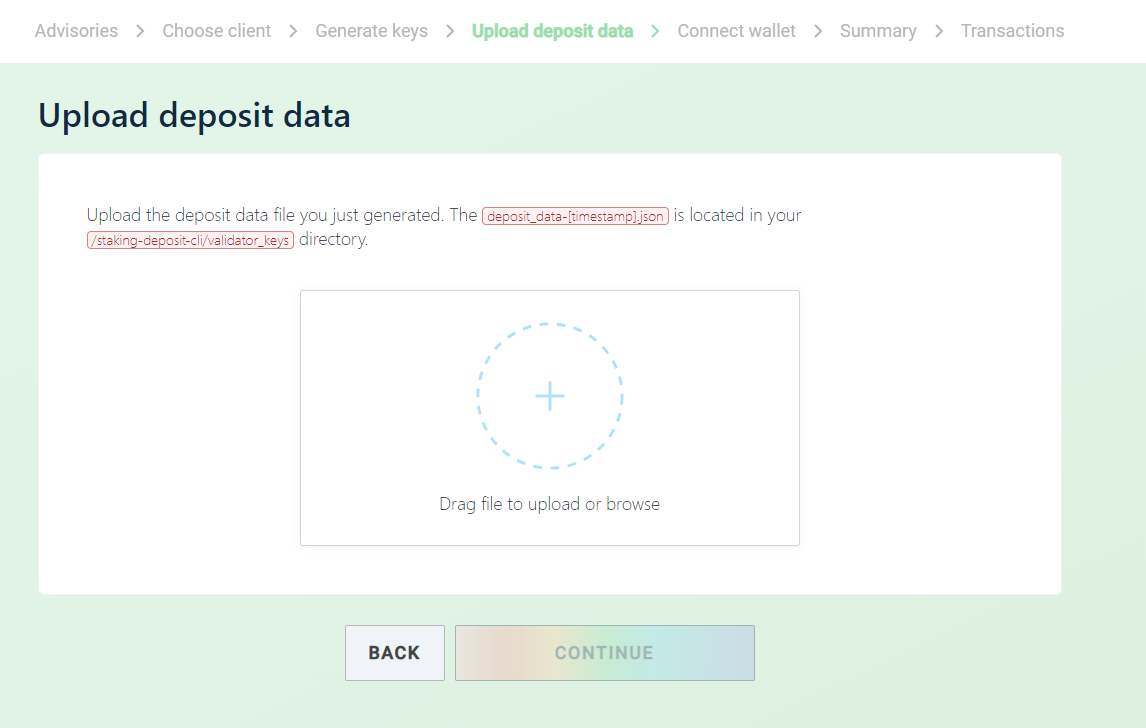
Continue clicking through until you reach the "Upload deposit data" section. Don't worry about the "Choose client" and "Generate keys" sections as you would already have dealt with those if you followed this guide in order.

Making the deposit

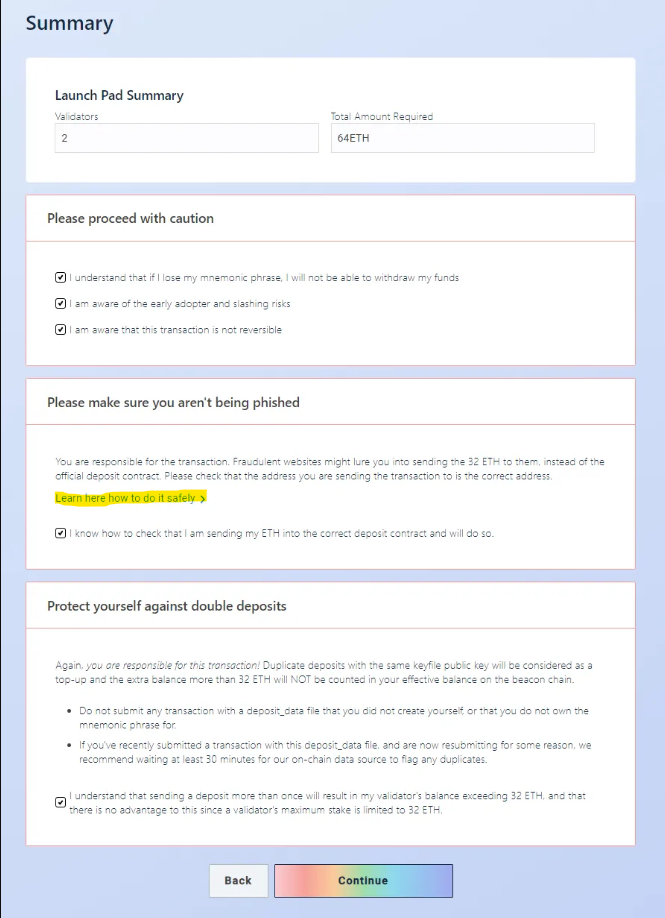
Upload your deposit_data-<timestamp>.json file you generated during the earlier section of the guide into the box above and click through until you see the following page.

Here you will need to check all disclaimer boxes before you can proceed. But before that, make sure you are not being phished by clicking on "Learn here how to do it safely" as highlighted above.

You will be brought to a page where you can reveal the address of the Ethereum Beacon Deposit Contract. Check that the address displayed in your wallet is the same before you execute the transaction approval.

Additionally, you can also check the address against the following sources:

The checks you perform above will point you to the deposit contract address for Mainnet. The deposit contract address on Holesky is:

0x4242424242424242424242424242424242424242

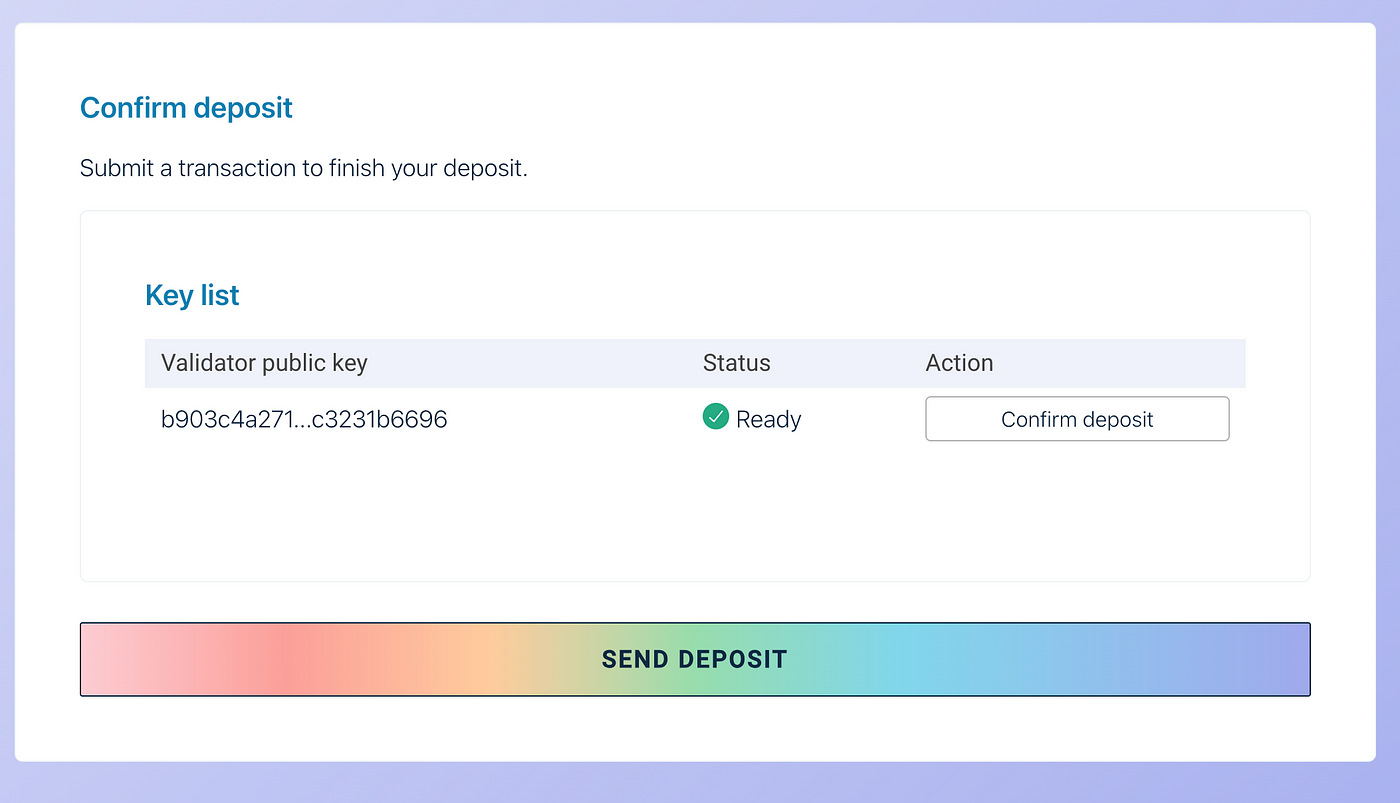
Once you are ready, click on "Send Deposit" and follow the instructions on Metamask or your other wallets.

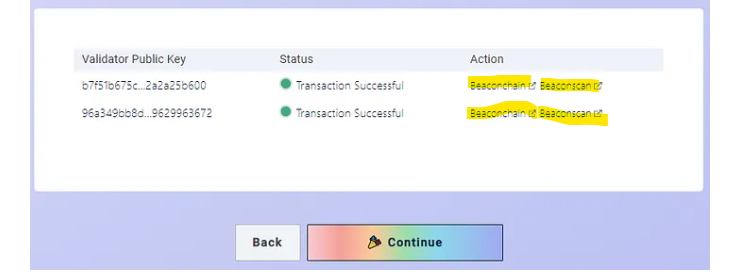
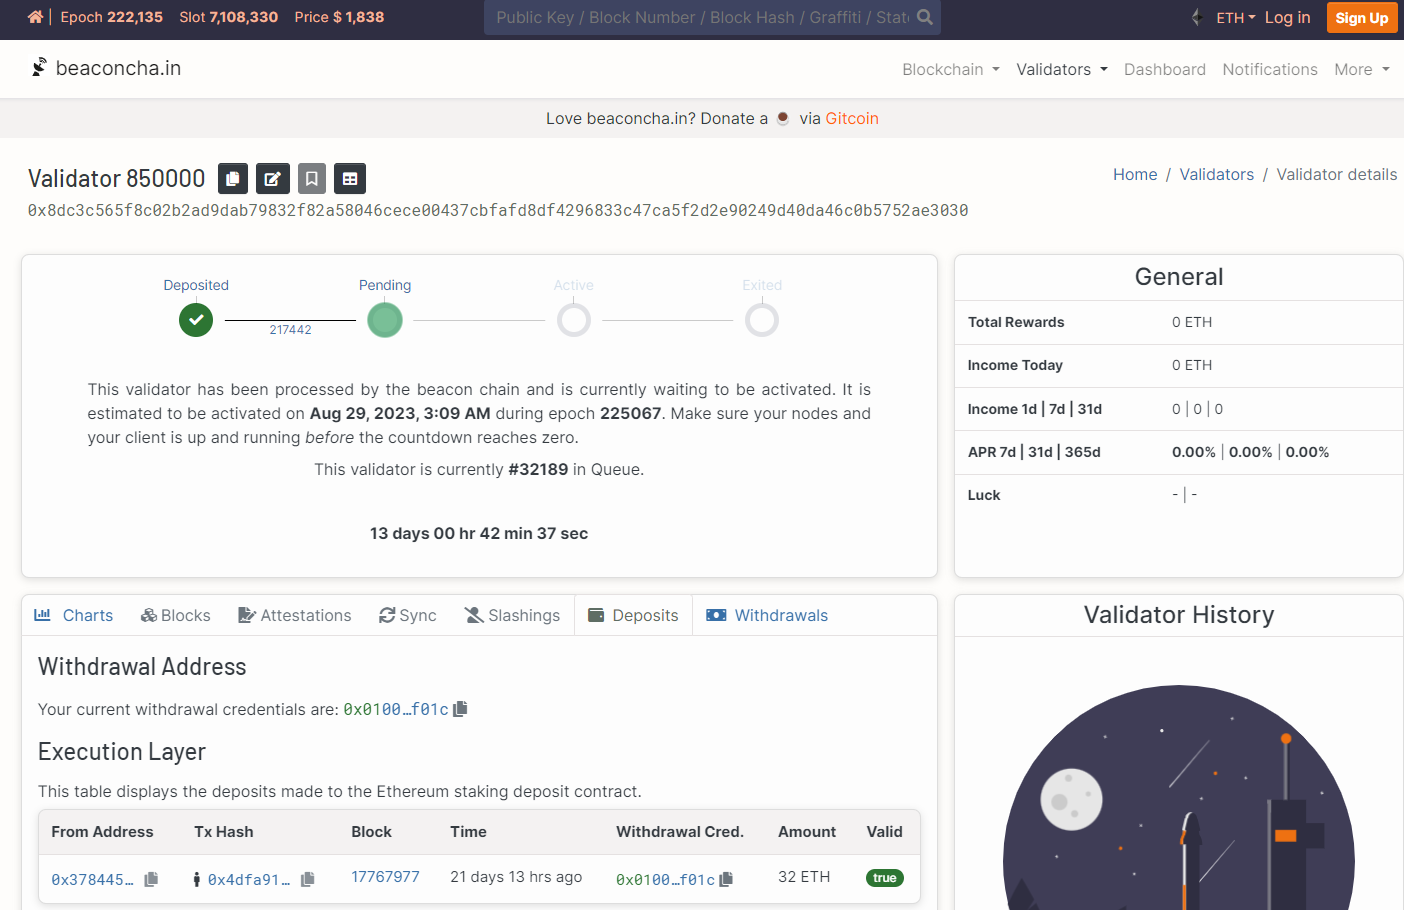
Once your transaction goes through, you will be able to click on the external links highlighted in yellow to track the activation progress and performance of your validator. Bookmark these links so that you can come back to them easily.

Don't panic if it doesn't show up initially! Give it some time to update itself :)

Go to on your browser and click on "Become a validator"
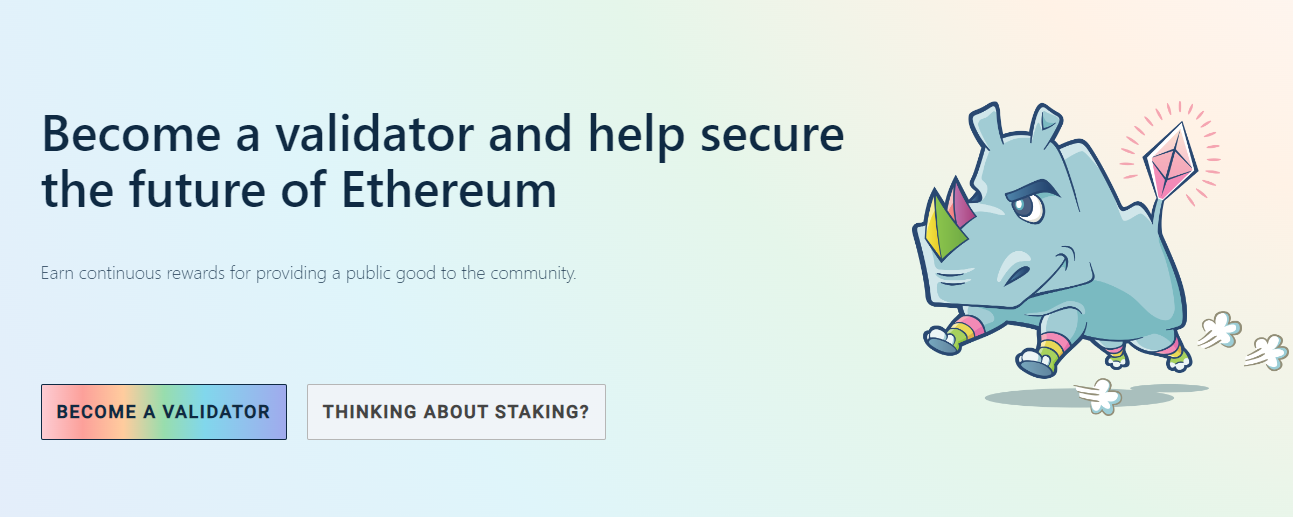
Congratulations! You are now a proud contributor to the decentralisation of the Ethereum network

🖖
https://holesky.launchpad.ethstaker.cc/
Etherscan
Consensys
Ethereum Foundation
https://holesky-faucet.pk910.de/
https://discord.gg/ethstaker
Signer.is