Validator key generation
Important
It is highly recommended that you perform this step using an air-gapped machine - i.e. a device that has never connected to the public internet before. We will describe a few methods below.
If this is not available, turn off all internet and wireless connection (e.g. Ethernet, WiFi, Bluetooth) before proceeding with the key generation step
In both cases above, make sure you are in a safe environment (e.g. home or office) with a trusted WiFi network for building the validator key generation tool from source. Make sure to also physically block all camera devices - e.g. laptop cameras, Webcams, people standing behind you during this process
Creating an air-gapped machine
The least technical way is to buy a cheap single board computer like the Raspberry Pi from official distributors for less than S$100 SGD
"OS-on-a-stick": For more technical workarounds, we can flash a new USB drive with TailsOS and run a completely fresh OS from this USB drive itself. This system will be completely isolated from your host device (e.g. working laptop) and the described method below will not store any files after you remove the USB drive
We will cover Method 2 in this guide.
What you will need
2 new and empty USB drives
A paper notebook and a pencil (Pens are not recommended)
100% FOCUS
Download the validator keystore generation file
This is the easiest GUI-based method of generating your validator keystores, deposit data, and recovery seed (mnemonic).
Download the Linux executable file onto your working laptop here: https://wagyu.gg/
Load the Linux executable file of Wagyu Keygen into a new and empty USB drive.
Downloading the executable binary file
Download the latest version of the Ethereum validator deposit key generation binary file on your working laptop here and verify the checksum of the downloaded zipped file.
Expected output:
After the checksum verification, move the zipped file into a new and empty USB drive.
*No action needed at this step.
Flash and install OS
1) Download latest TailsOS here and follow the respective instructions to verify the checksums of the downloaded file.
2) Download an ISO flasher (e.g. BalenaEtcher) and flash another new and empty USB drive with your preferred OS. Refer to the section below under steps (1) and (2) if needed.
Install and prepare the OS3) Once your USB drive is flashed with your preferred OS, plug it into your working device and reboot the device to go into the boot menu. Depending on your system, you might need to hold F2, F10, F12, or ESC during the rebooting process to bring up the boot menu.
4) Once you see the boot menu, select the option to boot up from your USB drive instead of your usual storage volume and you should see the following screen.
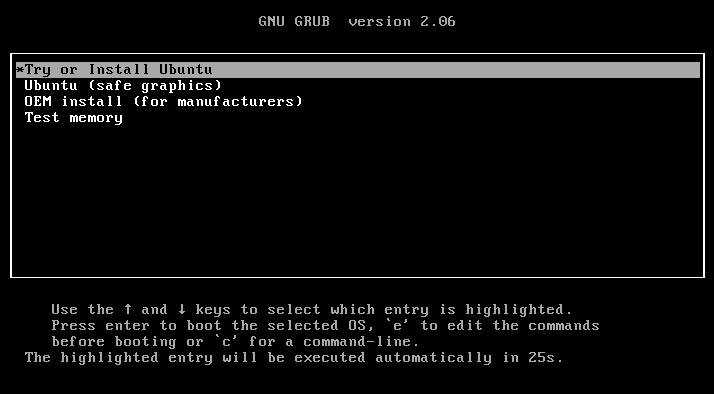
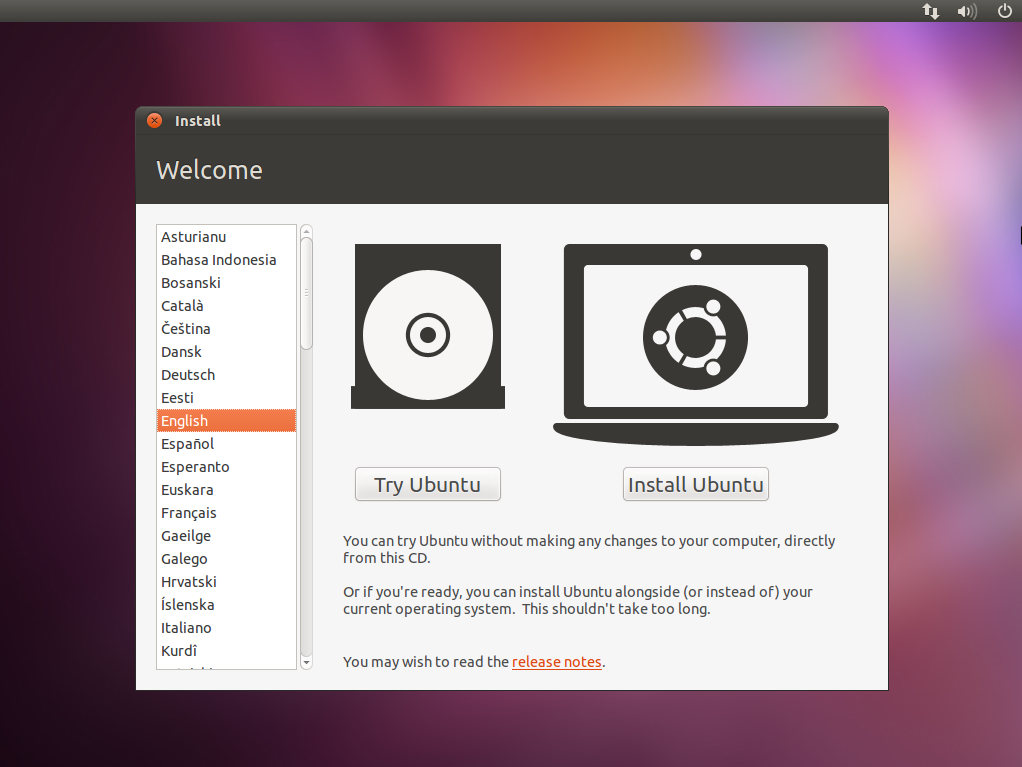
5) Select *Try or Install Tails and then Try Tailswhen you get to the next screen
Generate your validator signing keys
*BEFORE PROCEEDING TO THE NEXT STEP
Load the USB drive containing the Linux executable file of Wagyu Keygen onto the newly booted "OS-on-a-USB".
Move the Wagyu Keygen file into the Desktop of your "OS-on-a-USB" and run it (double-click).
Follow the instructions on the Wagyu Keygen GUI to:
Create a new secret recovery phrase
Select the network (Mainnet, Hoodi, Sepolia)
Write down your secret recovery phrase
Type in your secret recovery phrase manually to confirm you have written it down correctly
Choose how many validator keys you want to generate
Encrypt your validator keystores with a strong password
[IMPORTANT] Set your withdrawal address according to your setup (see below for options)
Native Solo Staking Setup: Use a secure Ethereum wallet address that you own--e.g., cold wallet address, SAFE multi-sig address
Diva Staking: Skip this section. The validator key shares will be assigned to you by the Diva client.
Lido CSM: Set your withdrawal address to the following.
RocketPool (WIP):
Stader (WIP):
Confirm password for validator keystores
Choose the folder to store the validator keystores and deposit data file that will be generated (choose the Desktop folder here)
There will be 2 files generated.
A
keystore-m_<timestamp>.jsonfile: This is your validator signing keystore that your validator node will use to sign attestations. Keep this file extremely secure.A
deposit_data-<timestamp>.json: This is the file that links your ETH deposit to your validator. You will only use this once, during the deposit process.
Store both files on a new USB drive by copying the entire staking-deposit-cli folder into it.
Restart your host device (e.g. working laptop) and remove the OS-on-a-stick. There will not be any persistent memory stored on it.
Load the USB drive containing the keystore generation zipped file onto the newly booted "OS-on-a-USB".
Copy the keystore generation zipped file into the Desktop of your "OS-on-a-USB".
Press ALT+T, then extract the contents of the zipped file and change directory into the extracted folder.
Generate your validator signing keys
*BEFORE PROCEEDING TO THE NEXT STEP
Run the following command to generate your validator keys. Replace <number> with the number of validators you want to set up and <YourWithdrawalAddress> with the actual withdrawal address depending on your setup choice.
Options for Withdrawal Address:
Native Solo Staking Setup: Use a secure Ethereum wallet address that you own--e.g., cold wallet address, SAFE multi-sig address
Diva Staking: Skip this section. The validator key shares will be assigned to you by the Diva client.
Lido CSM: Set your withdrawal address to the following.
RocketPool (WIP):
Stader (WIP):
You will be prompted to key in the following. Select accordingly.
Choose your language (for the session)
Confirm your execution address (your withdrawal address)
Choose the language of your mnemonic word list (seed phrase)
Create a password to encrypt your validator signing keystores
Confirm password created in step 4
Expected output:

Next, your mnemonic word list will be generated. Write it down on a piece of paper or notebook -*Never store this online or on any device that is connected to the internet.
Expected output:

Press any key once you have written your mnemonic down and the tool will prompt you to key in your mnemonic in the same order to verify that you have recorded it correctly.
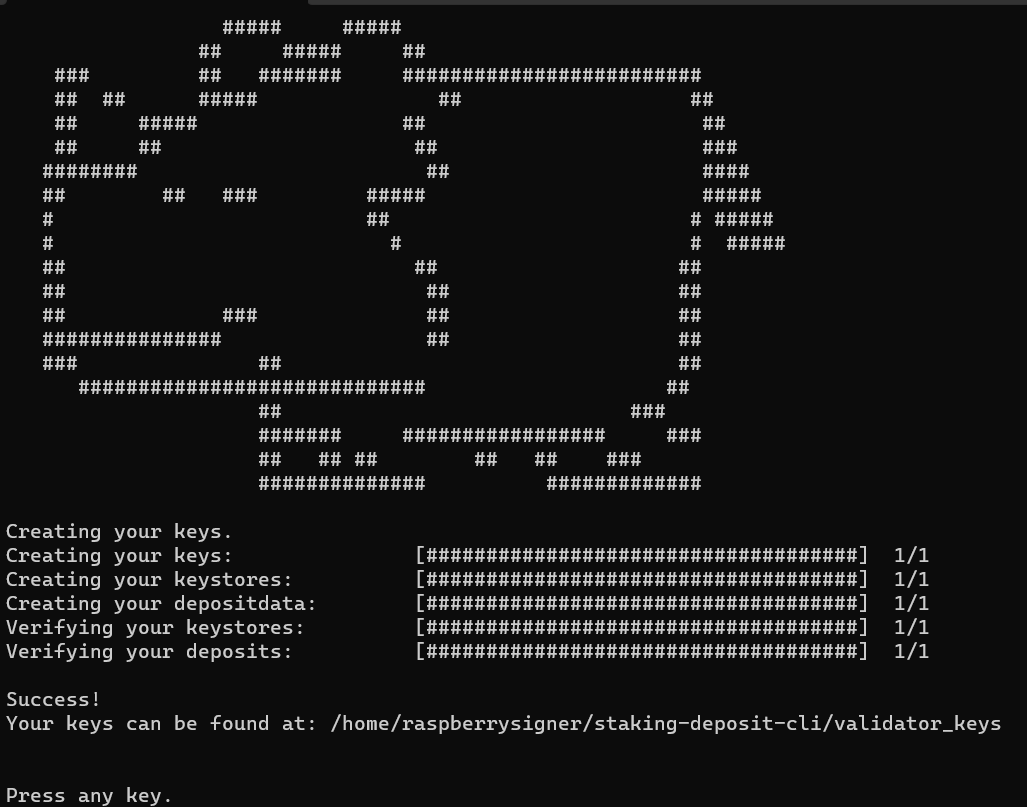
If you typed in your mnemonic correctly, you will be greeted by an ASCII art of a Rhino!
Expected output:
There will be 2 files generated.
A
keystore-m_<timestamp>.jsonfile: This is your validator signing keystore that your validator node will use to sign attestations. Keep this file extremely secure.A
deposit_data-<timestamp>.json: This is the file that links your ETH deposit to your validator. You will only use this once, during the deposit process.
Store both files on a new USB drive by copying the entire staking-deposit-cli folder into it.
Restart your host device (e.g. working laptop) and remove the OS-on-a-stick. There will not be any persistent memory stored on it.
Building the validator key generation tool from source
Connect your OS-on-a-USB to a trusted WiFi network and fire up the Linux terminal using Ctrl + Alt + T .
Install system dependencies - pip3 & virtualenv. Note: Remove the sudo prefix for each line if your system returns an error.
Create a python virtual environment to run the tool under:
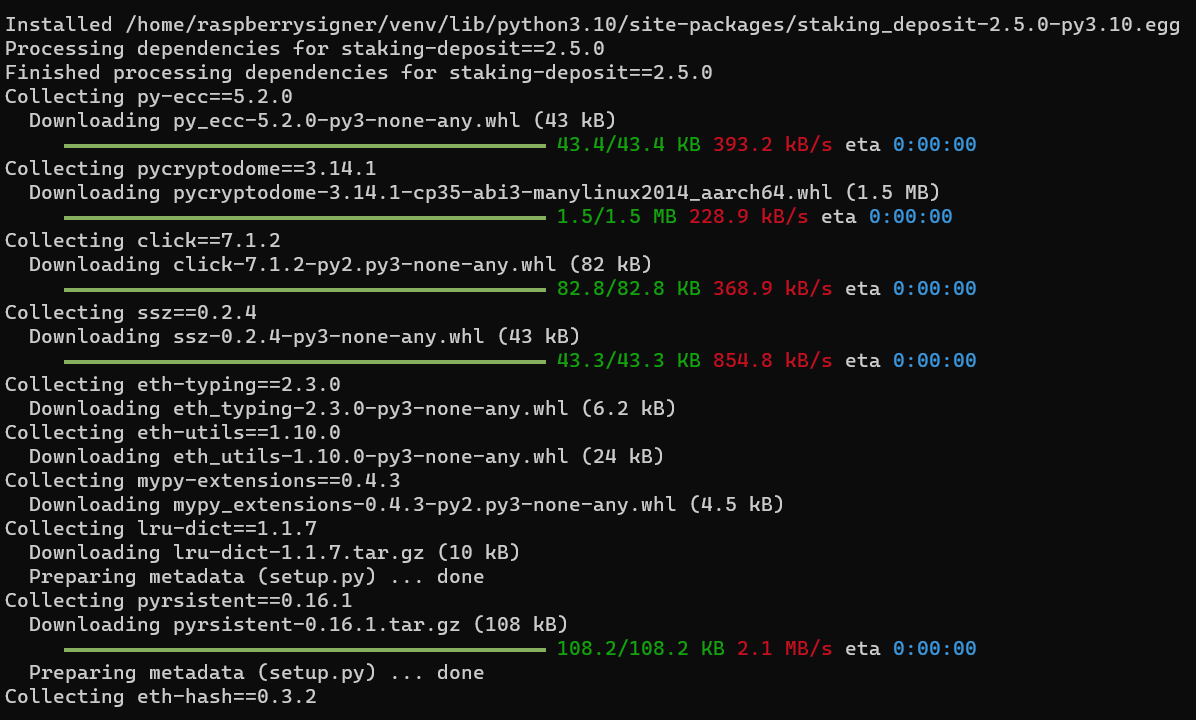
Install the dependency packages for running the tool:
Expected output: You should see some progress bars after a few seconds.
*BEFORE PROCEEDING TO THE NEXT STEP
Generate your validator signing keys
Run the following command to generate your validator keys. Replace <number> with the number of validators you want to set up and <YourWithdrawalAddress> with the actual withdrawal address depending on your setup choice.
Native Solo Staking Setup: Use a secure Ethereum wallet address that you own--e.g., cold wallet address, SAFE multi-sig address
Diva Staking: Skip this section. The validator key shares will be assigned to you by the Diva client.
Lido CSM:
On
mainnet, set your withdrawal address to the Lido CSM contract address0xB9D7934878B5FB9610B3fE8A5e441e8fad7E293fOn the
Hooditestnet, set your withdrawal address to the Lido CSM contract address0x4473dCDDbf77679A643BdB654dbd86D67F8d32f2
RocketPool (WIP):
Stader (WIP):
You will be prompted to key in the following. Select accordingly.
Choose your language (for the session)
Confirm your execution address (your withdrawal address)
Choose the language of your mnemonic word list (seed phrase)
Create a password to encrypt your validator signing keystores
Confirm password created in step 4
Expected output:

Next, your mnemonic word list will be generated. Write it down on a piece of paper or notebook -*Never store this online or on any device that is connected to the internet.
Expected output:

Press any key once you have written your mnemonic down and the tool will prompt you to key in your mnemonic in the same order to verify that you have recorded it correctly.
If you typed in your mnemonic correctly, you will be greeted by an ASCII art of a Rhino!
Expected output:

There will be 2 files generated.
A
keystore-m_<timestamp>.jsonfile: This is your validator signing keystore that your validator node will use to sign attestations. Keep this file extremely secure.A
deposit_data-<timestamp>.json: This is the file that links your ETH deposit to your validator. You will only use this once, during the deposit process.
Store both files on a new USB drive by copying the entire staking-deposit-cli folder into it.
Restart your host device (e.g. working laptop) and remove the OS-on-a-stick. There will not be any persistent memory stored on it.
Add validator key to the Node
Now that we have our validator signing keystore, we will need to place it in our validator node itself so that the node can sign attestations and propose blocks.
Plug in the USB drive with your validator signing keystores into your node device. Once the USB drive is plugged in, we will need to identify it. On the terminal of your node, run:
Expected output:
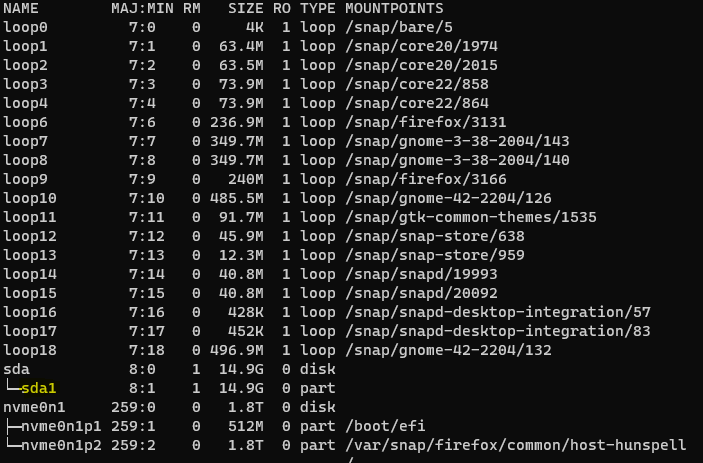
Look for your USB drive in the output list. It will take a name similar to the screenshot above - i.e. sdx.
After you find it, you can proceed to mount your USB drive onto the /media folder.
Note: Replace sda1 with the actual name of your USB drive.
You will now be able to access your USB drive via the terminal by going into the /media folder.
Go into your USB drive and copy your validator signing keystore into the HOME directory of your node.
Unmount and eject your USB drive.
Now you need to create a plain text password file for your validator node to decrypt your validator signing keystores.
First let's print and copy the file name of your validator signing keystore.
With the validator_signing_keystore_file_name copied, create the password file.
Type in the password you used when generating your validator keys in the earlier step. Then save and exit the file with CTRL + O, enter, CTRL + X.
32 ETH Solo Staking
Go to the Dappnode UI and navigate to the Stakers > Ethereum menu. Your Web3Signer will have a link saying Upload Keystores . If it doesn’t, make sure that you have waited enough time for all the packages to be installed (around 5 minutes) and refresh the page.
Then click on the Import Keystores button on the lower part of the Web3Signer UI.
Here browse for the keystore file(s) you generated in the previous step and enter them along with the password you chose to secure your keystores.
You are now ready to fund these validator accounts and start validating!
Lido CSM
Upload the keystores and tag them with "Lido".
The fee recipient will be automatically set to
0xE73a3602b99f1f913e72F8bdcBC235e206794Ac8for Holesky and0x388C818CA8B9251b393131C08a736A67ccB19297for Mainnet. It is not editable.
You are now ready to fund these validator accounts and start validating!
Last updated