# Replacements

## Clean-up testnet data

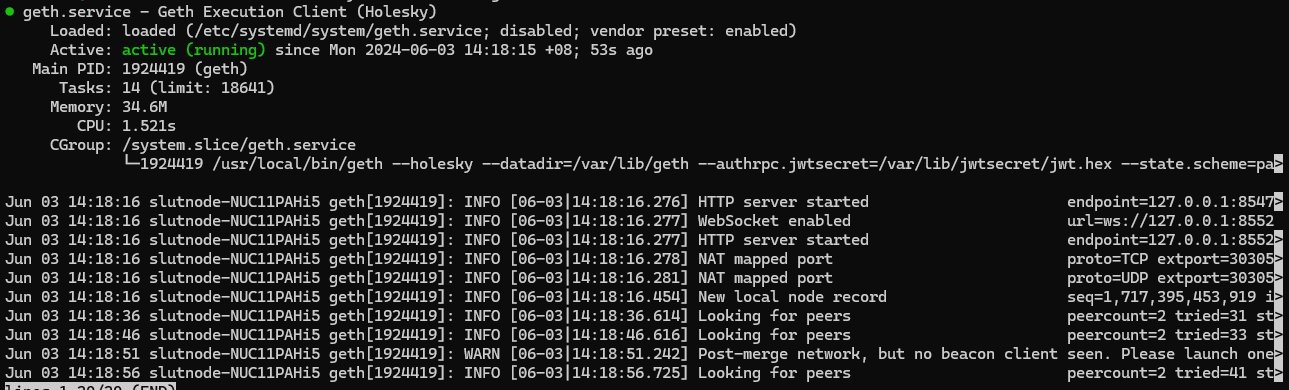
First, stop all existing clients running on the Holesky testnet.

```sh
sudo systemctl stop "execution_client.service"
sudo systemctl stop "consensus_client.service"
sudo systemctl stop "validator_client.service"
```

Additionally, for Lodestar users:

```sh
cd ~/lodestar_beacon
docker compose down
```

```sh
cd ~/validator
docker compose down
```

Then remove all existing data from client data directories. Select the ones relevant to your setup:

```sh
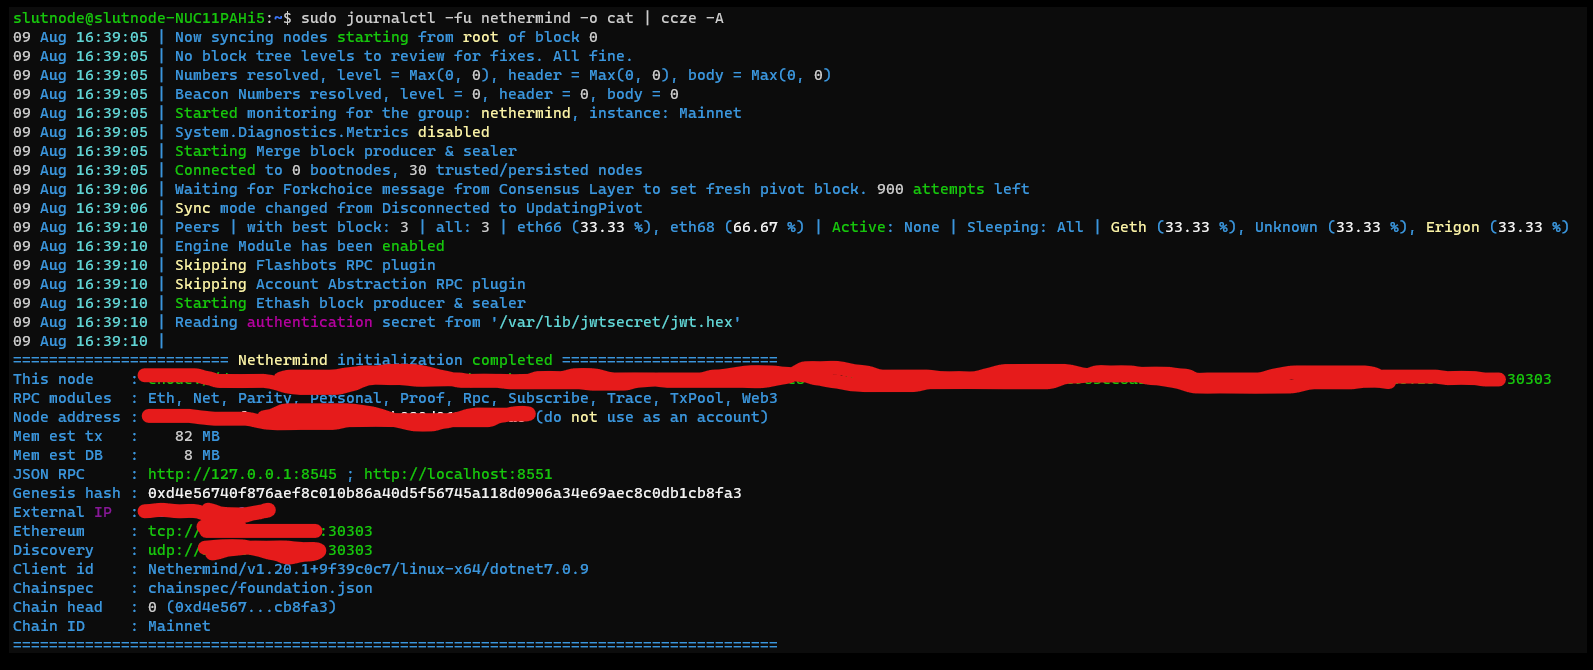
#Nethermind
sudo rm -r /var/lib/nethermind/*
#Besu
sudo rm -r /var/lib/besu/*
#Teku consensus
sudo rm -r /var/lib/teku_beacon/*
#Nimbus consensus
sudo rm -r /var/lib/nimbus_beacon/*
#Lodestar consensus
sudo rm -r /var/lib/lodestar_beacon/*
#Teku validator
sudo rm -r /var/lib/teku_validator/*
#Nimbus validator
sudo rm -r /var/lib/nimbus_validator/*
#Lodestar validator
sudo rm -r /var/lib/lodestar_validator/*
```

## Execution clients

1. Optionally, change the `Description` to Mainnet in the systemd configuration or docker-compose.yml for clarity - e.g.
   * Description=Nethermind/Besu Execution Client (Mainnet)
2. Set the network parameter in the systemd configuration files from `holesky` to `mainnet` - e.g.

   ```sh
   sudo nano /etc/systemd/system/"execution_client.service"
   ```

   * **Nethermind:** `--config mainnet`
   * **Besu:** `--network=holesky`

{% content-ref url="/spaces/oML8XLjdWBoYbtGBoQ9R/pages/fFMPQr8NuJnyMjNpSSqb" %}
[Set up and configure execution layer client](/installing-and-configuring-your-el+cl-clients/set-up-and-configure-execution-layer-client)
{% endcontent-ref %}

## Consensus clients

1. Optionally, change the `Description` to Mainnet in the systemd configuration or docker-compose.yml for clarity - e.g.
   * Description=Teku/Nimbus/Lodestar Consensus Client (Mainnet)
2. Set the network parameter in the systemd configuration or docker-compose.yml files from `holesky` to `mainnet` - e.g.

   ```sh
   sudo nano /etc/systemd/system/"consensus_client.service"
   ```

   * **Teku** (systemd): `--network=holesky`
   * **Nimbus** (systemd): `--network=holesky`
   * **Lodestar** (docker-compose.yml):&#x20;

     ```sh
     sudo nano ~/lodestar_beacon/docker-compose.yml
     ```

     * Amend `--network` flag

       ```
             - --network
             - mainnet
       ```
3. Set the checkpoint sync parameter in the systemd configuration or docker-compose.yml files from a `holesky` endpoint to `mainnet` - e.g.
   * **Teku** (systemd): `--initial-state=`
   * **Nimbus:** Re-run the checkpoint sync process on the mainnet separately.

     ```sh
     sudo /usr/local/bin/nimbus_beacon_node trustedNodeSync --network=mainnet --data-dir=/var/lib/nimbus_beacon --trusted-node-url=https://beaconstate.ethstaker.cc/ --backfill=false
     ```
   * **Lodestar** (docker-compose.yml):&#x20;

     ```
           - --checkpointSyncUrl
           - https://beaconstate.ethstaker.cc
     ```

{% hint style="info" %}
Choose one of the mainnet checkpoint sync URLs here - <https://eth-clients.github.io/checkpoint-sync-endpoints/>
{% endhint %}

Jump to section for reference below.

{% content-ref url="/spaces/oML8XLjdWBoYbtGBoQ9R/pages/WUnWqfxwlYe5PL9Rg7T6" %}
[Set up and configure consensus layer client](/installing-and-configuring-your-el+cl-clients/set-up-and-configure-consensus-layer-client)
{% endcontent-ref %}

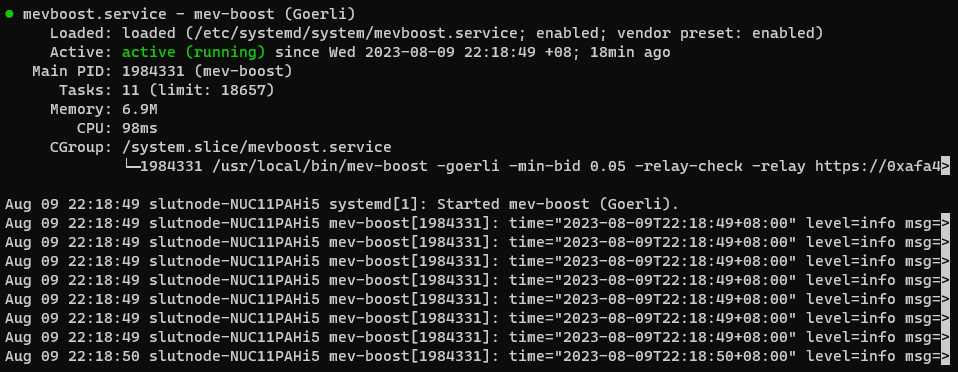
## MEV-Boost

1. Remove the `-holesky` flag in the systemd configuration file
2. Replace the URLs for your relays (`-relay` flag) with Mainnet ones.

```sh
sudo nano /etc/systemd/system/mevboost.service
```

Jump to section for reference below.

{% content-ref url="/spaces/oML8XLjdWBoYbtGBoQ9R/pages/Y2PN1jhI4eawhg4g3ze2" %}
[Set up and configure MEV-boost](/keystore-generation-and-mev-boost/set-up-and-configure-mev-boost)
{% endcontent-ref %}

## Validator clients

1. Optionally, change the `Description` to Mainnet in the systemd configuration or docker-compose.yml for clarity - e.g.
   * Description=Teku/Nimbus/Lodestar Validator Client (Mainnet)
2. Set the network parameter in the systemd configuration or docker-compose.yml files from `holesky` to `mainnet` - e.g.

   ```sh
   sudo nano /etc/systemd/system/"validator_client.service"
   ```

   * **Teku** (systemd): `--network=holesky`
   * **Nimbus** (systemd): No changes required
   * **Lodestar** (docker-compose.yml):&#x20;

     ```sh
     sudo nano ~/lodestar_validator/docker-compose.yml
     ```

     * Amend `--network` flag

       ```
             - --network
             - mainnet
       ```

Jump to section for reference below.

{% content-ref url="/spaces/oML8XLjdWBoYbtGBoQ9R/pages/yoh6eFpvKGFo82aqayhf" %}
[Validator client setup](/native-solo-staking-setup/validator-client-setup)
{% endcontent-ref %}

## Validator key generation

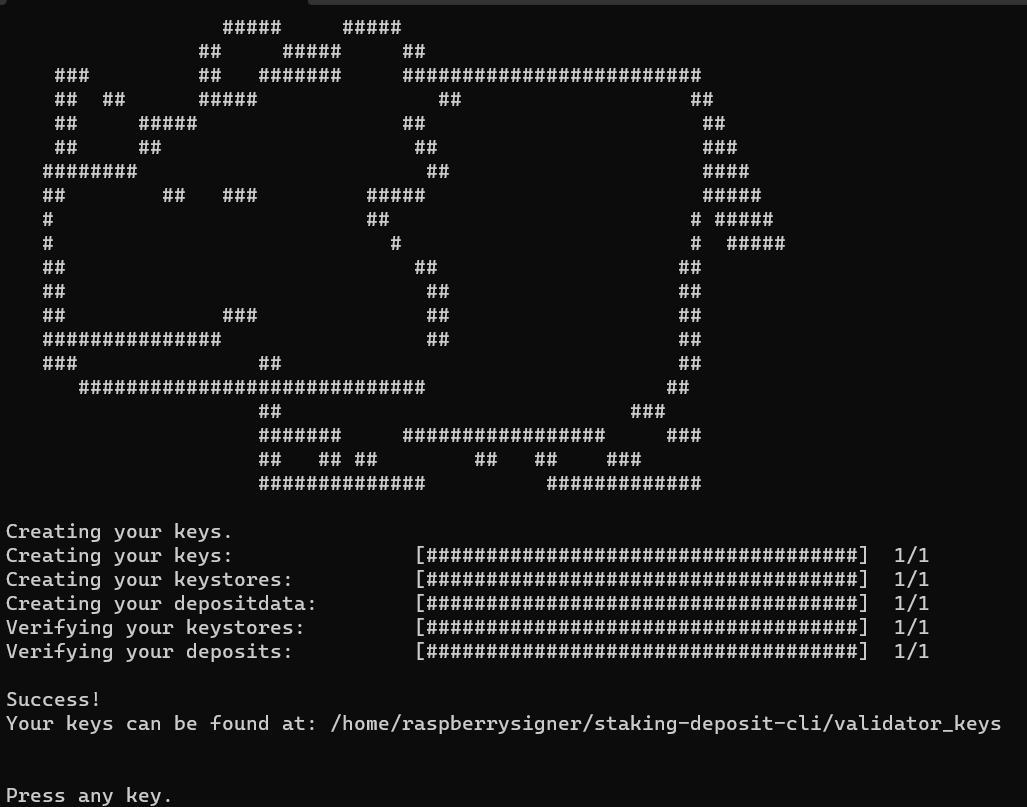
Generate a new validator signing keystore and deposit data set for mainnet use.

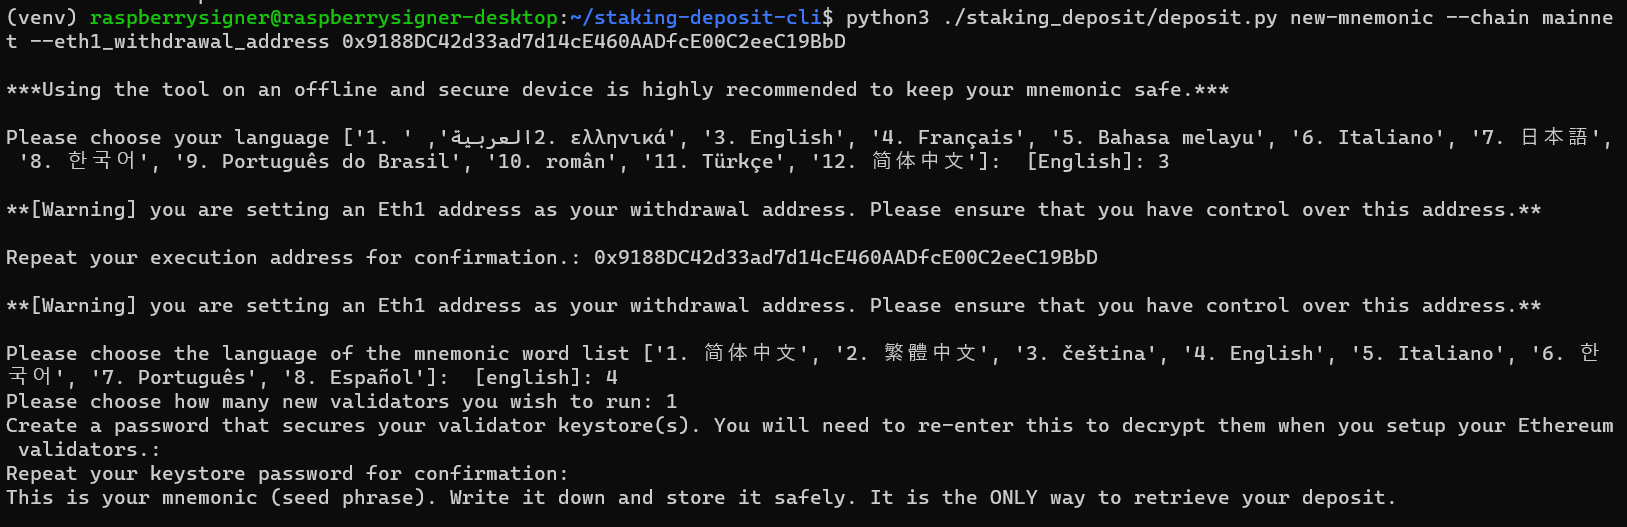
After following all prior steps, re-run the deposit key generation process while setting the `--chain` flag to `mainnet`.

#### Build from source method

```sh
python3 ./staking_deposit/deposit.py new-mnemonic --num_validators <number> --chain mainnet --eth1_withdrawal_address <YourWithdrawalAaddress>
```

#### Executable binaries method

```sh
./deposit new-mnemonic --num_validators <number> --chain mainnet --eth1_withdrawal_address <YourWithdrawalAaddress>
```

Jump to section for reference below.

{% content-ref url="/spaces/oML8XLjdWBoYbtGBoQ9R/pages/xKRzukcuy2WXF2GE7amh" %}
[Validator key generation](/keystore-generation-and-mev-boost/validator-key-generation)
{% endcontent-ref %}

## Depositing 32 ETH

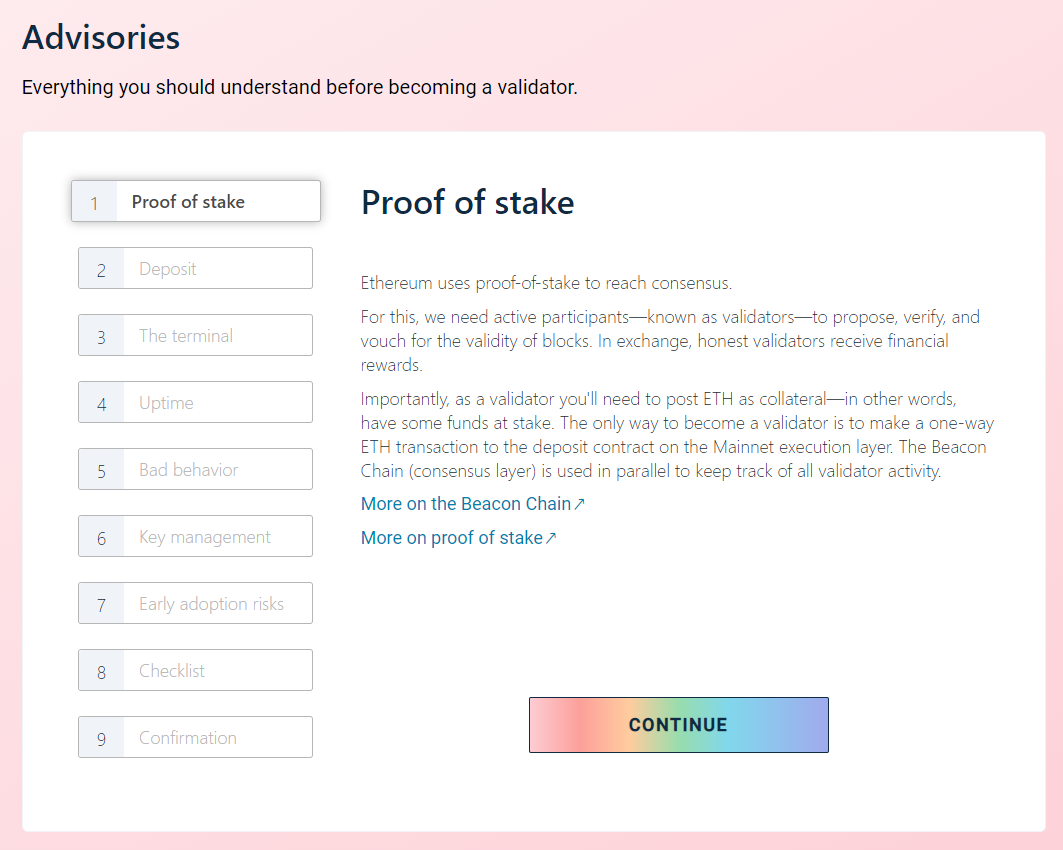
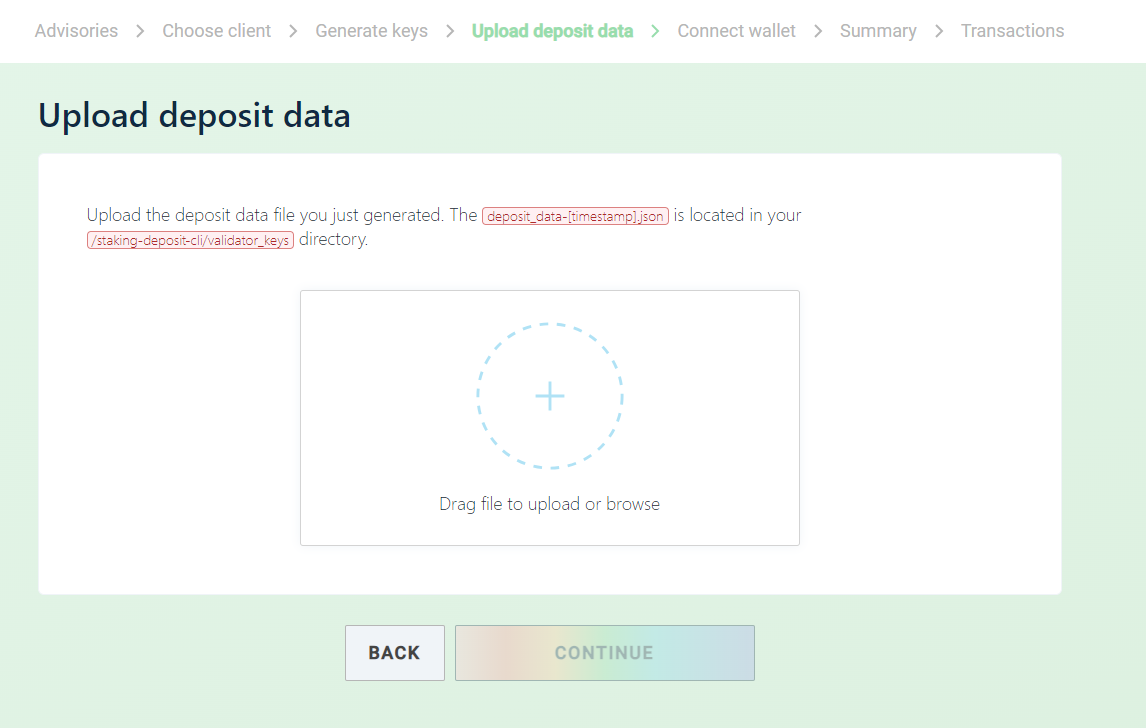
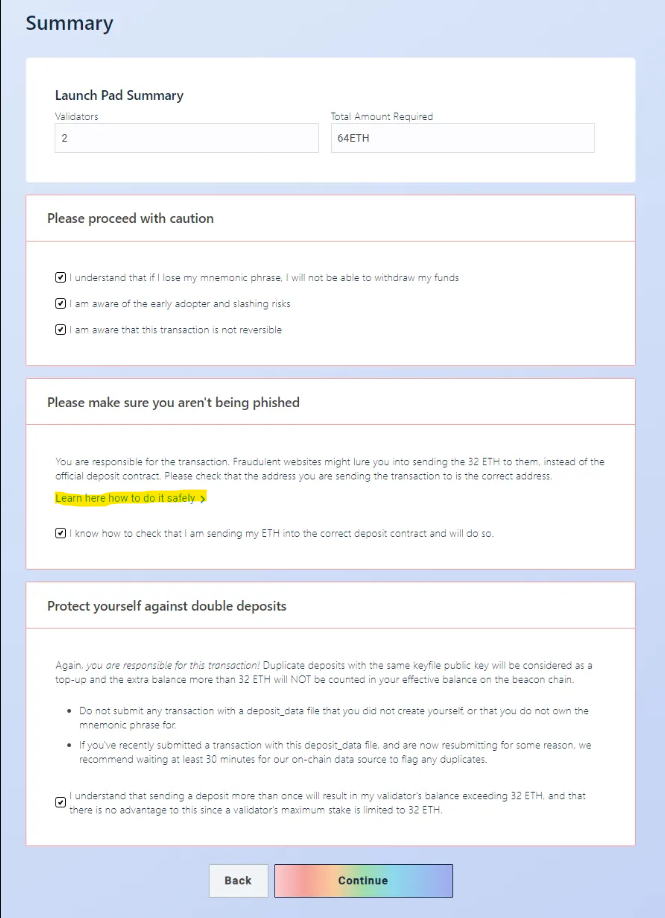
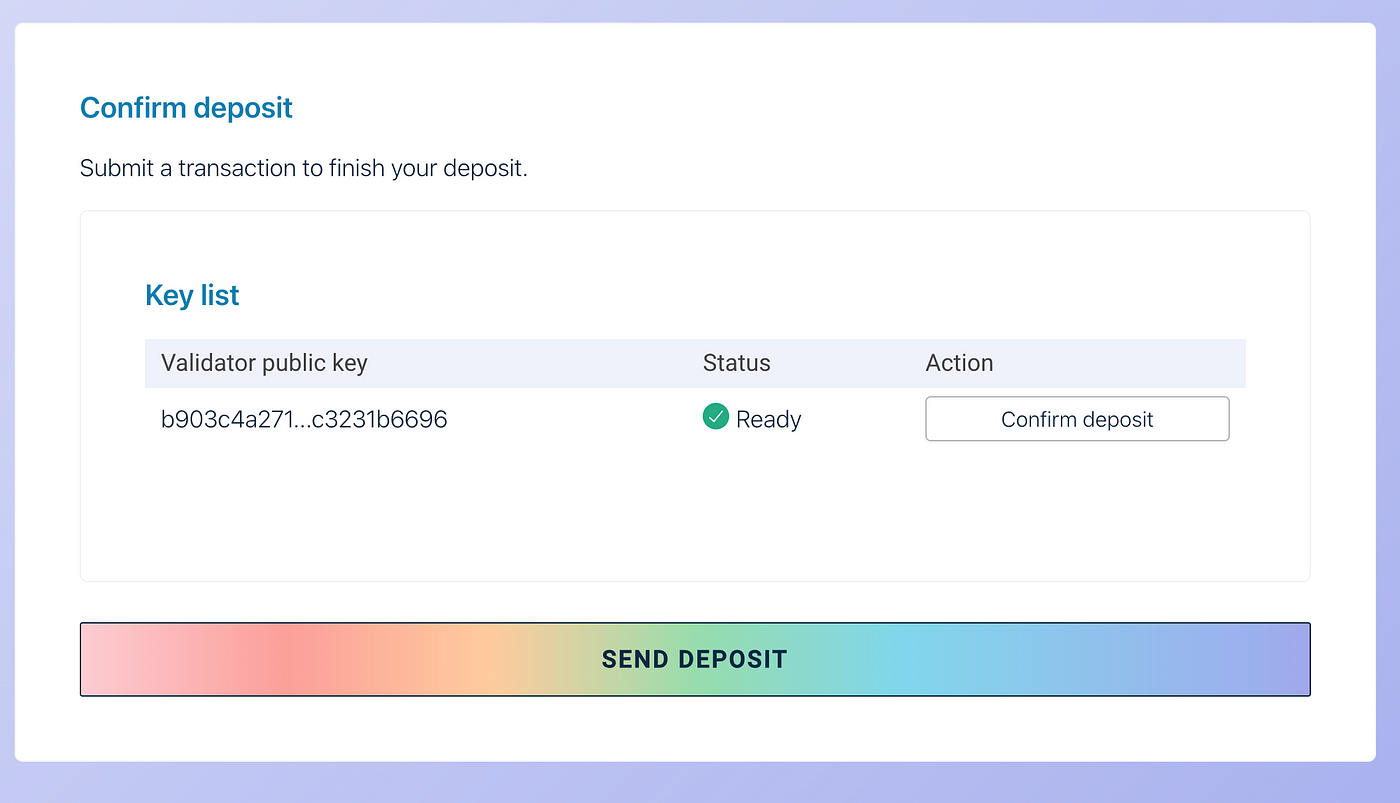
Go to [https://launchpad.ethereum.org](https://launchpad.ethereum.org/) to complete the deposit process. Jump to section for reference below.

{% content-ref url="/spaces/oML8XLjdWBoYbtGBoQ9R/pages/Vpm9jyJ0G3V1FF2vmIFt" %}
[Depositing 32 ETH into your validator](/native-solo-staking-setup/depositing-32-eth-into-your-validator)
{% endcontent-ref %}

{% hint style="info" %}
Triple check that the launch pad URL is pointing to the Mainnet and not the Holesky testnet.
{% endhint %}

## Monitoring

#### Beaconcha.in app

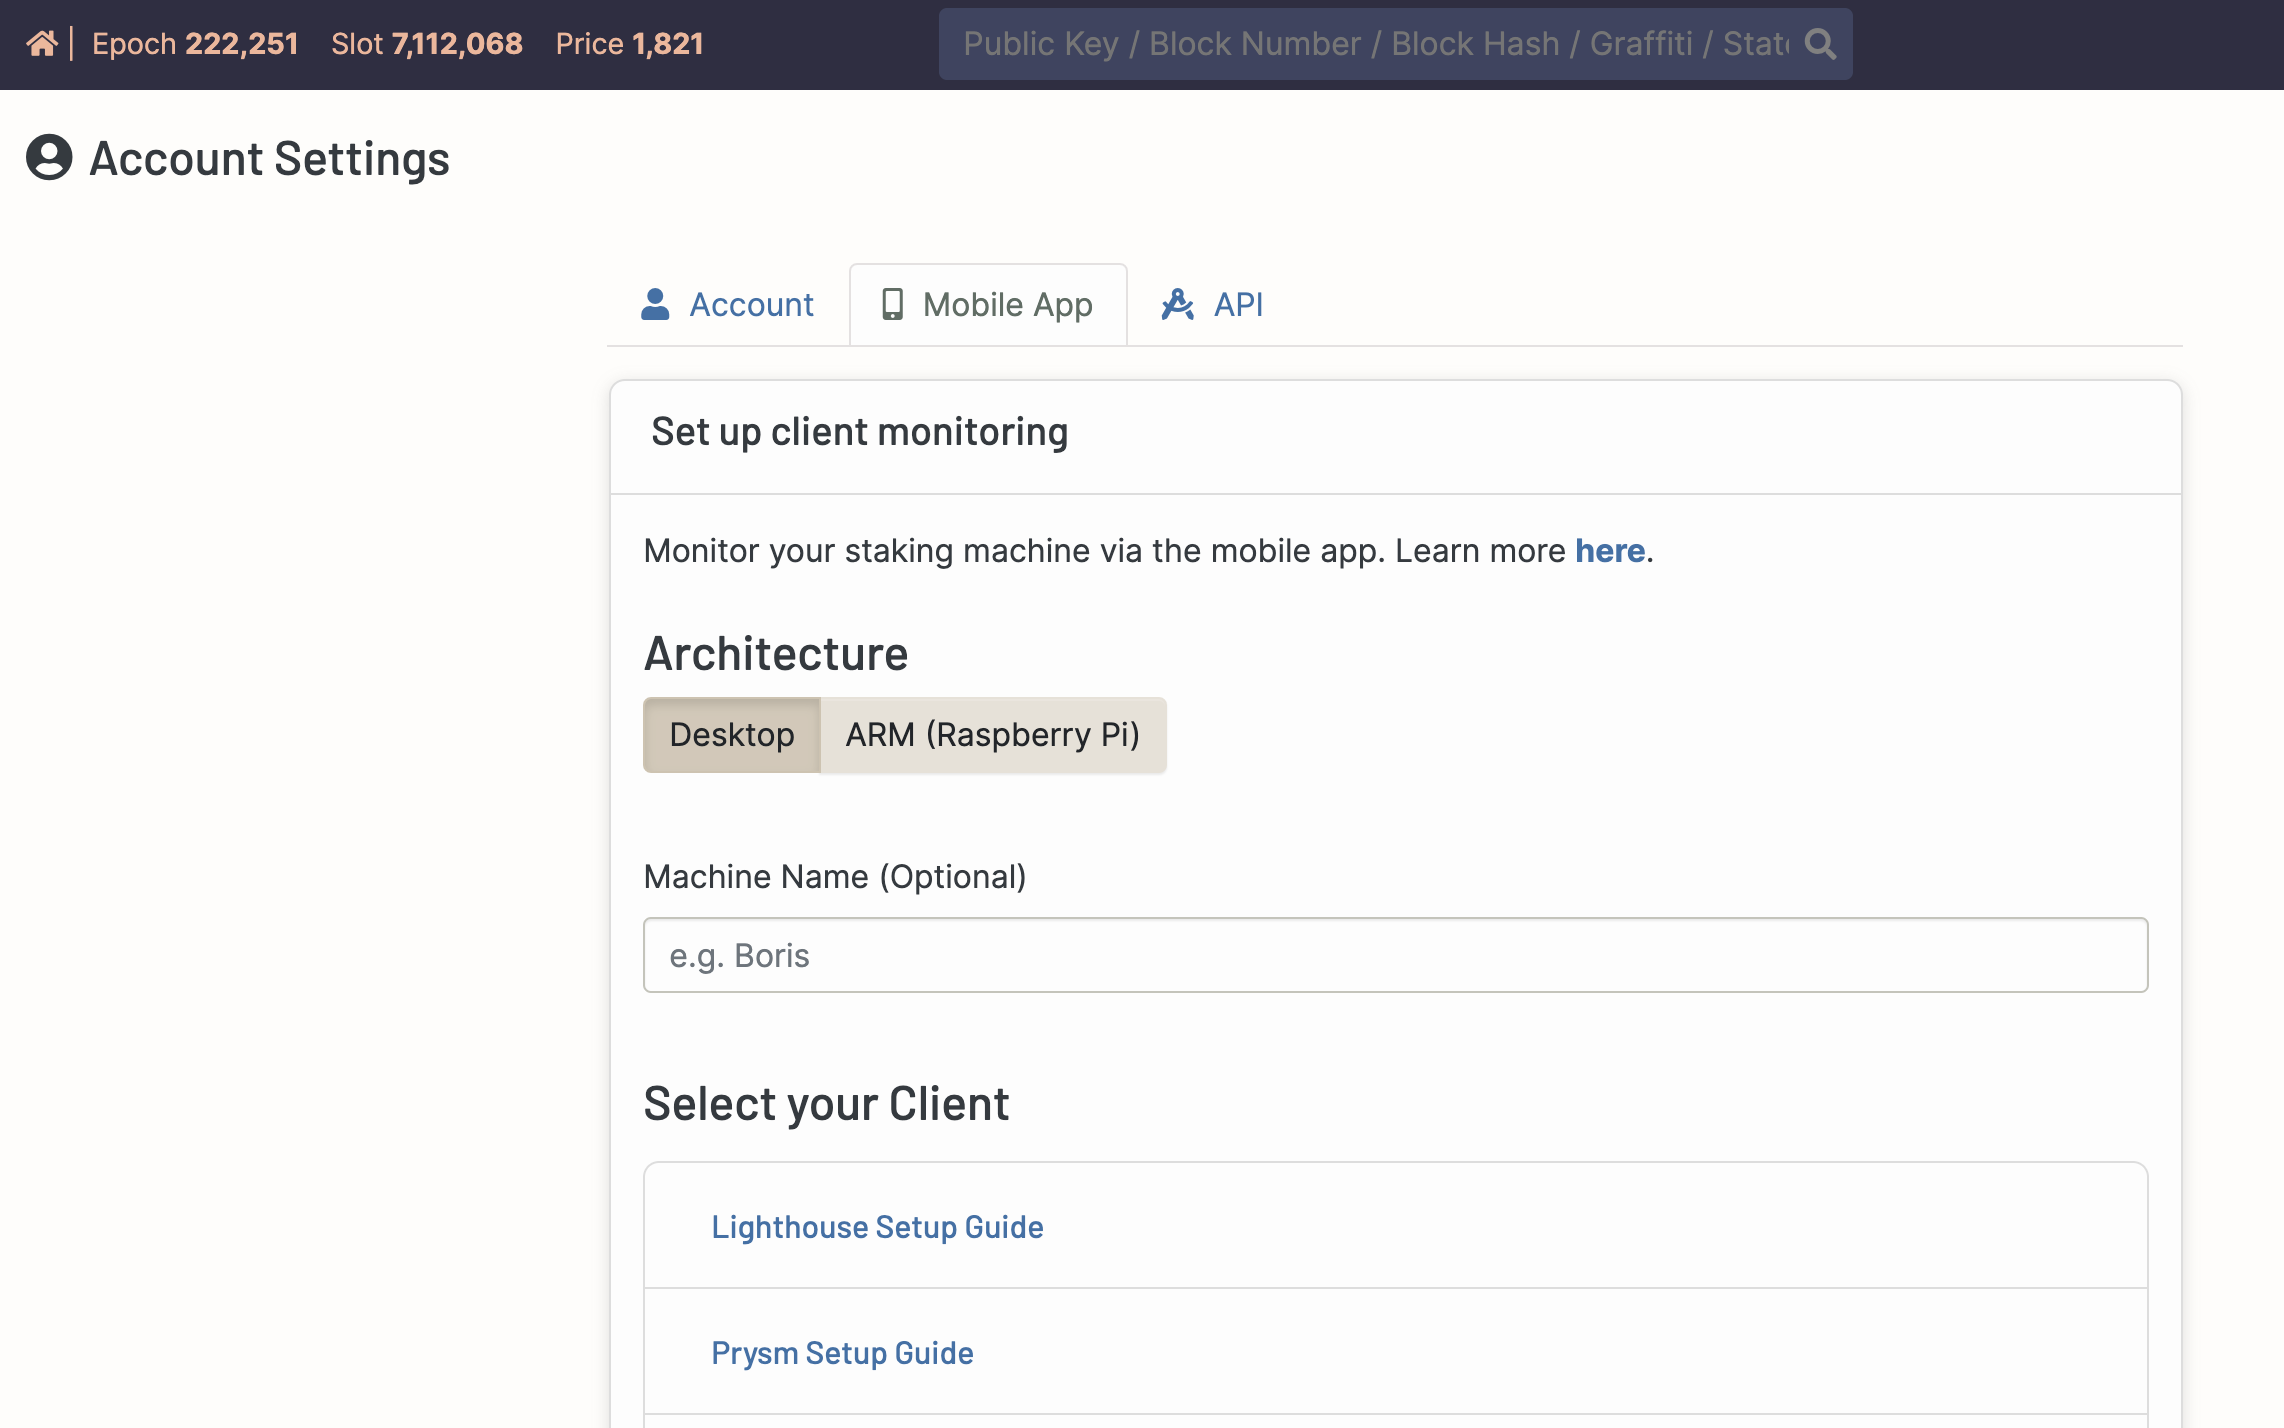
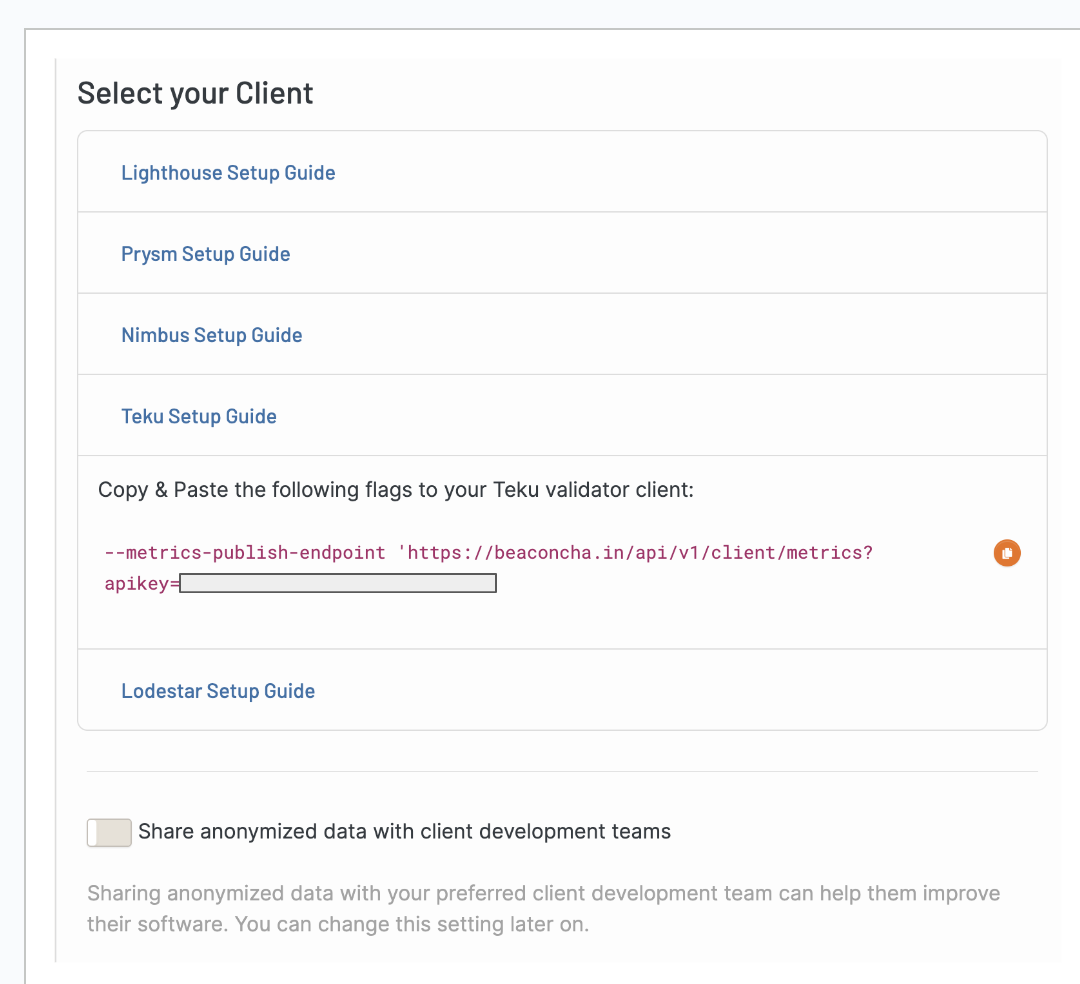
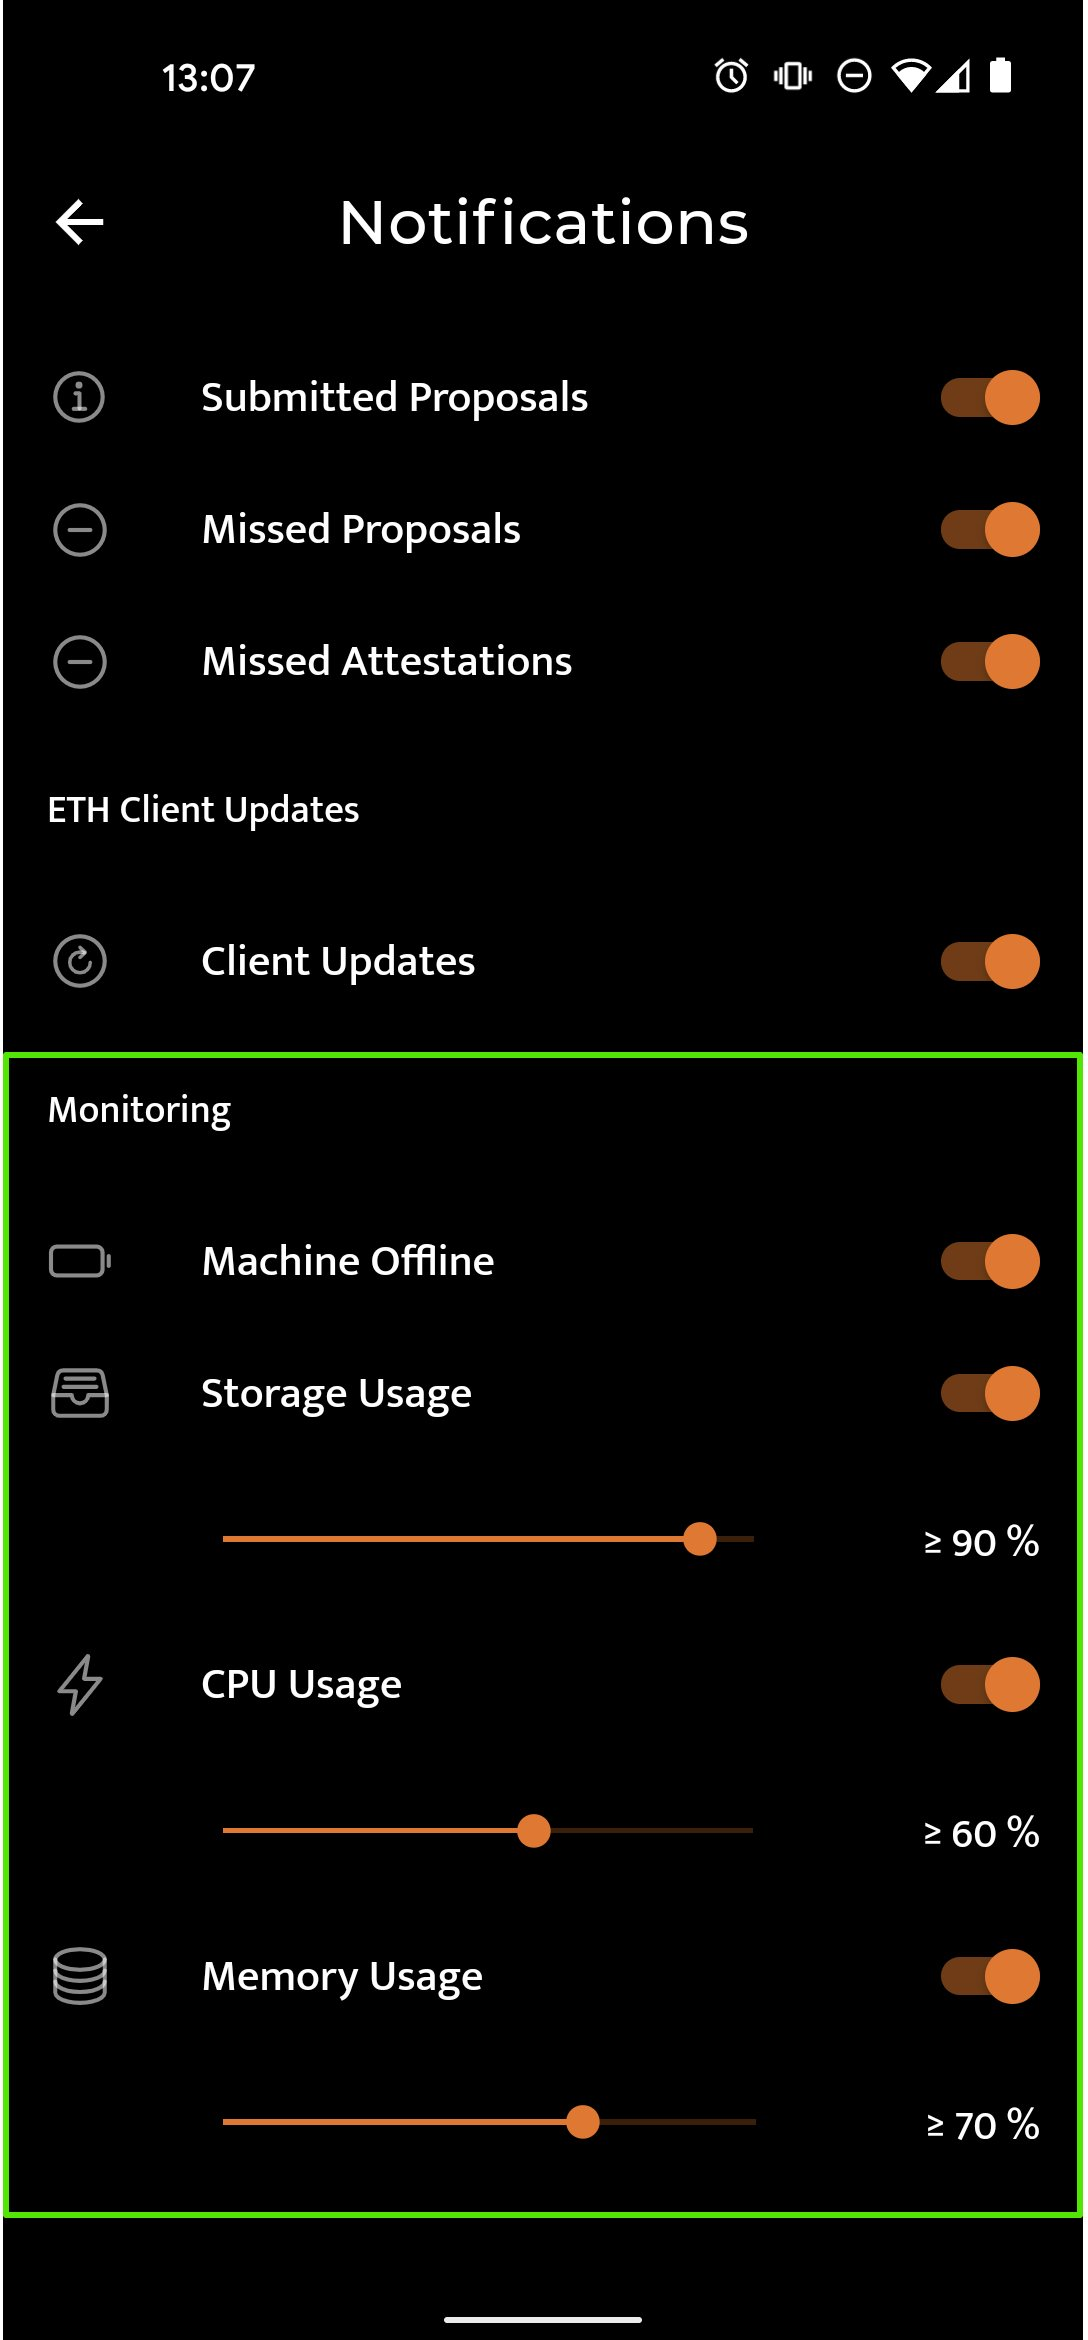
Go to <https://beaconcha.in> instead and repeat all steps. Jump to section for reference below.

{% content-ref url="/spaces/oML8XLjdWBoYbtGBoQ9R/pages/XrqiBwzsBRl9jD8nZFcU" %}
[Beaconcha.in App API](/monitoring-maintenance-and-updates/set-up-monitoring-suite/beaconcha.in-app-api)
{% endcontent-ref %}

## Diva Staking Setup

{% hint style="info" %}
Coming soon!
{% endhint %}

Jump to section for reference below.

{% content-ref url="/spaces/oML8XLjdWBoYbtGBoQ9R/pages/4QB2MghOxYLnSva5TUNZ" %}
[DVT Setup](/dvt-setup/diva-staking)
{% endcontent-ref %}


# The DVT Home Staking Curriculum

## What is this?

This is a knowledge base for Ethereum solo stakers (both native and DVT) designed with non-technical users in mind. It serves as a comprehensive curriculum for aspiring solo stakers.

With a standardised curriculum, organisations can fairly assess the proficiency of new solo stakers across the board using simple quizzes and on/off-chain deliverables when facilitating grants and incentivised test programmes.

This curriculum incorporates DVT, and native home staking methods so new solo stakers can launch their first home-based ETH validator from as little as 1 ETH.

## Who is this for?

While I hope that anyone who cares about keeping the Ethereum network decentralised will find this guide helpful, the way it is written caters to the following audiences of non-technical people:

1. Aspiring solo/home staker trying to go from zero to one
2. Existing solo/home staker looking to refresh your knowledge.

## How to use?

This curriculum has 2 major segments:

1. **Segment 1:** Practicing on the Testnet (current segment)
2. **Segment 2:** [Replacement steps to transition onto the Mainnet ](https://dvt-homestaker.stakesaurus.com/replacement-steps-mainnet/)

## Credits & Rights

This curriculum is designed collaboratively by ETHStaker and Stakesaurus, featuring Diva Staking with a grant from The Staking Foundation as a public good.

Aside from the voluntary user contribution options below, no entity is entitled to resell or commercialise the contents of this document without providing additional value.&#x20;

### If you found this helpful, consider supporting Stakesaurus in one of few ways below!&#x20;

* [Stakesaurus' liquid staking **ETH vault** powered by Stakewise V3](https://app.stakewise.io/vault/0x649955f4189c3921df60e25f58cb1e81070fedb0)

{% embed url="<https://app.stakewise.io/vault/mainnet/0x649955f4189c3921df60e25f58cb1e81070fedb0>" %}

* [Stakesaurus' liquid staking **GNO vault** powered by Stakewise V3](https://app.stakewise.io/vault/0x649955f4189c3921df60e25f58cb1e81070fedb0)

{% embed url="<https://app.stakewise.io/vault/gnosis/0x3cb4692177525db38d983da0445d4eb25c3826de>" %}

* Buy me a coffee!

{% embed url="<https://www.buymeacoffee.com/stakesaurus>" %}

* Subscribe to my newsletter

{% embed url="<https://stakesaurus.beehiiv.com/>" %}

### Other disclosures before you contribute

Stakesaurus has also received the following bounty and grants for earlier work from which this curriculum was partly adapted.

1. A bounty (1500 USDC) from the Stack Up x Google Cloud Challenge for creating a guide on setting up a cloud-based Ethereum validator node using the Google Cloud stack. More details are described [here](https://x.com/StackUpHQ/status/1701601281541091565).
2. A [retroactive grant (1000 DAI)](https://research.lido.fi/t/lido-community-lifeguards-initiative/4678/23?u=stakesaurus) from the Lido Ecosystem Grants Organisation for open-sourcing a comprehensive Ethereum home staking guide (no DVT) designed for non-technical people. More details are described [here](https://x.com/stakesaurus/status/1709419025435164696).

Stakesaurus is also a grantee of the [Lido Community Lifeguards Initiative](https://research.lido.fi/t/lido-community-lifeguards-initiative/4678), representing the voice & interests of community operators (e.g., solo/home stakers, Lido CSM operators) to the Lido DAO.

## How to get help?

1. **Main curriculum support channel:** [ETHStaker's DVT Home Staker Discord server](https://discord.gg/ethstaker)
   * Navigate to the "dvt-program" channel.
   * Weekly office hours: Daily @ 11:00am to 11:30am UTC+8
2. Client-specific support (Discord):
   * DVTs: [Diva Staking](https://discord.gg/gkgzbze4)
   * EL: [Nethermind](https://discord.gg/bphnunvcef), [Besu](https://discord.gg/consensys), [Geth](https://discord.gg/CYuF3A9S), [Erigon](https://github.com/ledgerwatch/erigon?tab=readme-ov-file#erigon-discord-server)
   * CL/VC: [Teku](https://discord.gg/consensys), [Nimbus](https://discord.gg/AuDqCzQb), [Lodestar](https://discord.gg/AuPdTD6N), [Lighthouse](https://discord.gg/5U2R2Awu), [Prysm](https://discord.gg/prysmaticlabs)
3. [Stakesaurus public Telegram group](https://t.me/stakesaurus)
   * For those who feel shy about the options above
   * **Note:** It is best practice to get help from highly public channels such as the main curriculum  & client-specific support channel above, especially when setting up for the Mainnet&#x20;

<figure><img src="/files/nfdeezlEZ8yRdCzPxyfH" alt=""><figcaption></figcaption></figure>


# Curriculum breakdown & timeline

Curriculum breakdown by week

## Week 1

1\) Understanding Ethereum validators

* What are nodes and validators on Ethereum, and why solo-stake?
* Roles & responsibilities of a node operator&#x20;
* Rewards and penalties
* Importance of client diversity
* Distributed validator technologies (DVTs)
* Bonded validators

2\) Hardware concepts

* Setup overview
* Hardware & system requirements performance
* Procuring your hardware

#### \*1 week lead time to purchase and receive hardware

## Week 3&#x20;

3\) Hardware purchase and setup

* Inspecting and assembling your hardware - preventing supply chain attacks

4\) Installing the Linux OS

* Install & Prepare OS&#x20;
* Test on Google Cloud VM using free credits

5\) Networking & network security

* Networking basics
* Advanced networking - Port forwarding, Upnp, VPN
* How to configure your home network

6\) Security

* How to use SSH tunnelling for secure remote access
* Firewalls, automatic patching, brute force protection, automatic security updates
* Verifying checksums

## Week 4

7\) Execution client setup **(Holesky)**

* Generating JWT token
* Installing dependencies
* Downloading and installing the execution client
* Prepare execution client configuration file
* Running the execution client

8\) Consensus client setup **(Holesky)**

* Installing dependencies
* Downloading and installing the consensus client
* Prepare consensus client configuration file
* Running the consensus client

## Week 5

9\) MEV-Boost setup **(Holesky)**

* Installing dependencies
* Prepare the MEV-boost configuration file
* Running MEV-boost&#x20;

10\) Monitoring suite

* Setting up Prometheus and Grafana
* Set up beaconcha.in notifications

11\) Maintenance

* Updating your validator node
* Pruning execution clients
* Pruning consensus clients

## Week 6

12\) Validator key generation **(Holesky)**

* Setting up an air-gapped machine&#x20;
* SOPs during key generation and storage&#x20;
* Key generation process

13\) Validator client setup **(Holesky)**

* Prepare validator client configuration file
* Running the validator client

14\) Depositing ETH

* Get **Holesky ETH** from faucets
* Complete the deposit process

15\) Tips and other best practices

* Slashing prevention
* Maximising uptime
* Optimising security
* Managing your withdrawal wallet

## Week 7

16\) DVT & bonded validator setup **(Holesky)**

## Week 8 to 9&#x20;

**17) Mainnet deployment**


# Introduction to ETH Validators

## How Ethereum achieves consensus in a nutshell

In order for blockchain networks to function, there needs to be a way for all computers (i.e. nodes) in such networks to agree on who owns what at any one point in time (i.e. achieve consensus).

With a robust consensus mechanism, transactions of users can be processed in a trust-less and permission-less manner.

On Ethereum, a network of nodes and validators run by individuals and institutions alike facilitates these processes. As long as >2/3 of the validator network agrees on the latest state of the network, that state is considered finalised. This means that it will require >1/3 of staked ETH to be burnt - along with another highly improbable level of network collusion - in order to revert any transaction to this finalised state.&#x20;

***But what if more than 1/3 | 1/2 | 2/3 of the network decides to collude anyway?***

They could then launch varying levels of attacks on the Ethereum network with effects ranging from halting the finality of the network and censorship to even rewriting the chain history (more on this [here](https://ethereum.org/developers/docs/consensus-mechanisms/pos/attack-and-defense)).

For this reason, having a large number of individuals running validators is healthier than a small group of institutions running them on behalf of everyone.

## What are Ethereum nodes?

Nodes are the computers running a suite of software called Ethereum clients.&#x20;

These computers communicate with one another in a permissionless and trustless manner to perform broadly two activities:

1. Broadcast and relay the transactions of users across the network of nodes. This is how your transactions get discovered and eventually processed by validators.&#x20;
2. Verify transaction (and block) data independently.

Anyone can run an Ethereum node without any minimum stake, but at the same time, there are no direct rewards for doing so as well. In order to earn rewards, you will need to turn your node into a validator.

Having said that, there are still benefits of running a non-validating node on Ethereum.

#### Benefits to yourself

1. **Don't trust, verify:** No need to trust any other nodes in the network because you can verify all transaction data yourself.&#x20;
2. **Privacy and security:** You can use Dapps more securely and privately because you won't have to leak your addresses and balances to intermediaries.
3. **Lower latency:** You can connect your Ethereum wallet directly to the RPC endpoint of your own Ethereum node. This gives you sole access and priority to get your transactions included instead of having to compete with everyone else via public RPC endpoints.

#### Benefits to the Ethereum network

1. **Increase security:**&#x20;
   * Full nodes enforce the consensus rules, so they can’t be tricked into accepting blocks that don't follow them.
   * In case of an attack which overcomes the crypto-economic defences of [proof-of-stake](https://ethereum.org/en/developers/docs/consensus-mechanisms/pos/#what-is-pos), a social recovery can be performed by full nodes choosing to follow the honest chain.
2. **Increase reliability & censorship resistance:** More nodes in the network result in a more diverse and robust network, making it harder for the entire network to fail or censor transactions.
3. **Increase the flexibility of use cases:** Full nodes provide access to blockchain data for lightweight clients that depend on it (i.e. Light Clients). This helps users access and interact with Ethereum in a secure and decentralized manner without having to sync the full blockchain, unlocking a wider range of use cases.

## What are Ethereum validators?

By generating a specialised signing key and staking 32 ETH into a smart contract linking to this key, you turn your Ethereum node into a validator.

Validators are "activated" nodes that actually process the transactions of users - vs simply broadcasting and relaying - and set them in stone (i.e., finalisation). The validity of each transaction is voted on by all validators (sign attestations) in the Ethereum network and vouched for by their ETH staked. This means that once your transaction is finalised, it will cost 1/3 of all staked ETH to undo it - providing strong economic securities users!

Because validators are processing and vouching for transactions of users, they are rewarded for performing their jobs well and penalised when they fall short. If validators are found to be dishonest, malicious, or grossly negligent, they will have their stake slashed for up to the entire amount and expelled from the network.

This incentivises validators to be and remain honest.&#x20;

## Pooled Staking vs Solo Staking

In general, pooled staking is more convenient and cost-efficient but comes at the cost of exposure to a broader set of risk factors.

This is because the asset owners are usually segregated from the owners of the validator key in pooled staking models. And as the saying goes — "not your keys, not your crypto".&#x20;

That being said, if your withdrawal address has already been set, the possible damage from exposing your validator key to 3rd parties is much lesser than exposing the key to your withdrawal wallet, as uncorrelated slashing penalties typically amount to around 1.1+ ETH.

You can however, still lose ALL your staked ETH because of correlation penalties. And that is one of the risks that comes with pooled staking, especially for large players with centralised practices.

<table><thead><tr><th>Method</th><th width="179">ETH owner</th><th>Operator</th><th>Validator key owner</th></tr></thead><tbody><tr><td>Pooled staking</td><td>Stakers</td><td>External node operators (NOs)</td><td>External node operators (NOs)</td></tr><tr><td>Solo staking</td><td>Stakers</td><td>Stakers</td><td>Stakers</td></tr></tbody></table>

To illustrate the risks, here are some scenarios that could happen:

#### Risk factor #1: External node operators run infrastructure on behalf of ETH stakers

1. **Location concentration:** Amazon Web Services is used by staking institutions to host 12.5% of all validators today. An extended mass outage event can wipe out >31% of staked ETH for validators who are affected.
2. **Software concentration:** Staking institutions might have strong preferences for using majority clients due to the pressure of maximising performance and yield to their users. However, a crazy bug or glitch causing >33% of validators to violate consensus rules can wipe out all who are affected. &#x20;
3. **Hardware concentration:** Due to economies of scale, staking institutions run hundreds of validator keys on a single set of hardware. This increases the blast radius of affected validators in the event of hardware failures. It is worth noting, however, that this is the mildest form of concentration.

#### Risk factor #2: External node operators have a copy of validator keys generated for staking ETH

1. **Mass leakage of keys:** Security breaches of staking institutions can put a large amount of users' capital at risk of blackmail via correlated slashing. The larger the institution, the more lucrative it is for potential attackers. &#x20;
2. **Slashing incidents from operational mistakes:** Staking institutions managing a large number of validator keys are likely to use some level of automation to run their maintenance and troubleshooting process. Operational mistakes can cascade and affect a large number of validators under their management. Most slashing incidents to date have been triggered by institutions rather than individuals.

### Pooled staking is more convenient, with higher yields

With the high convenience offered by liquid staking providers and the diminishing validator rewards due to a large influx of new validators, you can't help but wonder why we bother dealing with the headspace and costs required for running your own home-based validator nodes.&#x20;

Besides, liquid staking providers also smooth out block + MEV rewards across their entire validator set and auto-compounds your rewards, which leads to **higher median yields of roughly 0.5% - 0.8% (after fees) vs solo staking.**

This is because the occurrence and amounts of block rewards and MEV fees are entirely random, leading to a long right tail in the distribution of total rewards for solo validators where **median < mean.**

### But these come at a cost...&#x20;

However, as with all things in crypto, these conveniences come at a cost. There are two main risks to consider when using liquid staking platforms.

1. **Smart contract risks -** Smart contract exploits can happen anytime, and we have seen that not even blue chip projects (e.g. Curve) are immune to them
   * A huge contributing factor is because there is a fundamental imbalance between auditors and attackers - i.e. audits are performed once or at certain checkpoints while attackers are attempting to exploit the smart contract continuously&#x20;
2. **Governance/counter-party risks -** Centralised platforms are the first to come to mind when we think about this risk, but this exists even in DeFi because:
   1. Most smart contracts are upgradable and governed by a multi-sig and;
   2. Governance votes can change the rules (although indirectly) of the interaction with the smart contracts

This means that to stake large amounts, you will need to monitor the developments of the liquid staking smart contracts you are using very closely. Or you only stake amounts that you are comfortable with losing completely.

Another thing to note is that there will be a rush to exit when things go south, and you will likely not be the first one out the door. So the key question to ask yourself is if the additional 0.5% - 0.8% APY is worth the tail risk of your total staked ETH.

### Other benefits of solo-staking&#x20;

#### Contribute to a more decentralised Ethereum network

Having more solo stakers increases the difficulty of collusion among validators. If there were only independent solo stakers running validators, it would take an enormous amount of coordination to attack the network - e.g. halting finality, censorship, and rewriting chain history.

#### **Instead of tail risks, solo-stakers are exposed to "tail gains."**&#x20;

The largest block + MEV reward received by a single validator to date is 691 ETH. Some solo stakers think of this as giving up 0.5% - 0.8% of average APY for a chance for windfall gains. However, it is important to note that the likelihood of getting rich from this is extremely low so running a validator just to hit the lottery is not the right mindset to have.&#x20;

Having said that, there are current and upcoming open-source initiatives that will allow solo-stakers to enjoy rewards-smoothing benefits that were previously only available with liquid staking providers.

1. [Dappnode MEV smoothing pool](https://discourse.dappnode.io/t/mev-smoothing-pool-for-dappnode/1804) - Subscribers pool their block+MEV rewards with all other subscribers
2. [Protocol-enshrined MEV smoothing](https://notes.ethereum.org/cA3EzpNvRBStk1JFLzW8qg) - (Still under discussion) If all MEV is smoothed out across all validators, the average rewards for solo-stakers will be on par with liquid staking aside from the auto-compounding effect&#x20;
3. [Protocol-enshrined MEV burn ](https://ethresear.ch/t/burning-mev-through-block-proposer-auctions/14029) - (Still under discussion) Burning all MEV is equivalent to sharing MEV rewards with all ETH holders


# Roles & Responsibilities of a node operator

## What do validator nodes actually do?

In short, validator nodes on the Ethereum network ***process transactions and secure the network.*** This is done via the [proof-of-stake ](https://ethereum.org/en/developers/docs/consensus-mechanisms/pos/#:~:text=One%20validator%20is%20randomly%20selected,of%20the%20block%20being%20proposed.)consensus mechanism where each validator puts 32 ETH at stake to vouch for the validity of new blocks *- with a bundle of transactions in them -* that either others or themselves have created.

In exchange for doing the work above, validators receive rewards from both users and the Ethereum protocol directly. However, if validators are **caught acting dishonestly** by other nodes in the network, **their stake is slashed** - forcibly burning their 32 ETH based on the severity of their actions. This mechanism is further explained in the [Rewards and penalties sub-section](/understanding-eth-validators/rewards-and-penalties).

<figure><img src="/files/Ctj3npQQ0DMaAOf5kJWk" alt=""><figcaption><p>Source: <a href="https://github.com/flashbots/mev-boost">https://github.com/flashbots/mev-boost</a></p></figcaption></figure>

To understand this process in more detail, let's walk through the value chain of the ETH validator network.

1. In most cases, when users interact with Dapps built on top of the Ethereum network or directly sends Ethereum assets to one another, their transaction will first be sent into a holding area called the Mempool
2. Block Builders retrieve transactions via 3 channels to bundle into a block before pushing it to the upcoming block proposers via Relays.
   * **Observing the Mempool directly**
   * **Working with MEV searchers:** These are another group of users that observe the Mempool for arbitrage opportunities. When they find such opportunities, they insert their own transaction and submit the arbitrage transactions set to the block builders
   * **Working directly with users** who want to send their transactions directly to block builders&#x20;
3. The Relays connect to the Consensus Clients of the validator network via the mev-boost public auction service to allow validators to accept the highest bids (MEV fees)
4. The validator network picks up transactions in 2 ways:
   1. **From the Mempool directly** via the Execution Clients. Transactions received this way are built into blocks locally.
   2. **From the Relays** via the mev-boost public auction. Transactions received this way are pre-built into blocks by the block builders.
5. Every epoch (6.4 minutes), 32 validators are chosen randomly serve as block proposers, each proposing a block in their assigned \~12-second slots.
6. This block proposer has \~4 seconds to receive, execute, and send the block back out
7. A committee of validators (the Beacon Committee) is chosen at random to determine the validity of this new block within the remaining \~8 seconds
8. Once the new block is proposed and sufficiently attested to, it is added to the blockchain
9. At the end of every 2 epochs, all prior transactions are finalised and can no longer be reversed without burning a large portion of staked ETH across the whole network

## The responsibilities

Running an ETH validator node is a long term commitment. Your staked ETH will not be liquid while it is being staked and there will be lead time on both entering and exiting the validator queue.

Once your validator is activated, you have to be keep it running 24/7 and there will be penalties for inactivity / going offline.

This means that you have to invest in adequate hardware, a suitable space / environment to run your validator node from, and time to monitor / maintain / troubleshoot your node periodically.

You will also need to keep up to date with the latest developments across your execution and consensus client software as well as the overall Ethereum consensus mechanism.&#x20;

## The skillsets required

<figure><img src="/files/lI1PIlm06ERN8ElgXeyu" alt=""><figcaption><p>It's not a walk in the park but it's definitely easy enough for even non-technical people to pick up!</p></figcaption></figure>


# Rewards and penalties

## Rewards

In exchange for processing transactions on the Ethereum network and providing economic security, validators receive rewards in the form of issuance, transaction fees (tips), and MEV bribes. Issuance is received from performing attestations and tips + MEV bribes are received from proposing blocks.&#x20;

The breakdown of these fees on average are as follows:

1. Consensus Layer (issuance): **2.85%**
   * Block attestation
   * Sync committee duties
2. Execution Layer (Block rewards): **0.58%**
   * MEV and transaction tips

**Average total: \~3.42% APR**

<figure><img src="/files/SzgLSom5qmO4JZCSPPv1" alt=""><figcaption><p>Last 30 days data from Rated.Network. 2nd June 2024.</p></figcaption></figure>

#### Block attestation rewards

This component of validator rewards are relatively stable and changes slowly according to the number of active validators on the network - e.g. more validators = lower attestation rewards, less validators = higher attestation rewards.

#### Sync committee rewards

Every 24 hours, 512 validators are chosen randomly out of the validator network to perform sync committees duties for the next 24 hours. During this period, the computational load on the 512 validators are increased along with the rewards they receive. However, penalties incurred also increase at the same rate if the chosen validators are offline during this period.&#x20;

The purpose of the sync committee is to allow **Light Clients** to keep track of the chain of beacon block headers.&#x20;

#### Block rewards

Every epoch (6.4 minutes), 32 validators will be chosen as the block proposers for each block in that epoch. Block proposers will receive all transaction tips (paid by users) and MEV fees (paid by block builders) for their respective blocks.

{% hint style="info" %}
**Important Note:** Because the APR from block rewards are random and can be very large when they occur (i.e. a heavy right skew), the median total APR, which is what most validators will be getting is closer to 3.5%.&#x20;
{% endhint %}

These rewards are received every \~6.4 minutes (every epoch) and the accumulated balance is automatically withdrawn to your designated wallet every 6 days.

## Penalties

### Uncorrelated downtime

On the other hand, you will be penalised if your validator goes offline or is otherwise inactive. Under normal circumstances, your validator should not go offline together with other validators - i.e. "uncorrelated downtime" - and if so, your inactivity penalties per epoch will be roughly the same as your rewards rate per epoch. Unless of course, you miss your turn to propose a block while you were inactive.

This means that you typically don't have to panic when you start seeing missed attestations and should rather take your time to make sure you don't make a mistake when you troubleshoot your validator node.

### Correlated downtime

However, if your validator node goes down together with a large portion of the network, you will be penalised more heavily.&#x20;

In an extreme scenario, where more than 1/3 of the network goes offline, causing the chain to be in danger of splitting, the ["inactivity leak"](https://eth2book.info/capella/part2/incentives/inactivity/) will be triggered.

The inactivity leak is a state of emergency to compel the inactive 1/3 to resume their duties or otherwise removing them (and their ETH) from the network until the network has >2/3 of active validators once again.&#x20;

There are two main mechanisms that will occur during an inactivity leak:

1. **Normal attestation rewards will stop for all validators.** Block proposers will still receive their normal rewards from all 3 sources
2. **Quadratic leak** - where inactive validators will suffer increasing penalties that grows quadratically over time until the network has >2/3 of active validators once again

## Double signing

Double signing is a slash-able offense and occurs when your validator:

1. Signs two different beacon blocks for the same slot while serving as proposer - i.e. endorsing two different versions of the chain's history
2. Signs an attestation that “surrounds” another one while serving as an attester - i.e. trying to change the history of the chain&#x20;
3. Signs two different attestations with the same target while serving as an attester - i.e. signing the same block twice using the same key

Although these slashing mechanisms were set in place to discourage dishonest or malicious behaviour by the validator network. They can be cause by negligence and misconfiguration as well. In fact, all of the slashing incidents to-date have been due to common technical mistakes and you can learn how to prevent them below.

{% content-ref url="/pages/VqF6QFxpza4f7Bsf6Ri4" %}
[Slashing prevention](/best-practices/slashing-prevention)
{% endcontent-ref %}

When your validator is slashed, the following sequence of events will take place.

1. Your validator will be forcibly scheduled to exit the network within the next 36 days
2. Receive a minimal penalty of 1/32 of your effective balance initially when a whistleblowing validator reports your validator
3. Incur additional penalties for missing your validator duties over the next 36 days until your validator exits the network&#x20;
4. Additionally, a special penalty will be imposed on your validator for correlated slashing. This penalty increases with the number of other validators that were slashed over the same period as yours and can even come up to your entire effective balance.


# Importance of client diversity

Your Ethereum validator node is made up of various pieces of software clients working together to process and attest to transactions. Being a decentralised network, Ethereum is not dependent on any single physical server/node.&#x20;

However, if every node runs only on one single client set, the existence of crazy bugs or targeted attacks on the software layer can still disrupt this process.&#x20;

When this happens, we, as validator node operators, will suffer penalties. **These penalties increase exponentially when our validator nodes go offline together with a large portion of the network.**&#x20;

Looking at the chart below, correlation penalties involving 33% or more of the network will result in all of your staked ETH being slashed!

<figure><img src="/files/BEd4vKrEXA5psrS3if4d" alt=""><figcaption><p>Kiln's research on correlation penalties</p></figcaption></figure>

This is why there are at least 4 - 5 clients to choose from for execution layer and consensus layer clients today. With Geth owning more than 50% of the execution layer client market share today, the existence of a crazy bug causing validator nodes running Geth to double-sign will be catastrophic.&#x20;

This is why we will be recommending minority clients for this curriculum.

## Key considerations

Even though we should run minority clients, it does not automatically mean that any client can run on the same hardware. A key reason for Geth's popularity, other than its reliability, is the ability for it to run on minimal hardware.

**Execution layer clients (updated 4th Feb 2024)**

<table><thead><tr><th width="143">Client</th><th width="120">CPU speed</th><th width="81">RAM</th><th width="96">Storage</th><th width="161">SSD speeds</th><th width="74">Sync speed</th><th>Market share</th></tr></thead><tbody><tr><td><strong>Geth</strong></td><td>lowest</td><td>16 GB</td><td>2 TB</td><td>Good</td><td>2nd</td><td>78%</td></tr><tr><td><strong>Besu</strong></td><td>lower</td><td>32 GB</td><td>2 TB</td><td>Good</td><td>1st</td><td>5%</td></tr><tr><td><strong>Nethermind</strong></td><td>lower</td><td>32 GB</td><td>2 TB</td><td>Good</td><td>3rd</td><td>14%</td></tr><tr><td><strong>Erigon</strong></td><td>higher</td><td>32 GB</td><td>4 TB*</td><td>Good</td><td>4th</td><td>2%</td></tr></tbody></table>

*\*Erigon is optimised for running archival nodes (full nodes are sufficient for validators) and will consume 2 TB of disk space within several weeks after syncing.*&#x20;

*Source on market share -* [*https://clientdiversity.org/*](https://clientdiversity.org/)

**Consensus layer clients (updated 4th Feb 2024)**

Because the dependencies on hardware requirements is greater for the execution layer (EL) clients, the considerations for consensus layer (CL) clients will primarily be on market share.

<table><thead><tr><th width="158">Client</th><th>Market share</th></tr></thead><tbody><tr><td><strong>Prysm</strong></td><td>38.93%</td></tr><tr><td><strong>Lighthouse</strong></td><td>33.01%</td></tr><tr><td><strong>Teku</strong></td><td>18.69%</td></tr><tr><td><strong>Nimbus</strong></td><td>8.21%</td></tr><tr><td><strong>Lodestar</strong></td><td>1.16%</td></tr></tbody></table>

*Source on market share -* [*https://clientdiversity.org/*](https://clientdiversity.org/)

Further, because all CL clients now have the checkpoint sync feature - enabling CL syncing in just a few minutes - we can rapidly switch between CL clients with minimal downtime when there are bugs in one.

## Curriculum Scope

Because of the Key Considerations above, we will be covering the following clients as the scope for this DVT Home Staker Programme:

1. Execution layer: Nethermind and Besu
2. Consensus layer: Teku, Nimbus, Lodestar


# Distributed Validator Technologies (DVTs)

## What are DVTs

DVTs split the signing key and duties of a single validator into a cluster of validators, requiring them to act collectively for signing responsibilities.&#x20;

This removes the single point of failure on the hardware and signing key level that can result in offline penalties and slashing. Attackers will have a much harder time getting access to the entire validator signing key as it is now split up into many parts. It also allows for some nodes to go offline, as a subset of the machines in each cluster can do the necessary signing.

A highly simplified way to think about this is a multi-sig for the operations of validator nodes.&#x20;

All validator signing operations will require consensus among their respective clusters at a defined threshold (e.g. 62.5%). For example, in a DVT cluster of 16 validators, at least 10 validators need to attest to the same block to complete the operation - providing 2 benefits:

1. Offline fault tolerance of 6/16&#x20;
2. Slashing fault tolerance of 10/16

This reduces single points of failure and makes the validator set more robust!&#x20;

## How do I use DVTs as a solo staker?

Using DVTs involves a relatively trivial step  for solo stakers. It works by running an additional lightweight DVT client on top of your existing execution + consensus client setup.

You then expose the endpoints of your execution, consensus, and, in some cases, validator clients and connect them to your DVT client. This way, your DVT client can now "talk" to your existing execution + consensus client and perform its duties.

{% tabs %}
{% tab title="With DVT" %}

<figure><img src="/files/eYwCrIs17S0ciy0F6z5D" alt=""><figcaption><p>Simplified illustration of how DVT clients fit into the existing solo staker setup</p></figcaption></figure>

{% endtab %}

{% tab title="Without DVT" %}

<figure><img src="/files/OHZc7XXNSgZKf63vcz8D" alt=""><figcaption><p>Simplified illustration of a solo staker setup</p></figcaption></figure>
{% endtab %}
{% endtabs %}

## How do DVTs affect solo stakers?

For solo stakers, DVTs enable us to achieve levels of performance and security rivalling large staking institutions, lower the financial barriers to entry, and even allow us to scale our income.

### Improving performance

In a study conducted by Diva Staking, a set of validator nodes with 5% downtime each can reduce this number to less than 0.01% by incorporating their DVT solution. This is a huge improvement compared to the typical single-node operator, showcasing the resilience and reliability of the DVT system.

**In other words, Diva Staking's DVT turns a set of 16 nodes with 95% uptime into a Distributed Validator with 99.99% uptime!**

### Improving security

As solo stakers, our weakest link is the physical location of our validator nodes and, as a consequence, the location of our validator signing keys.&#x20;

This is because we leave information about our home addresses everywhere - from daily conversations to online forms. Attackers will be able to blackmail us by inducing slashing incidents if we lose sole access to our validator signing keys. As a result, most solo stakers prefer to stay anonymous.

DVTs can essentially render this attack vector useless, as attackers will need to collect the minimum shards required to restore the original key. This is because when using DVTs, there are no validator seed phrases or private keys to manage. Instead, each validator is operated by distributed key shares which together act as the validator key.

### Lowering financial requirements

A nice consequence of splitting our validator signing key is the splitting of the 32 ETH minimum requirement into equivalent parts.

For example, forming a cluster of 10 validators on Obol will require each participant to contribute 3.2 ETH to activate a single validator key.

***Other solutions like Diva Staking enable solo stakers to get started with just 1 ETH!***

### Scaling income

DVT solutions allow solo stakers to use their existing staking hardware to participate in DVT clusters, earning additional fees when they do so.&#x20;

Some examples below:&#x20;

1. **SSV:** Enables validator signing key owners to choose the SSV operator's node as one of the operators in their preferred cluster. SSV operators collect a fee in return for providing this service.
2. **Diva Staking:** Assigns node operators into clusters and assigns each cluster new key shares of active validators randomly. Solo stakers do not need to convince ETH holders to choose their node themselves in this case.
3. **Obol:** Enables solo stakers to form clusters with up to 9 other node operators manually. In most cases, the required ETH to activate validator keys is deposited by the cluster participants themselves.

<figure><img src="/files/tFDrdN3pNwf8g8qlqIw8" alt=""><figcaption><p>Illustration of how a single solo staking setup can be used to participate in multiple DVT clusters across various DVT providers</p></figcaption></figure>

## Different types of DVT solutions

### Obol

Obol works by requiring node operators to form and fund their own clusters. Fees among participants in each cluster can be determined among themselves - e.g. node operators who are able to run minority clients proficiently might be able to demand a higher fee within the cluster.&#x20;

The Obol client (Charon) sits between the validator client and the beacon node and does not handle the validator signing operations directly. Instead, it coordinates consensus within the cluster before any interaction with the beacon chain occurs.

### SSV

SSV works by turning nodes that run the SSV client into a "open market" DVT operator that validator key owners can select to shard their keys to. SSV operators are free to set their own fees - denominated in the SSV token - that validator key owners will pay when choosing such SSV operators. &#x20;

The SSV client replaces the validator client in a typical validator node setup. In this case, both the validator signing operations and coordination of consensus within the cluster is handled by the SSV client. &#x20;

### Diva Staking

The main difference is that Diva provides integrated Liquid Staking + DVT in one single trustless and permissionless system.

Diva node operators put up minimal collateral, and are automatically and randomly assigned to a cluster of 16 and assigned validator key shares.&#x20;

This way, Diva node operators do not need to form and fund their own clusters manually as with the case of Obol. Nor do they need to attract validator key owners to choose their node as with the case of SSV.

Stakers also get to enjoy the benefits of putting their ETH to work with DVT-enabled node operators - i.e. huge reduction in slashing risks and offline penalties - without having to pay additional fees denominated in a secondary token.  &#x20;

<figure><img src="/files/Y8BVpCdNVX7IcFRoCYhM" alt="" width="563"><figcaption><p>Source: <a href="https://docs.divastaking.com/install">https://docs.divastaking.com/install</a></p></figcaption></figure>

{% hint style="info" %}
Diva Staking supports Besu as the execution client as well despite being missing from the diagram above.
{% endhint %}


# Economics of using DVTs (WIP)


# Diva Staking (WIP)

As the economic model of Diva Staking is still being worked on, this section will be updated when more information is released.&#x20;


# Obol (WIP)


# SSV (WIP)


# Bonded Validators

## What are bonded validators?

Conventionally, running an Ethereum validator node as a solo staker required you to deposit 32 ETH into the [beacon deposit contract](https://etherscan.io/address/0x00000000219ab540356cBB839Cbe05303d7705Fa).

However, there are options available today to significantly reduce this capital requirement in the form of bonded validators. The basic mechanism works as follows:

1. **Liquid stakers** stakes native ETH into smart contracts of liquid staking protocols
2. **Node operators** provide some amount of ETH as collateral or bond (e.g., 1/2/4/8 ETH) to serve as the first line of defence against slashing events, poor performance, & MEV theft.
3. **Liquid staking protocols** assign some amount of staked ETH of liquid stakers to node operators to fulfil the 32 ETH minimum requirement per active validator key
4. **Fee distribution:** Liquid staker pay some fees (e.g., 10% or 14%) to the liquid staking protocol and a majority portion (or all) of this flows to node operators&#x20;

Hence, bonded validators enable node operators to lower their capital requirements and boost their rewards rate as compared to native solo staking.

## Examples of bonded validators

<table><thead><tr><th width="104">Option</th><th width="112">ETH bond</th><th width="139">ETH matched</th><th width="144">Non-ETH bond</th><th width="102">Fee %</th><th>Note</th></tr></thead><tbody><tr><td>Rocketpool</td><td>8</td><td>24</td><td>2.4 ETH worth of RPL</td><td>14% out of 14% total</td><td>8% APR on RPL staked</td></tr><tr><td>Stader</td><td>4</td><td>28</td><td>0.4 ETH worth of SD</td><td>6% out of 10% total</td><td>7.97% APR on SD staked</td></tr><tr><td>Lido</td><td>2</td><td>32</td><td>None</td><td>8% out of 10% total</td><td>Bond provided in stETH which also accrues rewards</td></tr><tr><td>Ether.fi (WIP)</td><td></td><td></td><td></td><td></td><td></td></tr><tr><td>Puffer (WIP)</td><td></td><td></td><td></td><td></td><td></td></tr></tbody></table>

## How do I run bonded validators as a solo staker?

***There are 2 methods of setting up bonded validators today.***

{% tabs %}
{% tab title="Lido CSM" %}

<figure><img src="/files/5iHhdrrHtgVwdLt06EPG" alt=""><figcaption></figcaption></figure>

For the Lido CSM, you will essentially be running just a native validator node with no additional services required on your hardware. Bond deposit is managed on the CSM Webapp.

### Jump to Lido CSM setup here

{% content-ref url="/pages/nWlQRwtV6GhBAl2BCgbS" %}
[Lido CSM](/bonded-validators-setup/lido-csm)
{% endcontent-ref %}
{% endtab %}

{% tab title="Rocketpool, Stader" %}

<figure><img src="/files/lZtyNNErms5RkViBo4G6" alt=""><figcaption></figcaption></figure>

For the Rocketpool and Stader, you will need to run an additional and separate service that handles the ETH bond + alternative tokens deposit on your hardware on top of your native validator node.&#x20;

You then expose the endpoints of your execution and consensus, and connect them to your bonded validator client. This way, your bonded validator client can now "talk" to your existing execution + consensus clients and perform its duties.

### Jump to Rocketpool and Stader setup below

{% content-ref url="/pages/SygBDjVrnkqEkAsc2STC" %}
[Rocketpool (WIP)](/bonded-validators-setup/rocketpool-wip)
{% endcontent-ref %}

{% content-ref url="/pages/N4Ne3MPu04lJfpKeD96Z" %}
[Stader (WIP)](/bonded-validators-setup/stader-wip)
{% endcontent-ref %}
{% endtab %}

{% tab title="Native Solo staking" %}

<figure><img src="/files/OHZc7XXNSgZKf63vcz8D" alt=""><figcaption><p>Simplified illustration of a solo staker setup</p></figcaption></figure>

### Jump to native Solo Staking setup below

{% content-ref url="/pages/zW8xHHAzi8R6JQYh4S7j" %}
[Setup Overview](/hardware-and-systems-setup/setup-overview)
{% endcontent-ref %}
{% endtab %}
{% endtabs %}

You can also run multiple bonded validator clients on the same hardware, provided that you have sufficient resources (e.g., CPU, RAM, Disk) on your hardware to meet the minimum requirements of each additional service.

<figure><img src="/files/fBUYFTGVYRn7xm4xoWb6" alt=""><figcaption></figcaption></figure>

{% hint style="info" %}
You can also run DVT clients alongside bonded validator clients.
{% endhint %}


# Economics of bonded validators (WIP)


# Setup Overview

## System stack

<figure><img src="/files/ZwGs5WmJnz5vcup2lBnA" alt=""><figcaption></figcaption></figure>

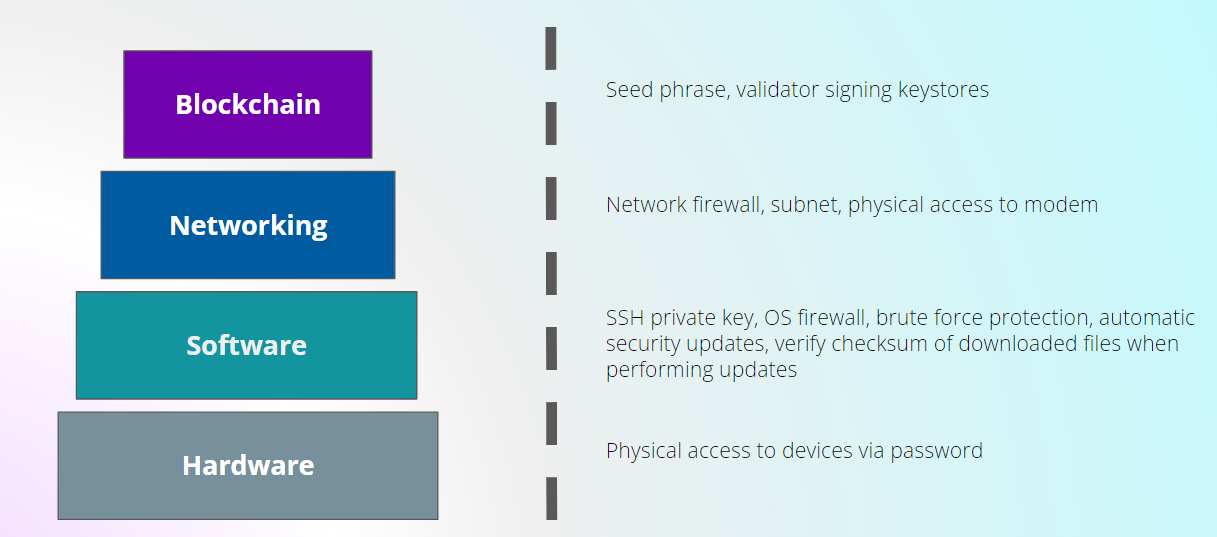
## Security Stack

<figure><img src="/files/nIYiXvN6YEov0b4dfcwM" alt=""><figcaption></figcaption></figure>


# Hardware & system requirements

Despite being catered towards home-staking, running an ETH validator node reliably still requires some thought on the choice of hardware. To run this locally in your own home, your hardware will need to meet the following requirements.&#x20;

## Minimum requirements

1. CPU: 4 cores, 8 threads
2. RAM: 64 GB&#x20;
3. Storage:&#x20;
   * 4TB NVME SSD, TLC, DRAM
   * 7000 mbps sequential read/write
   * 1,000,000 random read/write
4. Network requirements (Check with ISP):
   * **Volume**: Uncapped or at least 2 TB per month&#x20;
   * **Speeds:** At least 250mb/s shared - \*Your validator node needs dedicated internet speeds of 50 mbps download and 25 mbps upload&#x20;
   * **IP address:** Static if possible
5. Power: Uninterruptible power supply (UPS)

## "Fuss-free" requirements

1. Storage: 4TB NVME SSD, >5000 read IOPS, >1700 write IOPS, non-QLC
2. Everything else on par with the minimum requirements above&#x20;

## How each component affects performance

<table><thead><tr><th width="135">Component</th><th width="505">Impact on performance</th></tr></thead><tbody><tr><td>CPU</td><td><ul><li>Affects block execution speed (4s limit)</li><li>Will miss attestations and block proposals if this is too slow</li><li>This is one of the more expensive component</li></ul></td></tr><tr><td>RAM</td><td><ul><li>Services will shutdown/restart abruptly if the device runs out of memory, causing you to lose data. This can lead to database corruption, and in the worst case, require you to resync your validator node from scratch - missing attestations for 2 to 3 days in the meantime.</li><li>As the Ethereum network grows with more activity (e.g., more addresses, smart contracts, &#x26; transactions), there will be an increasing demand on your node's memory to maintain the chain state and propagate transactions to other nodes. </li><li>Go crazy on this if needed as it is the cheapest component. </li></ul></td></tr><tr><td>Storage</td><td><ul><li>Read and write speeds (IOPS) are the main bottleneck for block execution speeds</li><li>This is one of the more expensive component</li></ul></td></tr><tr><td>Network</td><td><ul><li>Affects latency on receiving/sending blocks, which affects overall block execution speed (4s limit)</li><li>Although not compulsory, having a static IP address improves discoverability by other nodes in the network and prevents issues of low peer count</li><li>Some ISPs also prevent port forwarding (for remote access to your node) if you don't have a static IP address</li></ul></td></tr><tr><td>Power</td><td><ul><li>Sudden power disruptions - e.g. lightning, power trips - will cause your node to shutdown uncleanly, causing you to lose data. This can lead to database corruption, and in the worst case, require you to resync your validator node from scratch - missing attestations for 2 to 3 days in the meantime.</li></ul></td></tr></tbody></table>

##


# Procuring your hardware

## Key considerations

As a home staker, some of the key considerations you'd have are:&#x20;

1. Space and aesthetic constraints in your home
2. Getting familiar with hardware assembly

The Intel NUC and ASUS Mini PC form factors are recommended here because of these reasons. They have similar compact sizes, sleek black design, in-built cooling system, and a standardised motherboard layout — which are ideal properties for new learners to get up to speed on hardware requirements rapidly.

<figure><img src="/files/HyUCCoIw8SLD6kXJ6v1m" alt="" width="375"><figcaption><p>Intel NUC</p></figcaption></figure>

<figure><img src="/files/CPQYUjY1wLOEUnLkpNS2" alt="" width="563"><figcaption><p>ASUS Mini PC</p></figcaption></figure>

## Suggested Shopping List&#x20;

*\*Prices in USD*

### **Essentials**

Either builds are good options but the Intel NUC CPU set is slightly more expensive on Amazon. The RAM and storage components are also interchangeable across both builds so it ultimately comes down to which components you are able to get at the cheapest price based on your location (i.e. vendor availability).&#x20;

#### **Intel (ASUS now) NUC Build**

<table><thead><tr><th width="208">Component</th><th width="196">Model</th><th width="152">Estimated Cost</th><th data-type="content-ref">Link</th></tr></thead><tbody><tr><td>CPU + motherboard + case</td><td>Intel NUC i5-1240P bare bones + case</td><td>$508</td><td><a href="https://www.amazon.com/Intel-NUC-NUC12WSHv5-Barebone-System/dp/B0BSLQKRZK/ref=sr_1_3?crid=2IEGBS85E0JS7&#x26;keywords=intel+nuc+i5+12th+gen+barebone&#x26;qid=1703419811&#x26;s=electronics&#x26;sprefix=intel+nuc+i5+12th+gen+barebon%2Celectronics%2C360&#x26;sr=1-3">https://www.amazon.com/Intel-NUC-NUC12WSHv5-Barebone-System/dp/B0BSLQKRZK/ref=sr_1_3?crid=2IEGBS85E0JS7&#x26;keywords=intel+nuc+i5+12th+gen+barebone&#x26;qid=1703419811&#x26;s=electronics&#x26;sprefix=intel+nuc+i5+12th+gen+barebon%2Celectronics%2C360&#x26;sr=1-3</a></td></tr><tr><td>RAM</td><td>32GB Lexar DDR4-3200 SODIMM </td><td>$68</td><td><a href="https://www.amazon.com/SODIMM-Laptop-Performance-Upgrade-LD4AS016G-B3200GSST/dp/B09KY6SXLZ/ref=sr_1_3?crid=2DYFPEB0TH9SD&#x26;keywords=16GB%2BLexar%2BDDR4-3200%2BSODIMM&#x26;qid=1703419934&#x26;s=electronics&#x26;sprefix=2x%2B16gb%2Blexar%2Bddr4-3200%2Bsodimm%2Celectronics%2C322&#x26;sr=1-3&#x26;th=1">https://www.amazon.com/SODIMM-Laptop-Performance-Upgrade-LD4AS016G-B3200GSST/dp/B09KY6SXLZ/ref=sr_1_3?crid=2DYFPEB0TH9SD&#x26;keywords=16GB%2BLexar%2BDDR4-3200%2BSODIMM&#x26;qid=1703419934&#x26;s=electronics&#x26;sprefix=2x%2B16gb%2Blexar%2Bddr4-3200%2Bsodimm%2Celectronics%2C322&#x26;sr=1-3&#x26;th=1</a></td></tr><tr><td>Storage</td><td>ADATA S70 2TB NVMe Gen4 SSD</td><td>$157</td><td><a href="https://www.amazon.com/XPG-2TB-GAMMIX-Blade-AGAMMIXS70B-2T-CS/dp/B093DNV47J/ref=sr_1_3?crid=1HDMZZ3ZR7J7M&#x26;keywords=ADATA%2BS70%2B2TB%2BNVMe%2BGen4%2BSSD&#x26;qid=1703420049&#x26;s=electronics&#x26;sprefix=adata%2Bs70%2B2tb%2Bnvme%2Bgen4%2Bssd%2Celectronics%2C323&#x26;sr=1-3&#x26;th=1">https://www.amazon.com/XPG-2TB-GAMMIX-Blade-AGAMMIXS70B-2T-CS/dp/B093DNV47J/ref=sr_1_3?crid=1HDMZZ3ZR7J7M&#x26;keywords=ADATA%2BS70%2B2TB%2BNVMe%2BGen4%2BSSD&#x26;qid=1703420049&#x26;s=electronics&#x26;sprefix=adata%2Bs70%2B2tb%2Bnvme%2Bgen4%2Bssd%2Celectronics%2C323&#x26;sr=1-3&#x26;th=1</a></td></tr><tr><td><strong>Total</strong></td><td></td><td><strong>$733</strong></td><td></td></tr></tbody></table>

**ASUS Mini PC**

<table><thead><tr><th width="208">Component</th><th width="196">Model</th><th width="152">Estimated Cost</th><th data-type="content-ref">Link</th></tr></thead><tbody><tr><td>CPU + motherboard + case</td><td>ASUS Mini PC Ryzen 7 4700U</td><td>$350</td><td><a href="https://www.newegg.com/p/1VK-001S-02DH9">https://www.newegg.com/p/1VK-001S-02DH9</a></td></tr><tr><td>RAM</td><td>Crucial RAM 32GB DDR4 3200MHz</td><td>$73</td><td><a href="https://www.amazon.com/gp/product/B07ZLC7VNH?th=1">https://www.amazon.com/gp/product/B07ZLC7VNH?th=1</a></td></tr><tr><td>Storage</td><td>SAMSUNG 980 (or 990) PRO SSD 2TB</td><td>$165 - $185</td><td><a href="https://www.newegg.com/samsung-2tb-980-pro/p/N82E16820147796">https://www.newegg.com/samsung-2tb-980-pro/p/N82E16820147796</a></td></tr><tr><td><strong>Total</strong></td><td></td><td><strong>$588 - $608</strong></td><td></td></tr></tbody></table>

{% hint style="info" %}

* If you plan to purchase any other SSDs, you should first refer to this list compiled by Yorick Downe and prioritise SSD models listed in the “Good” category — <https://gist.github.com/yorickdowne/f3a3e79a573bf35767cd002cc977b038>
* You may also refer to the full list in this google sheet and filter for models with **DRAM** and **TLC** (under NAND type) - <https://docs.google.com/spreadsheets/d/1B27_j9NDPU3cNlj2HKcrfpJKHkOf-Oi1DbuuQva2gT4/edit#gid=0>
  {% endhint %}

**Dappnode**

If you don't want the hassle of sourcing and assembling your own components, you can go for pre-built Ethereum home staking hardware for a premium.

Dappnode selects the optimal hardware components by taking into account upcoming Ethereum network upgrades and testing them rigorously so you can be assured about future-proofing and  quality.

Check out the various options on their site using my affiliate link below (no price difference):

{% embed url="<https://dappnode.com/collections/frontpage?sca_ref=6421280.pl3ldyi9Vn&utm_campaign=affiliate&utm_medium=socialmedia&utm_source=twitter>" %}

### **Optional**

<table><thead><tr><th width="208">Component</th><th width="196">Model</th><th width="152">Estimated Cost</th><th data-type="content-ref">Link</th></tr></thead><tbody><tr><td>4TB SSD Storage*</td><td>TEAMGROUP MP34 4TB</td><td>$210*</td><td><a href="https://www.amazon.sg/TEAMGROUP-Internal-Compatible-Desktop-TM8FP4004T0C101/dp/B08Z7LN8NM">https://www.amazon.sg/TEAMGROUP-Internal-Compatible-Desktop-TM8FP4004T0C101/dp/B08Z7LN8NM</a></td></tr><tr><td>Networking (Optional if your current router works well)</td><td>TP-Link Wifi 6 AX1500 Smart WiFi Router</td><td>$81</td><td><a href="https://www.amazon.com/WiFi-6-Router-Gigabit-Wireless/dp/B08H8ZLKKK/ref=sr_1_5?crid=2NBX76K6ZA24V&#x26;keywords=TP-Link+Wifi+6+AX1500+Smart+WiFi+Router&#x26;qid=1703420097&#x26;s=electronics&#x26;sprefix=tp-link+wifi+6+ax1500+smart+wifi+router%2Celectronics%2C344&#x26;sr=1-5">https://www.amazon.com/WiFi-6-Router-Gigabit-Wireless/dp/B08H8ZLKKK/ref=sr_1_5?crid=2NBX76K6ZA24V&#x26;keywords=TP-Link+Wifi+6+AX1500+Smart+WiFi+Router&#x26;qid=1703420097&#x26;s=electronics&#x26;sprefix=tp-link+wifi+6+ax1500+smart+wifi+router%2Celectronics%2C344&#x26;sr=1-5</a></td></tr><tr><td>Power</td><td>Cyberpower CP425SLG** (or another USB compatible UPS if not available in your region)</td><td>$58</td><td><a href="https://github.com/trevhub/guides/blob/main/CheapUPS.md">https://github.com/trevhub/guides/blob/main/CheapUPS.md</a></td></tr><tr><td>Miscellaneous</td><td>2x CAT7 LAN cables, 2x new 8GB USB drive</td><td>$27</td><td></td></tr></tbody></table>

*\*Actual price of this 4TB SSD might depend on the promotion period. Given that the Dencun upgrade is likely to arrive in a couple of months, it might be good to future-proof your build with a 4TB SSD in exchange for a slight increase in cost.*&#x20;

\*\*Setup instructions for an automatic shutdown in the event of a power outage and subsequently powering on after recovery can be found in the corresponding link.

## Cost considerations

1. **Revenue:** A single ETH validator will generate between 4.0% (median) to 5.3% (mean) yield. At ETH price = USD2300 (*28th Jan 2024*), this will give you an income of between USD2944 to USD3900 per year.
2. **Cost:** The minimal hardware cost described here is USD753 and electricity is negligible at around USD90 (SGD120) per year
3. **Payback Period:** \~3 months at median; \~5 months if no block proposals are received

**However, you will be able to run many "vanilla" validator keys, along with multiple liquid staking service on just a single set of hardware** to make your operations more capital efficient — e.g. running with 2 validator keys doubles your revenue without increasing your cost base.

Leveraging on liquid staking services like Diva Staking will allow you to further scale your TVL and income as a solo staker without increasing your capital proportionally.

## Other Considerations

For learners with more advanced knowledge in building home servers, you might want to consider building a device that supports ECC RAM. This will cost slightly more but can potentially save a large amount of troubleshooting time if there is a RAM failure. ***More information around this topic can be found on the Ethdocker resources below:***&#x20;

{% embed url="<https://eth-docker.net/Usage/Hardware/>" %}

The trade-offs, however, are that (i) you will likely require a larger form factor and (ii) because ECC RAMs non-consumer components, it might take a few weeks for your vendor to replace (not readily available) your RAM if there is a RAM failure.


# Assemble your hardware

{% hint style="info" %}
If your hardware has not arrived yet, follow the link below to spin up a Google Cloud virtual machine (VM) to perform the **"Prepare your OS"** steps.
{% endhint %}

{% content-ref url="/pages/68N04wxxW6k8PC4CHn8H" %}
[Google Cloud](/hardware-and-systems-setup/practicing-for-free-on-cloud-vms/google-cloud)
{% endcontent-ref %}

## Inspect your hardware

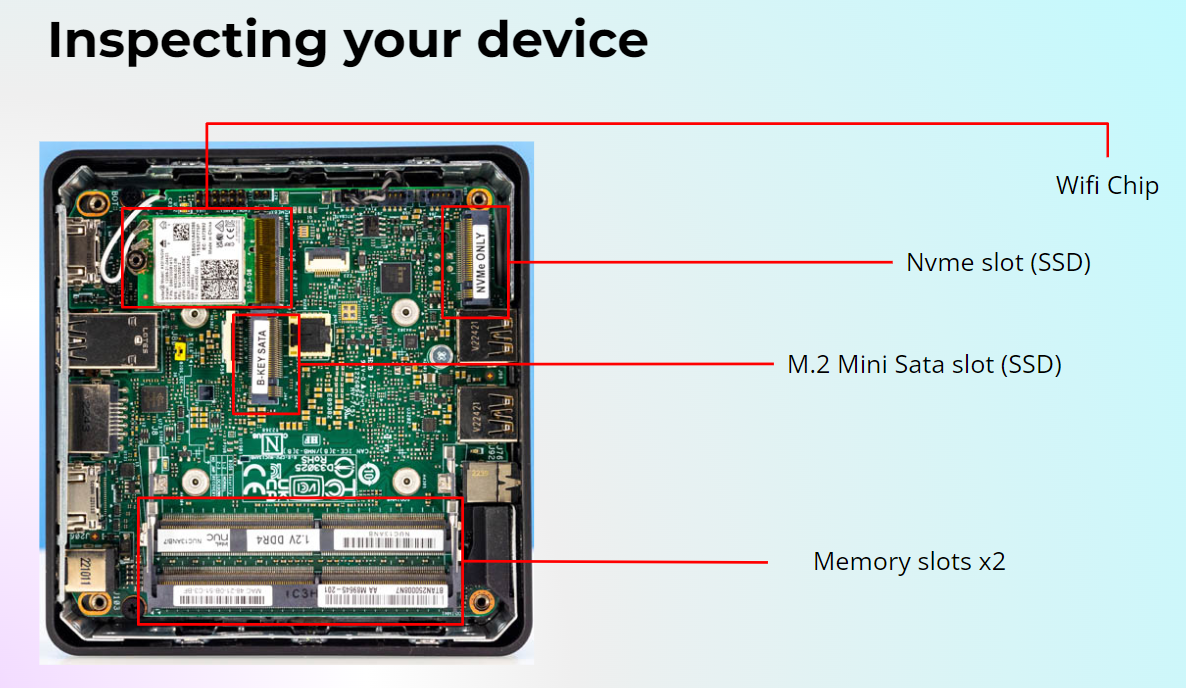
Inspecting your hardware physically is an important step to remove the possibility of supply chain attacks. This happens when the hardware is somehow compromised (e.g. with a keylogger) before it reaches you.

Open up your node device - the Intel NUC in this case - and make sure there are no unknown components that look badly soldered onto your motherboard (the big green plate). &#x20;

<figure><img src="/files/xCkLWFzD8hXemx03vO6Y" alt=""><figcaption><p>Basic anatomy of the Intel NUC device</p></figcaption></figure>

## Assembling your hardware

#### RAM:

* Align the gold plates of your 16GB Lexar DDR4-3200 SODIMM memory chip with each memory slot on the NUC *- starting first from the inner slot -* and slot it into the slot at a diagonal elevation.&#x20;
* Once the gold plates of the memory chip is snugly slotted in to the memory slot, gently push the memory chip downwards until you hear it "click" into place

#### **Storage:**&#x20;

* Unscrew the small screw near the WIFI chip
* Align the gold plates of your NVME SSD chip with the SSD slot on the NUC and slot it in
* Gently push and hold the SSD chip down and screw the small screw back into its original slot to hold the SSD chip in place. **Note:** You do not have to screw it on too tightly   &#x20;


# Practicing for free on Cloud VMs


# Google Cloud

### Here are some logistics you will need to prepare before hand:

1. Laptop
2. Google Cloud account with free trial activated. Credit card details are needed but don’t have to charge it
   * <https://cloud.google.com/free>
3. Go into your Google Cloud console&#x20;

   <figure><img src="/files/4yYGP1PfZq2mgPLSTfos" alt=""><figcaption></figcaption></figure>
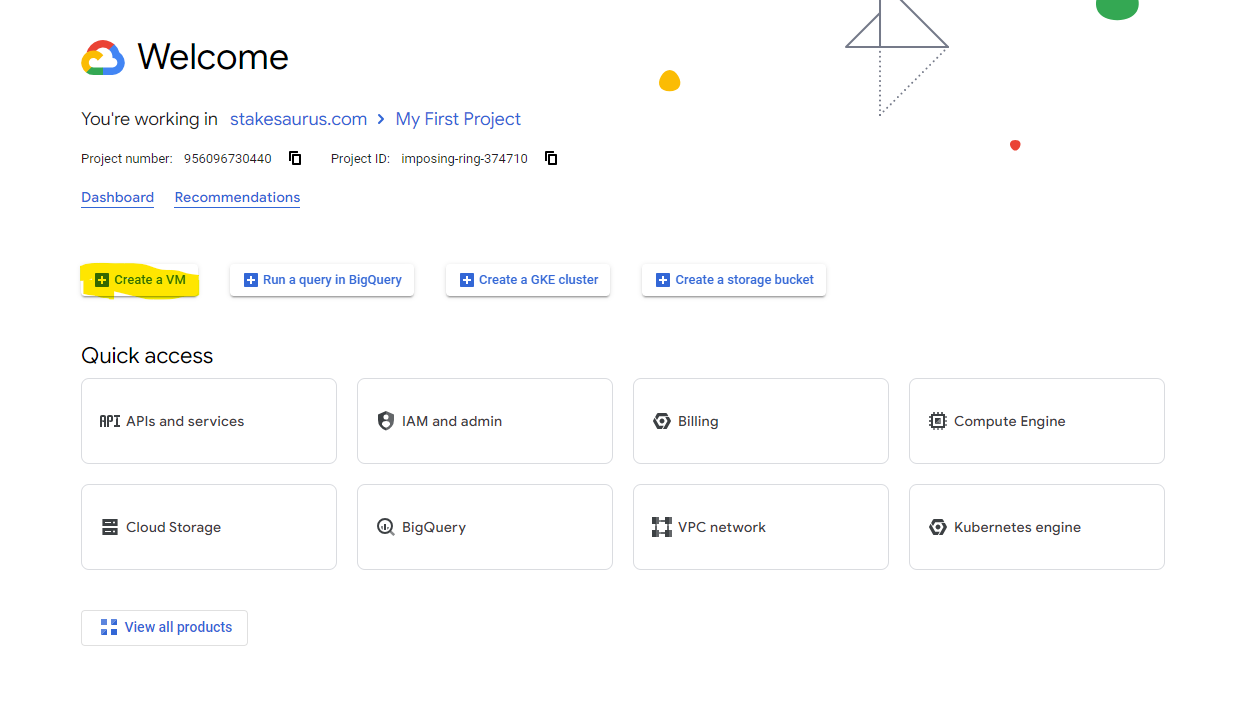
4. Go to **Create a VM**&#x20;

   <figure><img src="/files/wDEQKWBPwxP3xJklxgjO" alt=""><figcaption></figcaption></figure>
5. Enable the **Compute Engine API**&#x20;

   <figure><img src="/files/J6tAzqXGOCJesFyWn9ql" alt=""><figcaption></figcaption></figure>

## Create a new VM

Go to your google cloud console and create a new VM.

<figure><img src="/files/P9E0CeUlDVwH1rLwv91z" alt=""><figcaption></figcaption></figure>

Choose the following settings:

1. **Name:** Choose your own name or leave it as the default setting
2. **Region:** Choose your preferred region but it is recommended to diversify away from the popular regions (e.g. US, EU) for mainnet setups to minimise the risk of <mark style="color:red;">correlated downtime.</mark> I am going with Singapore in this example.
3. **Zone:** Choose any
4. **Machine configuration:** E2
5. **Machine type:** e2-standard-2, 8GB memory

<figure><img src="/files/gT6bJ1lWJjZo4zya0v7U" alt=""><figcaption></figcaption></figure>

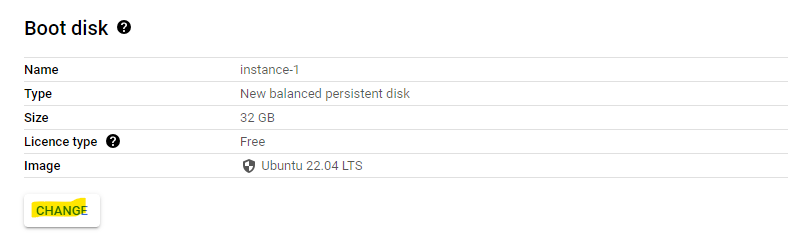
Under **OS and Storage**>>**Boot disk**, click on the **"change"** button.

<figure><img src="/files/M9yYansbonS61yBMcwqx" alt=""><figcaption></figcaption></figure>

Select `Ubuntu` for the operating system, `Ubuntu 24.04 LTS x86` for the version, `SSD persistent disk` for the boot disk type, and `300 GB` for the size of the storage. <mark style="color:blue;">**Note:**</mark> <mark style="color:blue;"></mark><mark style="color:blue;">Use</mark> <mark style="color:blue;"></mark><mark style="color:blue;">`250 GB`</mark> <mark style="color:blue;"></mark><mark style="color:blue;">storage if 300 GB does not work for you.</mark>

<figure><img src="/files/yASWKjIIZxHjWtwK9uRi" alt=""><figcaption></figcaption></figure>

Select `No service account` under **Security**>>**Identity and API access**.

<figure><img src="/files/JOW3Cl2iABYDc5UVb2KY" alt=""><figcaption></figcaption></figure>

Check the first 2 boxes under the **"Firewall"** section.

<figure><img src="/files/6JE6bKwx0Xd68sps4jFP" alt=""><figcaption></figcaption></figure>

Once you are done, click on the **"Create"** button at the bottom of the screen.

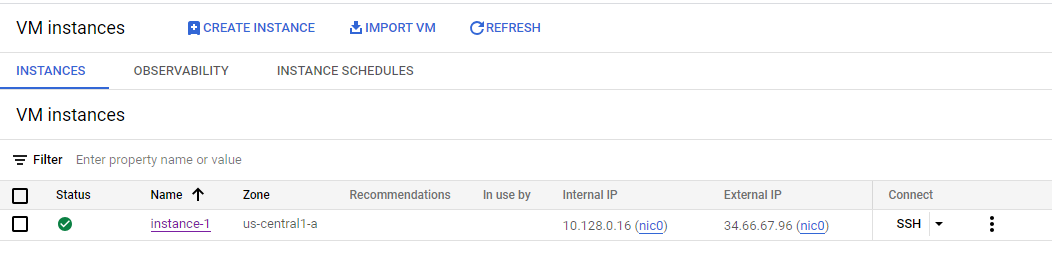
**Expected output:** You should see your VM instance coming online after loading for a few seconds

<figure><img src="/files/pu6AzbgnWwwDtD7wE4I6" alt=""><figcaption></figcaption></figure>

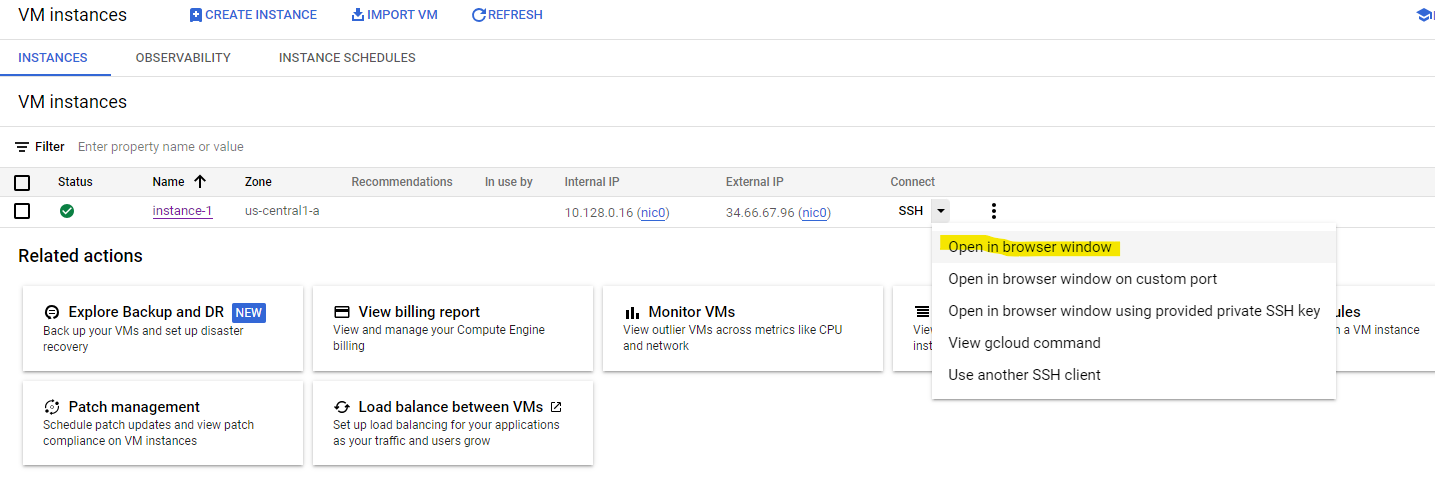
&#x20;Click on the dropdown beside the **"SSH"** column and select **"Open in browser window".** Click on **"Authorize"** when prompted.

<figure><img src="/files/Ht98ndSTNhblwblaoHif" alt=""><figcaption></figcaption></figure>

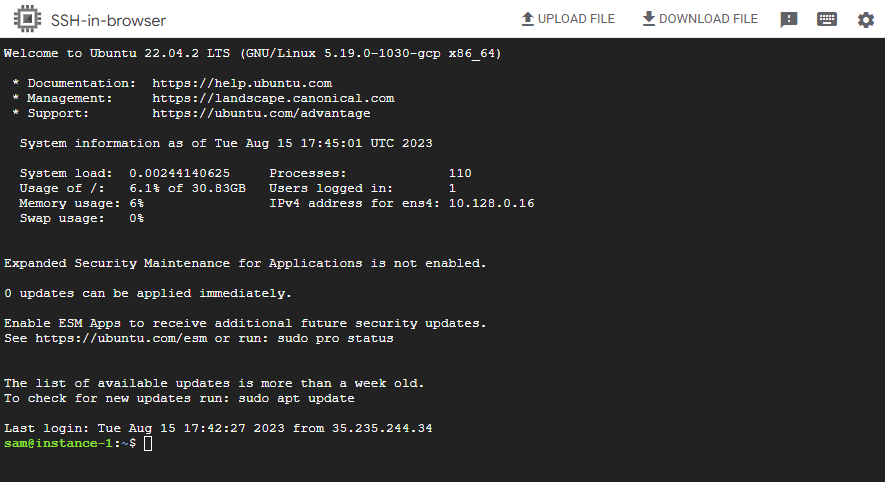
**Expected output:** Wait for the new window to load and your Ubuntu terminal will appear.

<figure><img src="/files/0PmceVp4GYnppyDZtnUj" alt=""><figcaption></figcaption></figure>

Once you are logged into your VM via SSH, run a general update using the command below.

```sh
sudo apt update -y && sudo apt upgrade -y
```

## Next Steps:

1. Lido CSM
   1. [Eth-Docker](/bonded-validators-setup/lido-csm/automations/csm-with-eth-docker)
   2. [Ethpillar](/bonded-validators-setup/lido-csm/automations/csm-with-ethpillar)
   3. [Dappnode](/bonded-validators-setup/lido-csm/automations/csm-with-dappnode)
2. [Obol Techne Bronze Speedrun](/dvt-setup/obol/techne-bronze-speedrun-launchpad)
3. [SSV Operator](/dvt-setup/ssv/ssv-operator)
4. **"Vanilla" Solo Staking:** Jump to the [Device level security setup](/linux-os-networking-and-security/device-level-security-setup) section


# Alibaba Cloud

## Creating an account

1\) Go to [Alibaba Cloud website](https://www.alibabacloud.com/en?_p_lc=1)

2\) Click on **"Free Trial"** in the top right corner

3\) Select **"Individual Account"**

4\) Enter your Email address and set your password

5\) Select your country/region and enter your phone number. Then, request for a verification code and enter the verification code sent to your phone number

6\) Select **"Individual Account"** again, fill in your billing information, verify your email address, and then submit the form

7\) Add your credit card details. **Note:** You will not be billed if you only select products within the **Free Tier**

8\) Once you have successfully created an account, click on **"Free Trial"**

<figure><img src="/files/FZGZ9qOrAdnlZQWy2wWC" alt=""><figcaption></figcaption></figure>

## Spin up your free VM

1\) Under the **Free Trial** page, scroll down and look for the **ECS u1 Instance.** You will be able to run one of this instance for free for 3 months.&#x20;

<figure><img src="/files/WXam0lmjw6YBnDabwTCG" alt="" width="342"><figcaption></figcaption></figure>

{% hint style="danger" %}
However, as the size is too small even for a testnet validator node, you can only practice the configuration steps without actually running the services using this.
{% endhint %}


# Install and prepare the OS

## Flash Ubuntu OS on USB Drive

### Download the latest version of Ubuntu

Now that you have assembled your hardware, you will need to install the Ubuntu OS onto your device. To do that, we will need to **create a bootable USB drive flashed with the latest Ubuntu OS&#x20;**<mark style="color:red;">**(Currently 24.04.2 LTS)**</mark>**.** Follow the steps below:

1. Prepare a new USB drive of at least 8GB
2. On your working laptop, download the latest version of Ubuntu here (this might take around 30 minute&#x73;**)** - <https://ubuntu.com/download/desktop> -&#x20;

<figure><img src="/files/QhXGHeY9x1nBC4J0a3JW" alt=""><figcaption></figcaption></figure>

1. Once the download is complete, you will need to verify the checksum of the downloaded file to ensure it has not been tampered with during the download&#x20;

### Verify the checksum of download

Click on "verify your download" and you should see a window appearing.

<figure><img src="/files/K2eCL6g0uOGaWi3Yvi7c" alt=""><figcaption></figcaption></figure>

Open up your terminal (Mac) or Windows Power Shell (Windows) and run the following commands.

**Mac:**

```sh
cd Downloads
echo "d7fe3d6a0419667d2f8eff12796996328daa2d4f90cd9f87aa9371b362f987bf *ubuntu-24.04.2-desktop-amd64.iso" | shasum -a 256 --check
```

**Windows:**

```sh
cd ~\Downloads; "d7fe3d6a0419667d2f8eff12796996328daa2d4f90cd9f87aa9371b362f987bf" -eq (Get-FileHash ubuntu-24.04.2-desktop-amd64.iso -Algorithm SHA256).Hash.ToLower() | ForEach-Object { if($_){"OK"}else{"FAILED"} }
```

You are good to go if you see an "OK" in the output.

```sh
ubuntu-24.04.2-desktop-amd64.iso: OK
```

### Download an ISO writer

After we download the ISO file of the latest Ubuntu version, we will need a tool to write this ISO file into the USB drive so that it is bootable when plugged into your NUC.&#x20;

1. Download and install BalenaEtcher - <https://etcher.balena.io/>

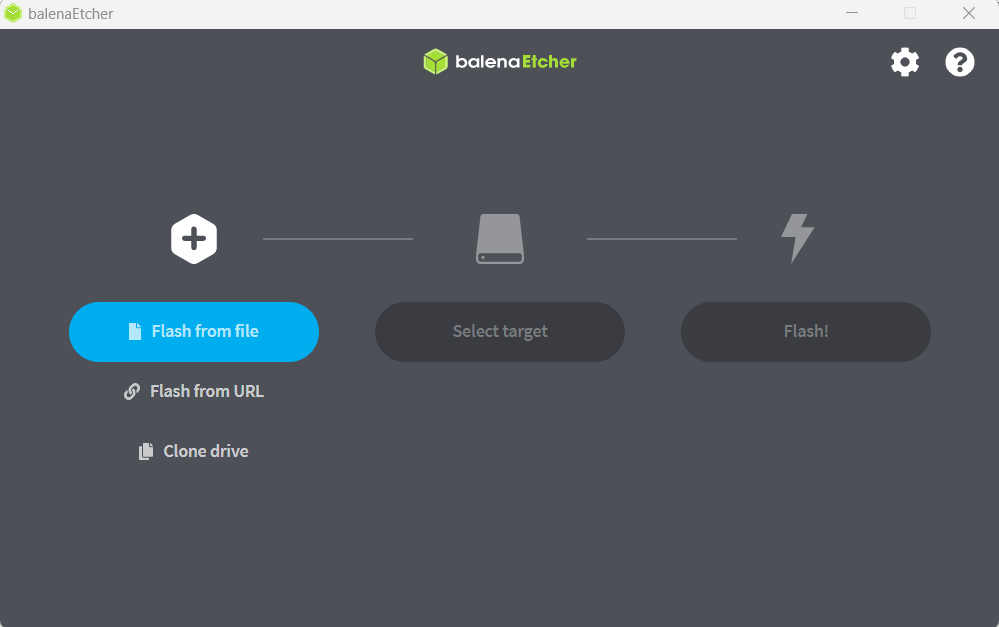
2. Open up BalenaEtcher and choose select flash from file&#x20;

   <figure><img src="/files/3ttxoJh4NqUnDbZjHghr" alt=""><figcaption></figcaption></figure>

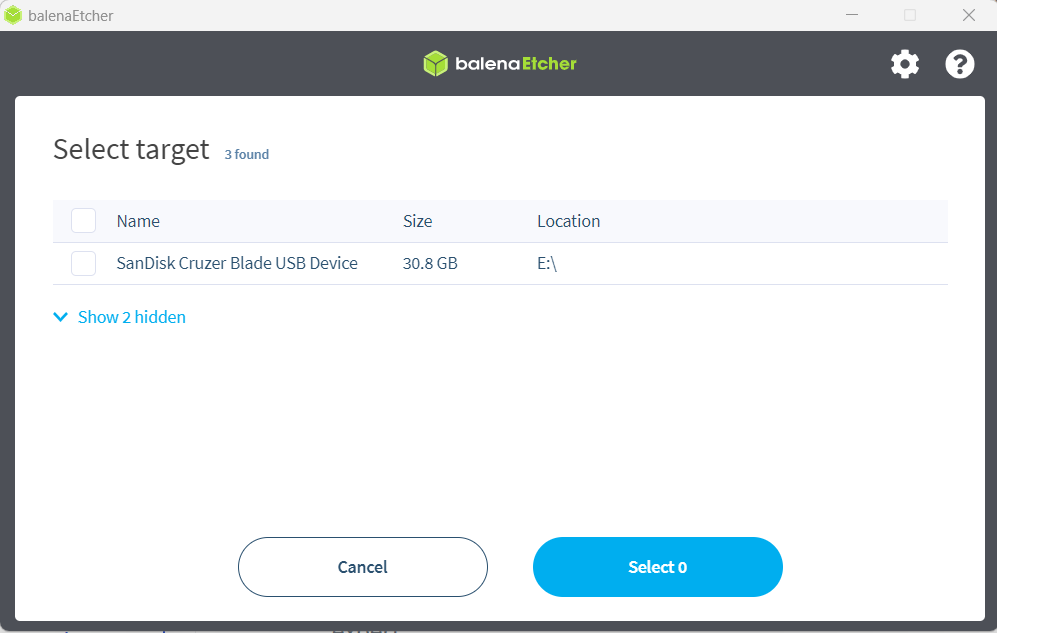
3. Select your new USB drive under the "Select target" option&#x20;

   <figure><img src="/files/iWm6vIkmLpOvr3wb4oxU" alt=""><figcaption></figcaption></figure>

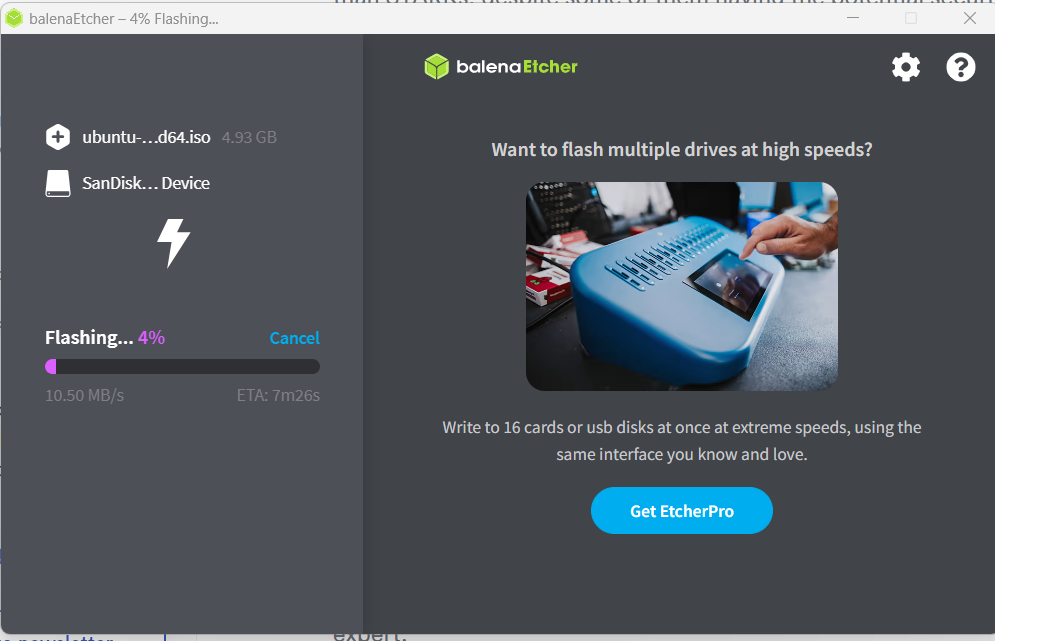
4. Hit the "Flash!" button and wait for the process to complete&#x20;

   <figure><img src="/files/ZjLaOSR81C5bF4pDQqM3" alt=""><figcaption></figcaption></figure>

## Install Ubuntu on your NUC (Node)

{% hint style="info" %}
You will need to connect your NUC device to a keyboard and monitor for the installation process
{% endhint %}

Connect your node to your router using a LAN cable.&#x20;

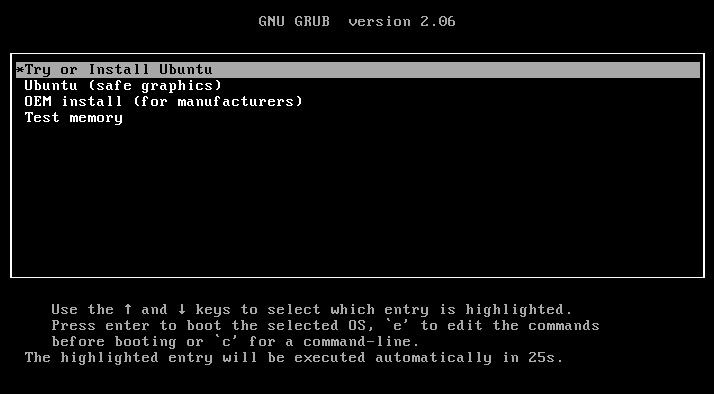
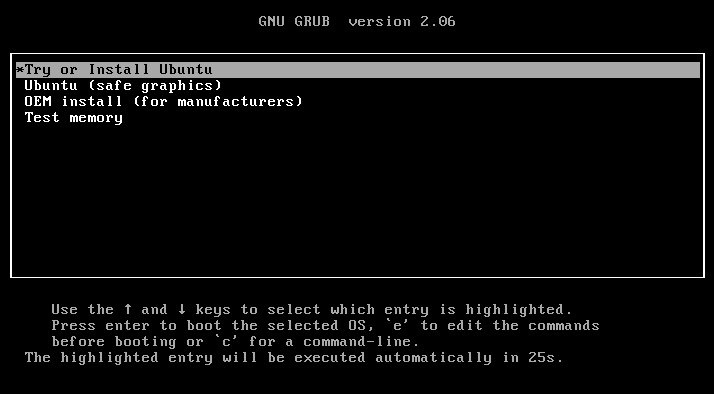
Plug your bootable USB drive into your NUC device and turn it on. Select `Try or Install Ubuntu` from the boot menu.&#x20;

<figure><img src="/files/SF51U6FczEQ5Wqwc1jmq" alt=""><figcaption></figcaption></figure>

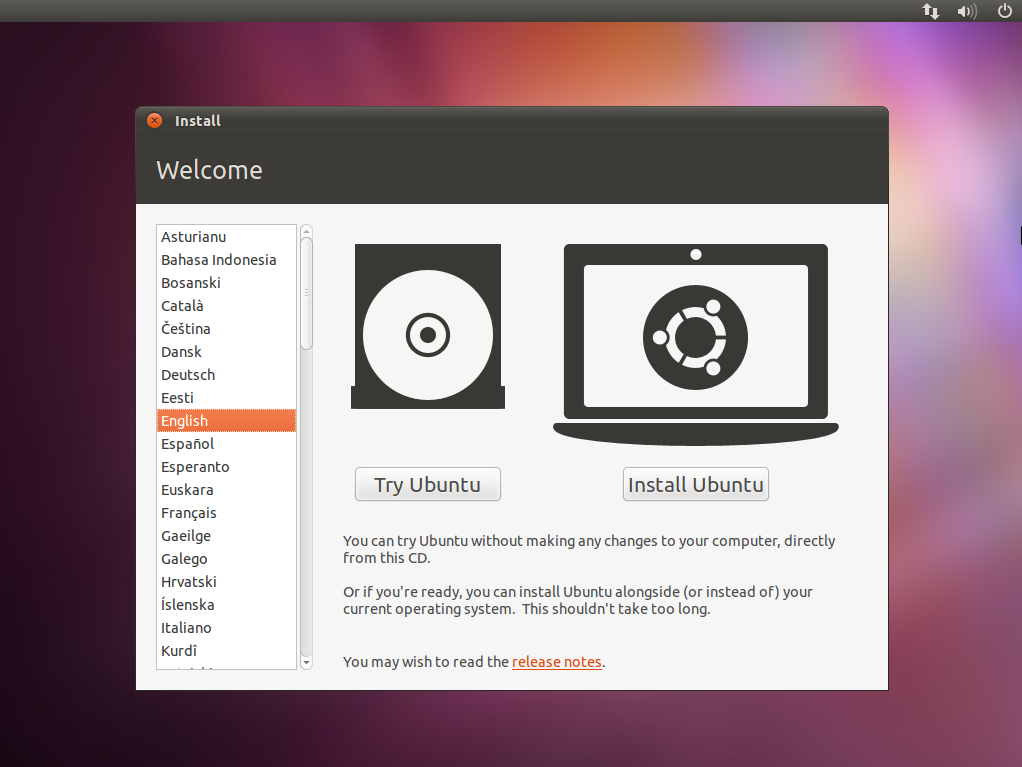
Choose the following options when prompted:

1. Install Ubuntu (not Try)
2. ***Connect to the WIFI network of your router***
3. Minimal installation + Download updates while installing Ubuntu
4. Erase disk and install Ubuntu
5. Set your username and password + "Require my password to login"
6. Restart your device
7. Skip connecting to your online accounts
8. Skip setting up Livepatch
9. Select "No, don't send system info"
10. Disable location services

Your NUC device is now installed with the Ubuntu OS.

### Install the SSH Server

Open up the Ubuntu terminal on your NUC by pressing `CTRL + ALT + T` and perform the following:

1\) General updates

```sh
sudo apt update -y && sudo apt upgrade -y
```

2\) Install the ssh server

```sh
sudo apt install openssh-server
```

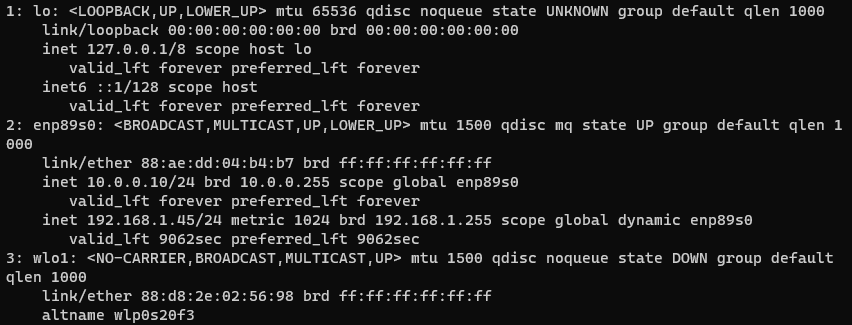
3\) Get the IP address of your NUC device within your Node Router subnet.

```sh
ip a
```

**Expected output:**

<figure><img src="/files/dywG0MiTD72NTOv83mlx" alt=""><figcaption></figcaption></figure>

Your NUC's IP address will be located under the `wl01` interface - e.g. 192.168.xx.xx.&#x20;

**Write this down** as you will need to use this IP address to access your NUC remotely and we will call this the `node_IP_address` moving forward.

You can now access your NUC (`Node`) remotely by running the following command while you are in the Node Router subnet and entering the password of the Node when prompted.

```sh
ssh <username>@<node_IP_address> -v
```

**Note:** This command will change slightly once you properly secure your Node device in the next section.

## Prepare your OS

### Install useful packages

```sh
sudo apt install curl jq htop
```

* `curl` allows you to query IP addresses, URLs, and the endpoints of internal services directly to test for connectivity and downloading files from the internet
* `jq` is a formatting package
* `htop` is a system monitoring tool&#x20;

### Configure timekeeping

We need to make sure the time on our device is the same with all other nodes so that we are able to sync with everyone else. If our timekeeping is off, we will start missing attestations (and rewards!).&#x20;

First, install `chrony`

```
sudo apt install chrony
```

Stop and disable the default timekeeping service.

```
sudo systemctl stop systemd-timesyncd
sudo systemctl disable systemd-timesyncd
```

Start and enable `chrony`

```
sudo systemctl enable chronyd
sudo systemctl start chronyd
```

Verify that `chrony` is running:

```
chronyc tracking
```

**Expected output:** Check that the time shown is correct and has low offset. i.e., system vs benchmark (NTP)  time.&#x20;

```
Reference ID    : 192.168.1.1 (time1.google.com)
Stratum         : 3
Ref time (UTC)  : Fri May 09 10:15:23 2025
System time     : 0.000024685 seconds slow of NTP time
Last offset     : +0.000031502 seconds
RMS offset      : 0.000031502 seconds
Frequency       : 10.141 ppm slow
Residual freq   : -0.004 ppm
Skew            : 0.012 ppm
Root delay      : 0.001655 seconds
Root dispersion : 0.000544 seconds
Update interval : 64.2 seconds
Leap status     : Normal
```


# Networking & network security

## Network architecture

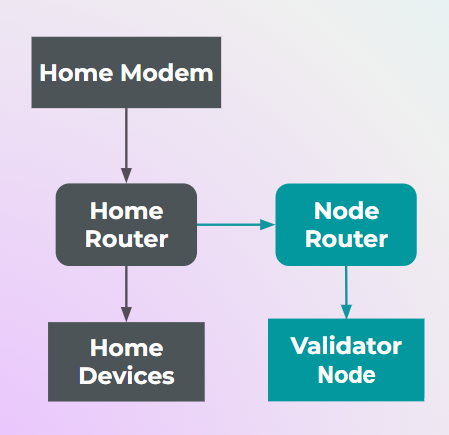
There are 2 ways to prepare your home network for your validator node.

{% hint style="info" %}
ISPs in some countries combine both modem and routers into a single device.
{% endhint %}

{% tabs %}
{% tab title="Shared router" %}
It is entirely possible and also sufficiently safe to connect your validator node directly to your existing home router if you do not plan to have un-trusted guests over at your home often.

<figure><img src="/files/Dy6BcnTv86MdCwaqTzgH" alt=""><figcaption></figcaption></figure>

* Secure your node router properly by setting strong passwords on the WIFI and device level. Do not expose these passwords or let anyone else connect to the WIFI network or log in to the device level of your node router.
  {% endtab %}

{% tab title="Dedicated router" %}
Adding a dedicated router in between your validator node and existing home router offers a greater level of segregation and adds another security layer. Useful if you plan to host guests at home frequently.

<figure><img src="/files/Iah7hzpfDwTxMMfIVB8n" alt=""><figcaption></figcaption></figure>

* Your existing home router will first be connected to a dedicated "node router" on the downstream via cable. This node router will be set to "router" mode and not "Access Point (AP)" mode - this will create a subnet within your main network for segregation of your regular home devices from your validator node setup.&#x20;
* The validator node will be connected to the node router further downstream via cable
* Secure your node router properly by setting strong passwords on the WIFI and device level. Do not expose these passwords or let anyone else connect to the WIFI network or log in to the device level of your node router.
* You will need to be connected to the WIFI network of your Node Router in order to access your Validator Node using a separate device (e.g. working laptop)
  {% endtab %}
  {% endtabs %}

{% hint style="info" %}
If you need to be away from home for long periods, port forwarding will need to be configured on both your Home Modem and your Home Router (i.e. Modem->Home Router->Node Router) to allow incoming connections from outside of your home network.&#x20;

* This is so that you can access your validator node for troubleshooting and maintenance even if you are not at home.
* You can also setup a VPN for remote access
* Turn off port forwarding on your Home Modem when you are no longer away from home
  {% endhint %}

Check out the Port Forwarding page below after you are done setting up your validator node.

{% content-ref url="/pages/tbZ1z2fKwHTUGm4dNmFj" %}
[Advanced networking](/tips/advanced-networking)
{% endcontent-ref %}

## Network security model

1. Your validator node will be secured with an SSH key so that only users who have this SSH key can access it
2. Any home devices that become compromised will not be able to access your validator node which sits in a separate subnet
3. If you think your SSH keys could be leaked, turn off any port forwarding settings and change the SSH key pair in your Validator Node

{% tabs %}
{% tab title="Shared Router" %}

<figure><img src="/files/sv0TacQteu4BukDGs3mA" alt=""><figcaption></figcaption></figure>
{% endtab %}

{% tab title="Dedicated Node Router" %}

<figure><img src="/files/jUBX5I5Vv2IdvritPKDl" alt=""><figcaption></figcaption></figure>
{% endtab %}
{% endtabs %}


# Device level security setup

## Configure remote access via SSH keypair

#### Generating an SSH key pair

On your client machine (e.g. working laptop), open up your terminal (Mac) or Windows Powershell (Windows) and run:

```sh
ssh-keygen -t ed25519 -C <USERNAME>
```

{% hint style="info" %}
Replace `<USERNAME>` with your actual username if you are using cloud VMs. Your username typically comes before the **"@"** symbol in your VM's terminal.
{% endhint %}

Press `Enter` and set a password to encrypt your SSH private key.

**Expected output:**

<figure><img src="/files/VoqQDzEkwQcq2xMllH1J" alt=""><figcaption></figcaption></figure>

#### Add SSH pubkey to your Node

While the private key portion of the SSH keypair stays in your working laptop, we will need to add the public key portion to your Node.

{% tabs %}
{% tab title="Transfer remotely" %}
On your working laptop, run:

```sh
ssh-copy-id -i ~/.ssh/id_ed25519.pub <username>@<node_IP_address>
```

Enter the password of your NUC device when prompted.

{% hint style="info" %}
The IP Address of your NUC device can be found via:

* Running `ip a` on the terminal of your NUC device (connect a monitor & keyboard during the initial setup)
* Logging into your home router and look for the connected NUC device. The assigned IP Address will be displayed here
  {% endhint %}
  {% endtab %}

{% tab title="Transfer physically" %}
Print out the SSH pubkey string and copy it. On your working laptop, run:

```
cat ~/.ssh/id_ed25519.pub
```

You will see a similar output below:

```
ssh-ed25519 AAAAC3NzaC1lZDI1NTE5AAAAIBKRXS4XpZoBcuqvXVN2sRNNolKL+ZHy2Xnzx27Op3uY ethnode
```

SSH into your NUC and enter your password when prompted:

```
ssh <username>@<node_IP_address> -v
```

Create the authorized SSH key file manually.

```
sudo mkdir -p ~/.ssh
sudo nano ~/.ssh/authorized_keys
```

Paste your copied SSH pubkey string into the `authorized_keys` file and press `CTRL + O, enter, CTRL + X`  to save the file and exit.
{% endtab %}

{% tab title="On Google Cloud" %}
Print out the SSH pubkey string and copy it. On your working laptop, run:

```sh
cat ~/.ssh/id_ed25519.pub
```

You will see a similar output below:

```sh
ssh-ed25519 AAAAC3NzaC1lZDI1NTE5AAAAIBKRXS4XpZoBcuqvXVN2sRNNolKL+ZHy2Xnzx27Op3uY sam
```

Copy this SSH pubkey and enter it into your Google Cloud VM.

{% embed url="<https://youtu.be/NJQhUMqPN9A>" %}

SSH into your VM with your custom SSH key.

```sh
# on your laptop
ssh <username>@<External_IP_address> -p 22 -i .ssh/id_ed25519 -v
```

{% endtab %}
{% endtabs %}

### Change the SSH port and disable remote password login

```bash
sudo nano /etc/ssh/sshd_config
```

1. Uncomment `#AuthorizedKeysFile` if it is commented (by removing the `#` in front of it)
2. Change `KbdInteractiveAuthentication yes` to `KbdInteractiveAuthentication no` and uncomment (by removing the `#` in front of it)
3. Change `PasswordAuthentication yes` to `PasswordAuthentication no` and uncomment (by removing the `#` in front of it)
4. Change `#PermitRootLogin prohibit-password` to `PermitRootLogin no` , removing the `#` prefix

Once you're done, save with `Ctrl+O` and `Enter`, then exit with `Ctrl+X`.

Now we restart the SSH server so it registers the new settings:

```bash
sudo systemctl restart sshd
sudo systemctl restart ssh
```

Now you will only be able to access your node remotely using your SSH private key. The command for your SSH connection will be amended slightly from before to:

```
ssh <username>@<node_IP_address> -p 22 -i .ssh/id_ed25519 -v
```

### Configure firewall rules

The basic rules we will implement on your NUC device are:

1. Deny all incoming traffic by default
2. Allow all outgoing traffic by default
3. Allow incoming traffic via port `<your_chosen_SSH_port>` for SSH access
4. Allow incoming traffic via port 30303 and 30304 for the execution clients to connect with other nodes
5. Allow incoming traffic via port 9000 and 9001 for the consensus clients to connect with other nodes
6. Allow incoming traffic via port 3000 and 3001 for Grafana to display monitoring dashboards for your node

```bash
sudo ufw default deny incoming
sudo ufw default allow outgoing
sudo ufw allow <your_chosen_SSH_port>/tcp
sudo ufw allow 30303 
sudo ufw allow 9000
sudo ufw allow 3000 
```

With these configurations set up, you will have blocked off all but 4 possible openings for potential attackers to enter from.&#x20;

* Ports 30303 and 9000 will be used by Nethermind and Teku. We will create dedicated user accounts with root access disabled for these services
* Port 3000 is only accessible within your local area network (i.e. not exposed to the public internet
* Your chosen SSH port is secured by your SSH private key so its virtually impossible to brute force the access.

#### Turn on the firewall

Now lets turn the firewall on and check our configurations before moving on.

```bash
sudo ufw enable
sudo ufw status numbered
```

You should see something similar to the screenshot below:

<figure><img src="/files/aRJRwkl81XHG7oAnN1IT" alt=""><figcaption></figcaption></figure>

### **Set up brute force protection**

Even though having our SSH key access implemented means an attacker will need 25 million years to try all combinations, lets go ahead and make it even harder for them - by limiting the number of attempts per IP address to 5 tries and blocking them after.

***Install the software:***

```bash
sudo apt install -y fail2ban
```

***Open the configuration file:***

```bash
sudo nano /etc/fail2ban/jail.d/ssh.local
```

***Add the following contents to the configuration file:***

```bash
[sshd]
enabled = true
banaction = ufw
port = <your_chosen_SSH_port>
filter = sshd
logpath = %(sshd_log)s
maxretry = 5
```

Once you're done, save and exit with `Ctrl+O`and `Enter`, then `Ctrl+X`.

***Finally, restart the service:***

```bash
sudo systemctl restart fail2ban
```

### Enable automatic security updates

```bash
sudo apt update
sudo apt install -y unattended-upgrades update-notifier-common
sudo nano /etc/apt/apt.conf.d/20auto-upgrades
```

***Add the following contents to the configuration file:***

```
APT::Periodic::Update-Package-Lists "1";
APT::Periodic::Unattended-Upgrade "1";
APT::Periodic::AutocleanInterval "7";
Unattended-Upgrade::Remove-Unused-Dependencies "true";
Unattended-Upgrade::Remove-New-Unused-Dependencies "true";
Unattended-Upgrade::Automatic-Reboot "true";
Unattended-Upgrade::Automatic-Reboot-Time "02:00";
```

Once you're done, save and exit with `Ctrl+O`and `Enter`, then `Ctrl+X`.

***Finally, restart the service:***

```bash
sudo systemctl restart unattended-upgrades
```

#### Check the logs for any warnings:

```sh
sudo cat /var/log/unattended-upgrades/unattended-upgrades.log
```

If you see following warnings, proceed to the next step.

```
2024-02-01 04:48:24,012 WARNING System is on battery power, stopping
2024-02-01 06:19:01,972 WARNING System is on battery power, stopping
2024-02-01 17:53:48,650 WARNING System is on battery power, stopping
```

If your device is definitely connected to a power source, amend the `50unattended-upgrades` file directly.

```
sudo nano /etc/apt/apt.conf.d/50unattended-upgrades
```

Look for the following line and uncomment it by removing the `//` prefix.

```
// Unattended-Upgrade::OnlyOnACPower "false";
```

Once you're done, save and exit with `Ctrl+O`and `Enter`, then `Ctrl+X`. Then restart your Unattended Upgrades service.

```sh
sudo systemctl restart unattended-upgrades
```


# Verifying checksums

## Concept

As a best practice, we should always verify the checksum of all downloaded binary and zipped files. This ensures that the downloaded files are indeed the ones we intended to download - i.e. have not been corrupted or tampered with since it was originally created.

Network and device level security are powerless against this attack vector because you are basically inviting these tampered files into your system if you do not perform checksum verification before running these files.

## How to verify checksums

Each downloadable file comes with it's own checksum (see below).

<figure><img src="/files/kDo6RNo5C7HPM4HnI3QW" alt=""><figcaption></figcaption></figure>

Verify its checksum after downloading the file.

```sh
echo "<checksum> <file_name>" | <checksum_method> --check
```

**Breakdown:**

* \<checksum> refers to the long hexadecimal string in the screenshot above
* \<checksum\_method> refers to the the hashing algorithm used (in lower case) - e.g. MD5, SHA256, SHA512&#x20;

**Example:**

```sh
echo "444bf523e0db9c23243b365e717b5b15 nethermind-1.20.1-9f39c0c7-linux-x64.zip" | md5sum --check
```

***Expected output:** Verify output of the checksum verification*

```
nethermind-1.20.1-9f39c0c7-linux-x64.zip: OK
```


# Set up and configure execution layer client


# Nethermind

### Generate the JWT file

We first need to create a JSON Web Token (JWT) that will allow the execution layer software (Nethermind) and the consensus layer software to talk to each other.

Run the following commands one line at a time to create a folder on the server to store the JWT file and generate the JWT file:

```bash
sudo mkdir -p /var/lib/jwtsecret
openssl rand -hex 32 | sudo tee /var/lib/jwtsecret/jwt.hex > /dev/null
```

We will be pointing the configuration files of the execution and consensus clients to this JWT file later.

### Install dependencies - Unzip, Snappy & the GNU C Library

```bash
sudo apt-get update
sudo apt-get install unzip libsnappy-dev libc6-dev libc6 -y
```

### Download Nethermind and configure the service

[Download](https://downloads.nethermind.io/) the latest version of Nethermind and run the checksum verification process to ensure that the downloaded file has not been tampered with.

```bash
cd
curl -LO https://nethdev.blob.core.windows.net/builds/nethermind-1.29.1-dfea5240-linux-x64.zip
echo "21c58995d82163d62bf7ebb78ea5916e nethermind-1.29.1-dfea5240-linux-x64.zip" | md5sum --check
```

{% hint style="info" %}
Each downloadable file comes with it's own checksum (see below). Replace the actual checksum and URL of the download link in the code block above.

{% hint style="info" %}
Make sure to choose the amd64 version. Right click on the linked text and select "copy link address" to get the URL of the download link to `curl`.
{% endhint %}
{% endhint %}

<figure><img src="/files/kDo6RNo5C7HPM4HnI3QW" alt=""><figcaption></figcaption></figure>

***Expected output:** Verify output of the checksum verification*

```
nethermind-1.29.1-dfea5240-linux-x64.zip: OK
```

If checksum is verified, extract the files and move them into the `(/usr/local/bin)` directory for neatness and best practice. Then, clean up the duplicated copies.

```bash
unzip nethermind-1.29.1-dfea5240-linux-x64.zip -d nethermind
sudo cp -a nethermind /usr/local/bin/nethermind
rm -r nethermind*
```

Create an account (`nethermind`) without server access for Nethermind to run as a background service. This type of user account will not have root access so it restricts potential attackers to only the Nethermind service in the unlikely event that they manage to infiltrate via a compromised client update.

```bash
sudo useradd --no-create-home --shell /bin/false nethermind
```

Create a directory for Nethermind to store the blockchain data of the execution layer. Then set the owner of this directory to `nethermind` so that this user can read and write to the directory.

```bash
sudo mkdir -p /var/lib/nethermind
sudo chown -R nethermind:nethermind /var/lib/nethermind
```

Create a systemd configuration file for the Nethermind service to run in the background.

```bash
sudo nano /etc/systemd/system/nethermind.service
```

Paste the configuration parameters below into the file:

```bash
[Unit]
Description=Nethermind Execution Client (Holesky)
After=network.target
Wants=network.target

[Service]
User=nethermind
Group=nethermind
Type=simple
Restart=always
RestartSec=5
WorkingDirectory=/var/lib/nethermind
Environment="DOTNET_BUNDLE_EXTRACT_BASE_DIR=/var/lib/nethermind"
ExecStart=/usr/local/bin/nethermind/nethermind \
  --config holesky \
  --datadir /var/lib/nethermind \
  --JsonRpc.JwtSecretFile /var/lib/jwtsecret/jwt.hex \
  --Sync.SnapSync true \
  --Network.P2PPort 30303 \
  --Network.DiscoveryPort 30303 \
  --JsonRpc.Enabled true \
  --JsonRpc.Host <Internal_IP_address> \
  --JsonRpc.Port 8547 \
  --HealthChecks.Enabled true \
  --Metrics.Enabled true \
  --Metrics.ExposePort=6060
  
[Install]
WantedBy=default.target
```

Once you're done, save with `Ctrl+O` and `Enter`, then exit with `Ctrl+X`. Understand and review your configuration summary below, and amend if needed.

**Nethermind configuration summary:**

1. `--config`: Run the on the Holesky testnet
2. `--datadir`: The directory for Nethermind to store the blockchain data of the execution layer
3. `--JsonRpc.JwtSecretFile`: The directory pointing to the JWT secret we generated earlier
4. `--Sync.SnapSync`: Use Nethermind's snap sync feature. More information [here](https://docs.nethermind.io/nethermind/ethereum-client/sync-modes)&#x20;
5. `--Network.P2PPort/--Network.DiscoveryPort:` Sets the port used for peer-to-peer communication. Defaults to 30303.
6. `--JsonRpc.Enabled:` Enables the JSON-RPC service on http and websocket. This is so that DVT clients such as the Diva service can connect to your execution client &#x20;
7. `--JsonRpc.Host:` Sets the IP address to connect to the JSON RPC service. Use the internal IP address of your device here (check by running `ip a`) - e.g. `192.168.x.x`. Defaults to `127.0.0.1` otherwise
8. `--JsonRpc.Port`: Sets the port to connect to the JSON RPC service that will be used by the DVT clients. You may choose any unused port number but remember to allow incoming connections into your chosen port in your firewall (`ufw`) rules. Defaults to 8545
9. `--HealthChecks.Enabled:` Enables you to test the connection to and health of your Nethermind service using the `curl` command - e.g. `curl http://<Internal_IP_address>:8545/health`
10. `--Metrics.Enabled`: Enable monitoring metrics on the Nethermind service
11. `--Metrics.ExposePort:` Pushes metrics to your monitoring suite&#x20;

### Start Nethermind

Reload the systemd daemon to register the changes made, start Nethermind, and check its status to make sure its running.

```bash
sudo systemctl daemon-reload
sudo systemctl start nethermind.service
sudo systemctl status nethermind.service
```

**Expected output:** The output should say Nethermind is **“active (running)”.** Press CTRL-C to exit and Nethermind will continue to run. It should take around 12 hours for Nethermind to sync on the Holesky testnet.

<figure><img src="/files/vTFUKtW98pEChX4ii4F0" alt=""><figcaption><p>Example output on the mainnet</p></figcaption></figure>

Use the following command to check the logs of Nethermind’s syncing process. Watch out for any warnings or errors.

```bash
sudo apt install ccze -y
sudo journalctl -fu nethermind -o cat | ccze -A
```

**Expected output:**

<figure><img src="/files/SxOCLgdRKZyArWvw2VgE" alt=""><figcaption></figcaption></figure>

Press `CTRL-C` to exit.

**Note:** You will also see the following error related to Pushgateway. This is expected because we have not installed and configured the Pushgateway service used for monitoring at this point.

<figure><img src="/files/R1lMEjIKNn87GFCRLrE6" alt=""><figcaption></figcaption></figure>

{% hint style="info" %}
For more details on interpreting the Nethermind journalctl logs, head [here](https://docs.nethermind.io/nethermind/first-steps-with-nethermind/getting-started).
{% endhint %}

If the Nethermind service is running smoothly, we can now enable it to fire up automatically when rebooting the system.

```bash
sudo systemctl enable nethermind.service
```

**Expected output:**

```
Created symlink /etc/systemd/system/default.target.wants/nethermind.service → /etc/systemd/system/nethermind.service.
```

## Resources:

1. Releases: <https://github.com/NethermindEth/nethermind/releases>
2. Documentation: <https://docs.nethermind.io/>
3. Discord: <https://discord.gg/MFBrZrGM32>


# Besu

### Generate the JWT file

We first need to create a JSON Web Token (JWT) that will allow the execution layer software (Besu) and the consensus layer software to talk to each other.

Run the following commands one line at a time to create a folder on the server to store the JWT file and generate the JWT file:

```bash
sudo mkdir -p /var/lib/jwtsecret
openssl rand -hex 32 | sudo tee /var/lib/jwtsecret/jwt.hex > /dev/null
```

We will be pointing the configuration files of the execution and consensus clients to this JWT file later.

### Install dependencies - JRE & Jemalloc

```bash
sudo apt-get update
sudo add-apt-repository ppa:openjdk-r/ppa
sudo apt-get -y install openjdk-21-jre libjemalloc-dev
```

### Download Besu and configure the service

[Download](https://github.com/hyperledger/besu/releases) the latest version of Besu and run the checksum verification process to ensure that the downloaded file has not been tampered with.

```bash
cd
curl -LO https://github.com/hyperledger/besu/releases/download/24.10.0/besu-24.10.0.tar.gz
echo "0648e108614861b04537a4017d63bddf5bae88c738bccd5942f76c6d544dcac2 besu-24.10.0.tar.gz" | sha256sum --check
```

{% hint style="info" %}
Each downloadable file comes with it's own checksum (see below). Replace the actual checksum and URL of the download link in the code block above.

{% hint style="info" %}
Make sure to verify the correct checksum according to the downloaded version. Right click on the linked text and select "copy link address" to get the URL of the download link to `curl`.
{% endhint %}
{% endhint %}

<figure><img src="/files/lFGV5KCz6hWTVL21OpC0" alt=""><figcaption></figcaption></figure>

***Expected output:** Verify output of the checksum verification*

```
besu-24.10.0.tar.gz: OK
```

If checksum is verified, extract the files and move them into the `(/usr/local/bin)` directory for neatness and best practice. Then, clean up the duplicated copies.

```bash
tar xvf besu-24.10.0.tar.gz
sudo cp -a besu-24.10.0 /usr/local/bin/besu
sudo rm -r besu*EL 
```

Create an account (`besu`) without server access for Besu to run as a background service. This type of user account will not have root access so it restricts potential attackers to only the Besu service in the unlikely event that they manage to infiltrate via a compromised client update.

```bash
sudo useradd --no-create-home --shell /bin/false besu
```

Create a directory for Besu to store the blockchain data of the execution layer. Then set the owner of this directory to `Besu` so that this user can read and write to the directory.

```bash
sudo mkdir -p /var/lib/besu
sudo chown -R besu:besu /var/lib/besu
```

Create a systemd configuration file for the Besu service to run in the background.

```bash
sudo nano /etc/systemd/system/besu.service
```

Paste the configuration parameters below into the file:

```
[Unit]
Description=Besu Execution Client (Holesky)
Wants=network-online.target
After=network-online.target

[Service]
User=besu
Group=besu
Type=simple
Restart=always
RestartSec=5
Environment="JAVA_OPTS=-Xmx6g"
ExecStart=/usr/local/bin/besu/bin/besu \
  --network=holesky \
  --sync-mode=X_SNAP \
  --data-path=/var/lib/besu \
  --data-storage-format=BONSAI \
  --engine-jwt-secret=/var/lib/jwtsecret/jwt.hex \
  --Xplugin-rocksdb-high-spec-enabled \
  --p2p-port=30303 \
  --rpc-ws-enabled \
  --rpc-ws-host=<internal_IP_address> \
  --rpc-ws-port=8547 \
  --rpc-http-enabled=true \
  --metrics-enabled=true
  
[Install]
WantedBy=multi-user.target
```

Once you're done, save with `Ctrl+O` and `Enter`, then exit with `Ctrl+X`. Understand and review your configuration summary below, and amend if needed.

**Besu configuration summary:**

1. `--network`: Run the on the Holesky testnet
2. `--sync-mode`: Uses the recommended Snap Sync mode to speed up syncing time. Checkpoint Sync is still an early access feature.
3. `--data-path`: The directory for Besu to store the blockchain data of the execution layer.
4. `--data-storage-format`: Bonsai Tries is a data storage layout policy designed to reduce storage requirements and increase read performance.
5. `--engine-jwt-secret`: The directory pointing to the JWT secret we generated earlier.
6. `--Xplugin-rocksdb-high-spec-enabled`: Speeds up sync time and performance. Use only if you have 32GB of RAM or more.
7. `--p2p-port:` Sets the port used for peer-to-peer communication. Defaults to 30303.
8. `--rpc-ws-enabled`: Enables the JSON-RPC service on websocket. This is so that DVT clients can connect to your execution client &#x20;
9. `--rpc-ws-host`: Sets the IP address to connect to the JSON-RPC service that will be used by the DVT client. Use the internal IP address of your device here (check by running `ip a`) - e.g. `192.168.x.x`. Defaults to `127.0.0.1` otherwise
10. `--rpc-ws-port`: Sets the port to connect to the JSON-RPC service. You may choose any unused port number but remember to allow incoming connections into your chosen port in your firewall (`ufw`) rules. Defaults to 8546
11. `--rpc-http-enabled`: Enables the JSON-RPC service over http. This allows you to query the execution client endpoint directly to test for sync status and overall health. Default IP address (host) = 127.0.0.1; Default port = 8545
12. `--metrics-enabled`: Enable monitoring metrics on the besu service

### Start Besu

Reload the systemd daemon to register the changes made, start Besu, and check its status to make sure its running.

```bash
sudo systemctl daemon-reload
sudo systemctl start besu.service
sudo systemctl status besu.service
```

**Expected output:** The output should say Besu is **“active (running)”.** Press CTRL-C to exit and Besu will continue to run. It should take just a few minutes for Besu to sync on Holesky.

<figure><img src="/files/hnxymzD4ZasraZmvuKVZ" alt=""><figcaption></figcaption></figure>

Use the following command to check the logs of Besu’s syncing process. Watch out for any warnings or errors.

```bash
sudo apt install ccze -y
sudo journalctl -fu besu -o cat | ccze -A
```

**Expected output:**

<figure><img src="/files/wTNu3FwqD6Cur6BAieQA" alt=""><figcaption></figcaption></figure>

Press `CTRL-C` to exit.

{% hint style="info" %}
For more details on interpreting the Besu journalctl logs, head [here](https://besu.hyperledger.org/23.4.0/public-networks/concepts/events-and-logs).
{% endhint %}

If the Besu service is running smoothly, we can now enable it to fire up automatically when rebooting the system.

```bash
sudo systemctl enable besu.service
```

**Expected output:**

```
Created symlink /etc/systemd/system/default.target.wants/besu.service → /etc/systemd/system/besu.service.
```

## Resources:

1. Releases: <https://github.com/hyperledger/besu/releases>
2. Documentation: <https://besu.hyperledger.org/public-networks>
3. Discord: <https://discord.gg/consensys> (Select the Besu channel)


# Geth

### Generate the JWT file

We first need to create a JSON Web Token (JWT) that will allow the execution layer software (Geth) and the consensus layer software to talk to each other.

Run the following commands one line at a time to create a folder on the server to store the JWT file and generate the JWT file:

```bash
sudo mkdir -p /var/lib/jwtsecret
openssl rand -hex 32 | sudo tee /var/lib/jwtsecret/jwt.hex > /dev/null
```

We will be pointing the configuration files of the execution and consensus clients to this JWT file later.

### Download Geth and configure the service

[Download](https://geth.ethereum.org/downloads) the latest version of Geth and run the checksum verification process to ensure that the downloaded file has not been tampered with.

```bash
cd
curl -LO https://gethstore.blob.core.windows.net/builds/geth-linux-amd64-1.14.11-f3c696fa.tar.gz
echo "34b08faca981f738cf6c6d9ebe266be7 geth-linux-amd64-1.14.11-f3c696fa.tar.gz" | md5sum --check
```

{% hint style="info" %}
Each downloadable file comes with it's own checksum (see below). Replace the actual checksum and URL of the download link in the code block above.

{% hint style="info" %}
Make sure to choose the amd64 version. Right click on the linked text and select "copy link address" to get the URL of the download link to `curl`.
{% endhint %}
{% endhint %}

<figure><img src="/files/V1dRpMw37A2Br6QgTGoy" alt=""><figcaption></figcaption></figure>

***Expected output:** Verify output of the checksum verification*

```
geth-linux-amd64-1.14.11-f3c696fa.tar.gz: OK
```

If checksum is verified, extract the files and move them into the `(/usr/local/bin)` directory for neatness and best practice. Then, clean up the duplicated copies.

```bash
tar xvf geth-linux-amd64-1.14.11-f3c696fa.tar.gz
sudo cp geth-linux-amd64-1.14.11-f3c696fa/geth /usr/local/bin
rm -r geth*
```

Create an account (`geth`) without server access for Geth to run as a background service. This type of user account will not have root access so it restricts potential attackers to only the Geth service in the unlikely event that they manage to infiltrate via a compromised client update.

```bash
sudo useradd --no-create-home --shell /bin/false geth
```

Create a directory for Geth to store the blockchain data of the execution layer. Then set the owner of this directory to `geth` so that this user can read and write to the directory.

```bash
sudo mkdir -p /var/lib/geth
sudo chown -R geth:geth /var/lib/geth
```

Create a systemd configuration file for the Geth service to run in the background.

```bash
sudo nano /etc/systemd/system/geth.service
```

Paste the configuration parameters below into the file:

```bash
[Unit]
Description=Geth Execution Client (Holesky)
After=network.target
Wants=network.target

[Service]
User=geth
Group=geth
Type=simple
Restart=always
RestartSec=5
ExecStart=/usr/local/bin/geth \
  --holesky \
  --datadir=/var/lib/geth \
  --authrpc.jwtsecret=/var/lib/jwtsecret/jwt.hex \
  --state.scheme=path \
  --port 30303 \
  --http \
  --http.addr <Internal_IP_address> \
  --http.port 8547 \
  --pprof \
  --metrics
  
[Install]
WantedBy=default.target
```

Once you're done, save with `Ctrl+O` and `Enter`, then exit with `Ctrl+X`. Understand and review your configuration summary below, and amend if needed.

**Geth configuration summary:**

1. `--holesky`: Run the on the Holesky testnet
2. `--datadir`: The directory for Geth to store the blockchain data of the execution layer
3. `--authrpc.jwtsecret`: The directory pointing to the JWT secret we generated earlier
4. `--state.scheme=path`: Use Geth's path-based state storage feature that is faster and prunes continuously. More information [here](https://blog.ethereum.org/2023/09/12/geth-v1-13-0)&#x20;
5. `--port`: Sets the port used for peer-to-peer communication. Defaults to 30303.
6. `--http`: Enables the HTTP-RPC service on http and websocket. This is so that DVT clients such as the Diva service can connect to your execution client &#x20;
7. `--http.addr`: Sets the IP address to connect to the JSON RPC service. Use the internal IP address of your device here (check by running `ip a`) - e.g. `192.168.x.x`. Defaults to `127.0.0.1` otherwise
8. `--http.port`: Sets the port to connect to the HTTP-RPC service that will be used by the DVT services. You may choose any unused port number but remember to allow incoming connections into your chosen port in your firewall (`ufw`) rules. Defaults to 8545.
9. `--pprof:` Enables the pprof HTTP server, providing profiling data about the Geth process. Includes CPU usage, memory allocation, blocking profiles, etc. Useful for debugging and optimizing performance.
10. `--metrics`: Enable monitoring metrics on the Geth service.

### Start Geth

Reload the systemd daemon to register the changes made, start Geth, and check its status to make sure its running.

```bash
sudo systemctl daemon-reload
sudo systemctl start geth.service
sudo systemctl status geth.service
```

**Expected output:** The output should say Geth is **“active (running)”.** Press CTRL-C to exit and Geth will continue to run. It should take around 6 hours for Geth to sync on the Holesky testnet.

<figure><img src="/files/1n3TWdtq3QeGZRmCFJwQ" alt=""><figcaption></figcaption></figure>

Use the following command to check the logs of Geth’s syncing process. Watch out for any warnings or errors.

```bash
sudo apt install ccze -y
sudo journalctl -fu geth -o cat | ccze -A
```

**Expected output:**

<figure><img src="/files/fCjUa86xoWTEOFPkuqFl" alt=""><figcaption></figcaption></figure>

Press `CTRL-C` to exit.

{% hint style="info" %}
For more details on interpreting the Geth journalctl logs, head [here](https://geth.ethereum.org/docs/fundamentals/logs).
{% endhint %}

If the Geth service is running smoothly, we can now enable it to fire up automatically when rebooting the system.

```bash
sudo systemctl enable geth.service
```

**Expected output:**

```
Created symlink /etc/systemd/system/default.target.wants/geth.service → /etc/systemd/system/geth.service.
```

## Resources:

1. Releases: <https://geth.ethereum.org/downloads>
2. Documentation: <https://geth.ethereum.org/docs>
3. Discord: <https://discord.com/invite/nthXNEv>


# Erigon

{% hint style="info" %}
You will need a 4TB NVME SSD to run the Erigon execution client.&#x20;
{% endhint %}

{% hint style="info" %}
The Erigon execution client is optimised to run as an Archival Node, which stores the full state of the Ethereum blockchain instead of just the most recent 128 blocks in Full Nodes. Running a Ethereum validator only requires a full node.&#x20;
{% endhint %}

### Generate the JWT file

We first need to create a JSON Web Token (JWT) that will allow the execution layer software (Erigon) and the consensus layer software to talk to each other.

Run the following commands one line at a time to create a folder on the server to store the JWT file and generate the JWT file:

```bash
sudo mkdir -p /var/lib/jwtsecret
openssl rand -hex 32 | sudo tee /var/lib/jwtsecret/jwt.hex > /dev/null
```

We will be pointing the configuration files of the execution and consensus clients to this JWT file later.

### Download Erigon and configure the service

[Download](https://github.com/erigontech/erigon/releases) the latest version of Erigon and run the checksum verification process to ensure that the downloaded file has not been tampered with.

```bash
cd
curl -LO https://github.com/erigontech/erigon/releases/download/2.60.7/erigon_2.60.7_linux_amd64.tar.gz
echo "ab3ed8a91a11958df1a6ee56c03acac71a1aa7beb19e271b9c5e2e639159f125  erigon_2.60.7_linux_amd64.tar.gz" | sha256sum --check
```

{% hint style="info" %}
Each downloadable file comes with it's own checksum (see below). Replace the actual checksum and URL of the download link in the code block above.

{% hint style="info" %}
Make sure to choose the amd64 version. Right click on the linked text and select "copy link address" to get the URL of the download link to `curl`.
{% endhint %}
{% endhint %}

<figure><img src="/files/Ot7SXtDLkTWOtCo93Hr4" alt=""><figcaption></figcaption></figure>

***Expected output:** Verify output of the checksum verification*

```
erigon_2.60.7_linux_amd64.tar.gz: OK
```

If checksum is verified, extract the files and move them into the `(/usr/local/bin)` directory for neatness and best practice. Then, clean up the duplicated copies.

```bash
tar xvf erigon_2.60.7_linux_amd64.tar.gz
sudo cp erigon /usr/local/bin
rm -r erigon* README.md
```

Create an account (`erigon`) without server access for Erigon to run as a background service. This type of user account will not have root access so it restricts potential attackers to only the Geth service in the unlikely event that they manage to infiltrate via a compromised client update.

```bash
sudo useradd --no-create-home --shell /bin/false erigon
```

Create a directory for Erigon to store the blockchain data of the execution layer. Then set the owner of this directory to `erigon` so that this user can read and write to the directory.

```bash
sudo mkdir -p /var/lib/erigon
sudo chown -R erigon:erigon /var/lib/erigon
```

Create a systemd configuration file for the Erigon service to run in the background.

```bash
sudo nano /etc/systemd/system/erigon.service
```

Paste the configuration parameters below into the file:

```bash
[Unit]
Description=Erigon Execution Client (Holesky)
After=network.target
Wants=network.target

[Service]
User=erigon
Group=erigon
Type=simple
Restart=on-failure
RestartSec=5
ExecStart=/usr/local/bin/erigon \
  --chain holesky \
  --datadir /var/lib/erigon \
  --authrpc.jwtsecret=/var/lib/jwtsecret/jwt.hex \
  --port 30303 \
  --http \
  --http.addr value <Internal_IP_address> \
  --http.port 8547 \
  --pprof \
  --prune htc \
  --private.api.addr "" \
  --metrics
  
[Install]
WantedBy=default.target
```

Once you're done, save with `Ctrl+O` and `Enter`, then exit with `Ctrl+X`. Understand and review your configuration summary below, and amend if needed.

**Erigon configuration summary:**

1. `--chain holesky`: Run the on the Holesky testnet
2. `--datadir`: The directory for Erigon to store the blockchain data of the execution layer
3. `--authrpc.jwtsecret`: The directory pointing to the JWT secret we generated earlier
4. `--port`: Sets the port used for peer-to-peer communication. Defaults to 30303.
5. `--http`: Enables the HTTP-RPC service on http and websocket. This is so that DVT clients such as the Diva service can connect to your execution client &#x20;
6. `--http.addr`: Sets the IP address to connect to the JSON RPC service. Use the internal IP address of your device here (check by running `ip a`) - e.g. `192.168.x.x`. Defaults to `127.0.0.1` otherwise
7. `--http.port`: Sets the port to connect to the HTTP-RPC service that will be used by the DVT services. You may choose any unused port number but remember to allow incoming connections into your chosen port in your firewall (`ufw`) rules. Defaults to 8545.
8. `--pprof:` Enables the pprof HTTP server, providing profiling data about the Erigon process. Includes CPU usage, memory allocation, blocking profiles, etc. Useful for debugging and optimizing performance.
9. `--prune htc`: Chooses which ancient data delete from DB. h=history, t=transaction, c=call traces
10. `--private.api.addr`: Disables the private API typically used by developers (txpool, rpcdaemon, sentry, downloader data). Defaults to 127.0.0.1:9090, which conflicts with Prometheus Node Exporter is not disabled&#x20;
11. `--metrics`: Enable monitoring metrics on the Erigon service.

### Start Erigon

Reload the systemd daemon to register the changes made, start Erigon, and check its status to make sure its running.

```bash
sudo systemctl daemon-reload
sudo systemctl start erigon.service
sudo systemctl status erigon.service
```

**Expected output:** The output should say Erigon is **“active (running)”.** Press CTRL-C to exit and Erigon will continue to run. It should take around 6 hours for Erigon to sync on the Holesky testnet.

<figure><img src="/files/yKtE1mjaoNg06QDbsmdB" alt=""><figcaption></figcaption></figure>

Use the following command to check the logs of Erigon’s syncing process. Watch out for any warnings or errors.

```bash
sudo apt install ccze -y
sudo journalctl -fu erigon -o cat | ccze -A
```

**Expected output:**

<figure><img src="/files/6R7YbCMcahXWD4V74eVw" alt=""><figcaption></figcaption></figure>

Press `CTRL-C` to exit.

If the Erigon service is running smoothly, we can now enable it to fire up automatically when rebooting the system.

```bash
sudo systemctl enable erigon.service
```

**Expected output:**

```
Created symlink /etc/systemd/system/default.target.wants/erigon.service → /etc/systemd/system/erigon.service.
```

## Resources:

1. Releases:[ ](https://github.com/ledgerwatch/erigon/releases)<https://github.com/ledgerwatch/erigon/releases>
2. Documentation: <https://github.com/ledgerwatch/erigon#documentation>
3. Discord: Request access via their website [here](https://erigon.tech/)


# Reth

### Generate the JWT file

We first need to create a JSON Web Token (JWT) that will allow the execution layer software (Reth) and the consensus layer software to talk to each other.

Run the following commands one line at a time to create a folder on the server to store the JWT file and generate the JWT file:

```bash
sudo mkdir -p /var/lib/jwtsecret
openssl rand -hex 32 | sudo tee /var/lib/jwtsecret/jwt.hex > /dev/null
```

We will be pointing the configuration files of the execution and consensus clients to this JWT file later.

### Download Reth and configure the service

[Download](https://github.com/paradigmxyz/reth/releases) the latest version of Reth and it's digital signature (.asc) file. for verifying the checksum to ensure that the downloaded file has not been tampered with.

```bash
cd
curl -LO https://github.com/paradigmxyz/reth/releases/download/v1.1.0/reth-v1.1.0-x86_64-unknown-linux-gnu.tar.gz
curl -LO https://github.com/paradigmxyz/reth/releases/download/v1.1.0/reth-v1.1.0-x86_64-unknown-linux-gnu.tar.gz.asc
```

Run the checksum verification process.

```
gpg --keyserver keyserver.ubuntu.com --recv-keys A3AE097C89093A124049DF1F5391A3C4100530B4
gpg --verify reth-v1.1.0-x86_64-unknown-linux-gnu.tar.gz.asc reth-v1.1.0-x86_64-unknown-linux-gnu.tar.gz
```

Verify the release signing key (`--recv-keys`) in the first command above [here](https://reth.rs/installation/binaries.html).

{% hint style="info" %}
Each downloadable file comes with it's own checksum (see below). Replace the actual checksum and URL of the download link in the code block above.

{% hint style="info" %}
Make sure to choose the amd64 version. Right click on the linked text and select "copy link address" to get the URL of the download link to `curl`.
{% endhint %}
{% endhint %}

<figure><img src="/files/54L0M4sQZUgkT4pXq8SO" alt=""><figcaption></figcaption></figure>

***Expected output:** Verify output of the checksum verification*

```
-linux-gnu.tar.gz.asc reth-v0.1.0-alpha.23-x86_64-unknown-linux-gnu.tar.gz
gpg: Signature made Mon Apr 22 16:57:36 2024 UTC
gpg:                using EDDSA key A3AE097C89093A124049DF1F5391A3C4100530B4
gpg: Good signature from "Georgios Konstantopoulos (This is the key used by gakonst to sign Reth releases) <georgios@paradigm.xyz>" [expired]
gpg: Note: This key has expired!
Primary key fingerprint: A3AE 097C 8909 3A12 4049  DF1F 5391 A3C4 1005 30B4
```

{% hint style="info" %}
It seems the release key `A3AE097C89093A124049DF1F5391A3C4100530B4` used by the developers has expired so there should be a new key used for future releases.
{% endhint %}

If checksum is verified, extract the files and move them into the `(/usr/local/bin)` directory for neatness and best practice. Then, clean up the duplicated copies.

```bash
tar xvf reth-v1.1.0-x86_64-unknown-linux-gnu.tar.gz
sudo cp reth /usr/local/bin
rm -r reth*
```

Create an account (`reth`) without server access for Reth to run as a background service. This type of user account will not have root access so it restricts potential attackers to only the Reth service in the unlikely event that they manage to infiltrate via a compromised client update.

```bash
sudo useradd --no-create-home --shell /bin/false reth
```

Create a directory for Reth to store the blockchain data of the execution layer. Then set the owner of this directory to `reth` so that this user can read and write to the directory.

```bash
sudo mkdir -p /var/lib/reth
sudo chown -R reth:reth /var/lib/reth
```

Create a systemd configuration file for the Reth service to run in the background.

```bash
sudo nano /etc/systemd/system/reth.service
```

Paste the configuration parameters below into the file:

<pre class="language-bash"><code class="lang-bash">[Unit]
Description=Reth Execution Client (Holesky)
After=network.target
Wants=network.target

[Service]
User=reth
Group=reth
Type=simple
Restart=always
RestartSec=5
ExecStart=/usr/local/bin/reth node \
  --chain holesky \
  --datadir=/var/lib/reth \
  --log.file.directory=/var/lib/reth/logs \
  --authrpc.jwtsecret=/var/lib/jwtsecret/jwt.hex \
  --full \
  --port 30303 \
  --http \
  --http.api eth,web3,net,txpool,debug,trace \
<strong>  --http.addr &#x3C;Internal_IP_address> \
</strong>  --http.port 8547 \
  --ws \
  --ws.addr &#x3C;Internal_IP_address> \
  --ws.port 8548 \
  --metrics 127.0.0.1:6060
  
[Install]
WantedBy=default.target

</code></pre>

Once you're done, save with `Ctrl+O` and `Enter`, then exit with `Ctrl+X`. Understand and review your configuration summary below, and amend if needed.

**Reth configuration summary:**

1. `--chain`: Run the on the Holesky testnet
2. `--datadir`: The directory for Reth to store the blockchain data of the execution layer
3. `--log.file.directory`: The path to put log files in
4. `--authrpc.jwtsecret`: The directory pointing to the JWT secret we generated earlier
5. `--full:` Run full node.
6. `--port`: Sets the port used for peer-to-peer communication. Defaults to 30303.
7. `--http`: Enables the HTTP-RPC service on http and websocket. This is so that DVT clients such as the Diva service can connect to your execution client &#x20;
8. `--http.api`: Rpc modules to be configured for the HTTP server.
9. `--http.addr`: Sets the IP address to connect to the JSON RPC service. Use the internal IP address of your device here (check by running `ip a`) - e.g. `192.168.x.x`. Defaults to `127.0.0.1` otherwise
10. `--http.port`: Sets the port to connect to the HTTP-RPC service that will be used by the DVT services. You may choose any unused port number but remember to allow incoming connections into your chosen port in your firewall (`ufw`) rules. Defaults to 8545.
11. `--ws`: ws=Websocket. Enable the WS-RPC server. This is so that DVT clients can connect to your execution client.
12. `--ws.addr`: Websocket server address to listen on. Used by DVT clients.
13. `--ws.port`: Websocket server port to listen on. Used by DVT clients.
14. `--metrics`: Enable monitoring metrics on the Reth service.

### Start Reth

Reload the systemd daemon to register the changes made, start Reth, and check its status to make sure its running.

```bash
sudo systemctl daemon-reload
sudo systemctl start reth.service
sudo systemctl status reth.service
```

**Expected output:** The output should say Reth is **“active (running)”.** Press CTRL-C to exit and Reth will continue to run. It should take around 6 hours for Reth to sync on the Holesky testnet.

<figure><img src="/files/1n3TWdtq3QeGZRmCFJwQ" alt=""><figcaption></figcaption></figure>

Use the following command to check the logs of Reth’s syncing process. Watch out for any warnings or errors.

```bash
sudo apt install ccze -y
sudo journalctl -fu reth -o cat | ccze -A
```

**Expected output:**

<figure><img src="/files/fCjUa86xoWTEOFPkuqFl" alt=""><figcaption></figcaption></figure>

Press `CTRL-C` to exit.

{% hint style="info" %}
For more details on interpreting the Reth journalctl logs, head [here](https://geth.ethereum.org/docs/fundamentals/logs).
{% endhint %}

If the Reth service is running smoothly, we can now enable it to fire up automatically when rebooting the system.

```bash
sudo systemctl enable reth.service
```

**Expected output:**

```
Created symlink /etc/systemd/system/default.target.wants/reth.service → /etc/systemd/system/reth.service.
```

## Resources:

1. Releases: <https://github.com/paradigmxyz/reth/releases>
2. Documentation: <https://reth.rs/>
3. Telegram: <https://t.me/paradigm_reth>


# Set up and configure consensus layer client


# Teku BN

## Install the dependencies - Java Runtime Environment

```bash
sudo apt-get update
sudo add-apt-repository ppa:openjdk-r/ppa
sudo apt-get -y install openjdk-21-jre libjemalloc-dev
```

## Download Teku

[Download](https://github.com/ConsenSys/teku/releases) the latest version of Teku and run the checksum verification process to ensure that the downloaded file has not been tampered with.

```bash
cd
curl -LO https://artifacts.consensys.net/public/teku/raw/names/teku.tar.gz/versions/24.10.2/teku-24.10.2.tar.gz
echo "1cc76913f3b85987e2a60c9b94c6918d31773ebd3237c5fdf33de366fa259202 teku-24.10.2.tar.gz" | sha256sum --check
```

{% hint style="info" %}
Each downloadable file comes with it's own checksum. Replace the actual checksum and URL of the download link in the code block above.

{% hint style="info" %}
Make sure to choose the amd64 version. Right click on the linked text and select "copy link address" to get the URL of the download link to `curl`.
{% endhint %}
{% endhint %}

***Expected output:** Verify output of the checksum verification.*

```
teku-24.10.2.tar.gz: OK
```

If checksum is verified, extract the files and move them into the `(/usr/local/bin)` directory for neatness and best practice. Then, clean up the duplicated copies.

```bash
tar xvf teku-24.10.2.tar.gz
sudo cp -a teku-24.10.2 /usr/local/bin/teku
rm -r teku*
```

## Configure the Teku Consensus Client

{% hint style="info" %}
*We will be running the consensus client and validator client of Teku as separate services so that there is more flexibility to configure a failover node for maximum uptime when you decide it is needed.*
{% endhint %}

Create an account (`teku`) without server access for the Teku Consensus Client & Validator Client to run as a background service. This type of user account will not have root access so it restricts potential attackers to only the Teku Consensus Client & Validator Client services in the unlikely event that they manage to infiltrate via a compromised client update.

```bash
sudo useradd --no-create-home --shell /bin/false teku
```

Create a directory for Teku to store the blockchain and validator data of the Consensus layer. Move the `validator_keys` directory into this folder. Then set the owner of this directory to the `teku` so that this user can read and write to the directory.

```bash
sudo mkdir -p /var/lib/teku_beacon
sudo chown -R teku:teku /var/lib/teku_beacon
sudo chmod 700 /var/lib/teku_beacon
```

If there are no errors, create a systemd configuration file for the Teku Consensus Client service to run in the background.

```bash
sudo nano /etc/systemd/system/tekubeacon.service
```

Paste the configuration parameters below into the file:

```bash
[Unit]
Description=Teku Beacon Node (Holesky)
Wants=network-online.target
After=network-online.target
[Service]
User=teku
Group=teku
Type=simple
Restart=always
RestartSec=5
Environment="JAVA_OPTS=-Xmx6g"
Environment="TEKU_OPTS=-XX:-HeapDumpOnOutOfMemoryError"
ExecStart=/usr/local/bin/teku/bin/teku \
  --network=holesky \
  --data-path=/var/lib/teku_beacon \
  --ee-endpoint=http://127.0.0.1:8551 \
  --ee-jwt-secret-file=/var/lib/jwtsecret/jwt.hex \
  --initial-state=https://holesky.beaconstate.ethstaker.cc/ \
  --metrics-enabled=true \
  --metrics-port=8008 \
  --p2p-port=9000 \
  --rest-api-enabled=true \
  --rest-api-interface=0.0.0.0 \
  --rest-api-host-allowlist=<Internal_IP_address> \
  --rest-api-port=5052 \
  --builder-endpoint=http://127.0.0.1:18550 \
  --validators-builder-registration-default-enabled=true \
  --builder-bid-compare-factor=100 \
  --p2p-nat-method=UPNP 

[Install]
WantedBy=multi-user.target
```

Once you're done, save with `Ctrl+O` and `Enter`, then exit with `Ctrl+X`. Understand and review your configuration summary below, and amend if needed.

**Teku Consensus Client configuration summary:**

1. `--network`: Run the Consensus Client service on the ETH Holesky testnet
2. `--data-path`: Specify the directory for Teku to store data related to the consensus client
3. `--ee-endpoint`: URL to connect to the execution layer client
4. `--ee-jwt-secret`: File path to locate the JWT secret we generated earlier
5. `--initial-state`: Enables nearly instant syncing of the Consensus Client by pointing to one of the checkpoint sync URLs here - <https://eth-clients.github.io/checkpoint-sync-endpoints/>
6. `--metrics-enabled`: Enable monitoring of Consensus Client metrics
7. `--p2p-port:` Sets the port for peer-to-peer communication. Defaults to 9000.
8. `--rest-api-enabled`: Allows the validator client to connect to this consensus client. Also allows monitoring endpoints to pull metrics from this service
9. `--rest-api-interface`: Sets the IP address to connect to the REST API of the consensus client that will be used by the DVT clients. Use 0.0.0.0 here and restrict to specific host IP addresses of your device using `--rest-api-host-allowlist`.
10. `--rest-api-host-allowlist:` Sets the IP address ***that is allowed*** to connect to the REST API of the consensus client that will be used by the DVT clients. Use the internal IP address of your device here (check by running `ip a`) - e.g. `192.168.x.x`. Defaults to `127.0.0.1` otherwise
11. `--rest-api-port`: Sets the port to connect to the consensus client
12. `--builder-endpoint`: URL to connect to external builders (e.g. MEV relays)
13. `--validators-builder-registration-default-enabled`: Required when using external builders to build blocks (e.g. MEV relays)
14. `--builder-bid-compare-factor`: What is the multiplier (in %) of the value of externally-built blocks in order to outsource block building vs building blocks locally. Set to `100` to be indifferent. Default `=90`
15. `--p2p-nat-method=UPNP`: Enables your Consensus Client to better discover and connect to other Consensus Clients in the ETH network without needing to use port forwarding

## Start the Teku Consensus Client

Reload systemd to register the changes made, start the Teku Consensus Client service, and check its status to make sure its running.

```bash
sudo systemctl daemon-reload
sudo systemctl start tekubeacon.service
sudo systemctl status tekubeacon.service
```

**Expected output:** The output should say Teku Consensus Client is **“active (running)”.** Press CTRL-C to exit and Teku Consensus Client will continue to run. It should take just a few minutes for Teku to sync on the Mainnet.

<figure><img src="/files/ymOinQnlttdgTozrWV5b" alt=""><figcaption><p>Example output of the Teku consensus client running on the mainnet </p></figcaption></figure>
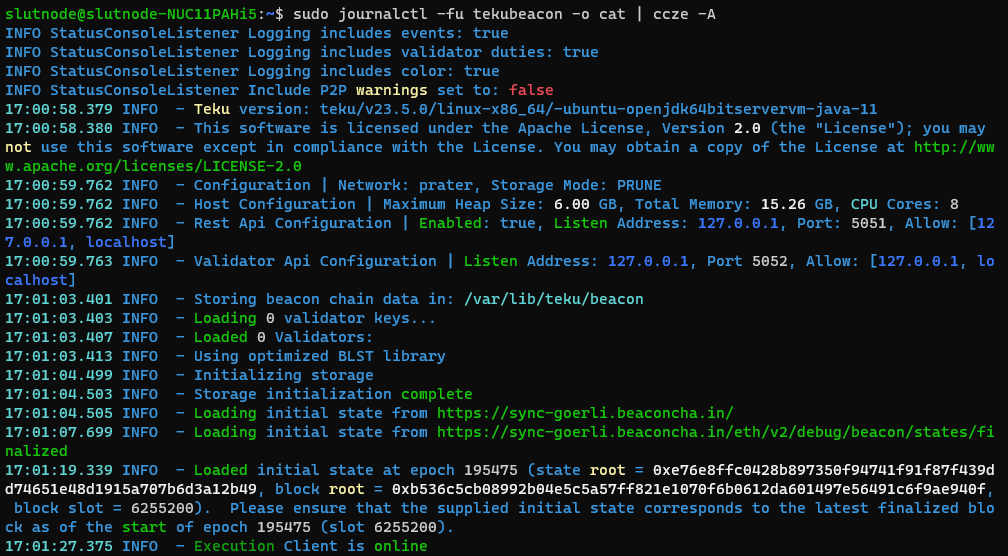
Use the following command to check the logs of Teku Consensus Client’s syncing process. Watch out for any warnings or errors.

```bash
sudo journalctl -fu tekubeacon -o cat | ccze -A
```

**Expected output:**&#x20;

<figure><img src="/files/Fb7ZbYNfIeYThOA92JCt" alt=""><figcaption><p>This example runs on the goerli testnet. You should see a different initial state URL being printed on Holesky.</p></figcaption></figure>

Press `Ctrl+C` to exit monitoring.

If the Teku Consensus Client service is running smoothly, we can now enable it to fire up automatically when rebooting the system.

```bash
sudo systemctl enable tekubeacon.service
```

## Verify the Initial State roots (Checkpoint Sync)

1. Go to <https://holesky.beaconcha.in/> on your browser and search for the slot number (`slot`).&#x20;
2. &#x20;Verify the `Block Root` and `State Roo`t with your `journalctl` output

   <figure><img src="/files/emXnjBAnnMexsi1Fwmd5" alt=""><figcaption><p>testnet example: prater.beaconcha.in</p></figcaption></figure>
3. `journalctl` output

<figure><img src="/files/w7QvLEMxqCHkmMh64EdW" alt=""><figcaption></figcaption></figure>

## Resources

* Releases: <https://github.com/Consensys/teku/releases>
* Documentation: <https://docs.teku.consensys.io/introduction>
* Discord: <https://discord.gg/consensys> (Select the Teku channel)


# Nimbus BN

## Download Nimbus

[Download](https://github.com/status-im/nimbus-eth2/releases) the latest version of Nimbus, extract the zipped file, and then run the checksum verification process to ensure that the "nimbus\_beacon\_node" and "nimbus\_validator\_client" files have not been tampered with during download.

<pre class="language-bash"><code class="lang-bash">cd
curl -LO https://github.com/status-im/nimbus-eth2/releases/download/v24.9.0/nimbus-eth2_Linux_amd64_24.9.0_f54a0366.tar.gz
<strong>tar xvf nimbus-eth2_Linux_amd64_24.9.0_f54a0366.tar.gz
</strong><strong>cd nimbus-eth2_Linux_amd64_24.9.0_f54a0366/build
</strong><strong>echo "e40ec8fb6ded9a085bf52f7fa4b2e3cb8f63670f4d4c0f8e190f5a3d7e0038230985083b22ed859a1ddbdce230df05ebb182a73cfa8a614b470aa7516111b7d0  nimbus_beacon_node" | sha512sum --check
</strong>echo "35737f59e52fdc47823532b15d372a225779f38887c39664239a2171bc6f24a79633dfbb9257c7715ae640ea9037a3c6352e2e58c53af74a352d745e23d8c74b  nimbus_validator_client" | sha512sum --check
</code></pre>

{% hint style="info" %}
Each downloadable file comes with it's own checksum. Replace the actual checksum and URL of the download link in the code block above.

{% hint style="info" %}
Make sure to choose the amd64 version. Right click on the linked text and select "copy link address" to get the URL of the download link to `curl`.
{% endhint %}
{% endhint %}

***Expected output:** Verify output of the checksum verification.*

```
nimbus_beacon_node: OK
nimbus_validator_client: OK
```

If checksum is verified, extract the consensus client and validator client binaries into the `(/usr/local/bin)` directory (as a best practice). Then, clean up the duplicated copies.

```bash
cd ~/nimbus-eth2_Linux_amd64_24.9.0_f54a0366/build
sudo cp nimbus_beacon_node nimbus_validator_client /usr/local/bin
cd
rm -r nimbus*
```

## Configure the Nimbus Consensus Client

{% hint style="info" %}
*We will be running the Consensus client and Validator client of Nimbus as separate services so that there is more flexibility to configure a failover node for maximum uptime when you decide it is needed.*
{% endhint %}

Create an account (`nimbus`) without server access for the Nimbus Beacon Node & Validator Client to run as a background service. This type of user account will not have root access so it restricts potential attackers to only the Nimbus Beacon Node & Validator Client services in the unlikely event that they manage to infiltrate via a compromised client update.

```bash
sudo useradd --no-create-home --shell /bin/false nimbus
```

Create a directory for Nimbus to store the blockchain and validator data of the Consensus layer. Move the `validator_keys` directory into this folder. Then set the owner of this directory to the Nimbus so that this user can read and write to the directory.

```bash
sudo mkdir -p /var/lib/nimbus_beacon
sudo chmod 700 /var/lib/nimbus_beacon
```

If there are no errors, create a systemd configuration file for the Nimbus Beacon Node service to run in the background.

```bash
sudo nano /etc/systemd/system/nimbusbeacon.service
```

Paste the configuration parameters below into the file:

```
[Unit]
Description=Nimbus Beacon Node (Holesky)
Wants=network-online.target
After=network-online.target

[Service]
User=nimbus
Group=nimbus
Type=simple
Restart=always
RestartSec=5
ExecStart=/usr/local/bin/nimbus_beacon_node \
  --network=holesky \
  --data-dir=/var/lib/nimbus_beacon \
  --web3-url=http://127.0.0.1:8551 \
  --jwt-secret=/var/lib/jwtsecret/jwt.hex \
  --payload-builder=true \
  --payload-builder-url=http://127.0.0.1:18550 \
  --tcp-port=9000 \
  --udp-port=9000 \
  --rest \
  --rest-address=<Internal_IP_address> \
  --rest-port=5052 \
  --metrics \
  --metrics-port=8008 \
  --local-block-value-boost=0
  
[Install]
WantedBy=multi-user.target
```

Once you're done, save with `Ctrl+O` and `Enter`, then exit with `Ctrl+X`. Understand and review your configuration summary below, and amend if needed.

**Nimbus Beacon Node configuration summary:**

1. `--network`: Run the beacon node service on the ETH Holesky testnet
2. `--data-path`: Specify the directory for Nimbus to store data related to the consensus client
3. `--web3-url`: URL to connect to the execution layer client
4. `--jwt-secret`: File path to locate the JWT secret we generated earlier
5. `--payload-builder`: Enable external payload builder
6. `--payload-builder-url`: URL to connect to external payload builder (MEV-boost)
7. `--tcp-port / --udp-port:` Sets the port for peer-to-peer communication. Defaults to 9000.
8. `--rest`: Enable the REST API endpoint for validator and DVT clients to connect to this consensus client&#x20;
9. `--rest-address`: Sets the IP address to connect to the REST API of the consensus client that will be used by the DVT clients. Use the internal IP address of your device here (check by running `ip a`) - e.g. `192.168.x.x`. Defaults to `127.0.0.1` otherwise
10. `--rest-port`: Port to connect to the REST API endpoint
11. `--metrics`: Enable monitoring of consensus client metrics
12. `--metrics-port`: Port to connect to the metrics endpoint
13. `--local-block-value-boost`: How much more (in %) must the value of externally-built blocks be in order to outsource block building vs building blocks locally. Set to `0` to be indifferent. Default `=10`

## Run the checkpoint sync process

For Nimbus, you have to first run the checkpoint sync process separately before firing up the consensus client with the above configurations.

```sh
sudo /usr/local/bin/nimbus_beacon_node trustedNodeSync --network=holesky --data-dir=/var/lib/nimbus_beacon --trusted-node-url=https://holesky.beaconstate.ethstaker.cc/ --backfill=false
```

* Checkpoint sync URL list: <https://eth-clients.github.io/checkpoint-sync-endpoints/>
* Go to [holesky.beaconcha.in ](https://holesky.beaconcha.in/)on your browser and search for the slot number (`slot`)
* Verify the `Block Root` and `State Root` with your output

**Expected output:**

<figure><img src="/files/9UzwFXZxdAM2Y8TLS9S6" alt=""><figcaption></figcaption></figure>

## Start the Nimbus Consensus Client

First we have to change the owner of the nimbus beacon data directory to the `nimbus` user.

```sh
sudo chown -R nimbus:nimbus /var/lib/nimbus_beacon
```

Reload systemd to register the changes made, start the Nimbus Consensus Client service, and check its status to make sure its running.

```bash
sudo systemctl daemon-reload
sudo systemctl start nimbusbeacon.service
sudo systemctl status nimbusbeacon.service
```

**Expected output:** The output should say Nimbus Beacon Node is **“active (running)”.** Press CTRL-C to exit and Nimbus Beacon Node will continue to run. It should take just a few minutes for Nimbus to sync on the Holesky.

<figure><img src="/files/5n6OzO30fDFNgehI83aF" alt=""><figcaption></figcaption></figure>

Use the following command to check the logs of Nimbus Consensus Client’s syncing process. Watch out for any warnings or errors.

```bash
sudo journalctl -fu nimbusbeacon -o cat | ccze -A
```

**Expected output:**&#x20;

<figure><img src="/files/ePHpaFI6LNcuplIMS4bA" alt=""><figcaption></figcaption></figure>

Press `Ctrl+C` to exit monitoring.

**Note:** You will see some warnings around `"Block failed to load unexpectedly"` if your execution client has yet to fully sync. The following output is expected initially and should go away after a few hours.

<figure><img src="/files/K6sCGf5mWNZavpj9uyzm" alt=""><figcaption></figcaption></figure>

If the Nimbus Consensus Client service is running smoothly, we can now enable it to fire up automatically when rebooting the system.

```bash
sudo systemctl enable nimbusbeacon.service
```

## Resources

* Releases: <https://github.com/status-im/nimbus-eth2/releases>
* Documentation: <https://nimbus.guide/install.html>
* Discord: [https://discord.gg/qnjVyhatUa](<https://discord.gg/qnjVyhatUa >)


# Lodestar BN

{% hint style="info" %}
**IMPORTANT:** For mainnet usage, the Lodestar (Chainsafe) team only recommends installing via Docker to prevent supply chain attacks on the npm package manager. More details here - <https://chainsafe.github.io/lodestar/install/npm/>

Hence, we will be using the Docker method to install Lodestar even for the testnet version so that you can familiarise yourself with this method.
{% endhint %}

Don't feel apprehensive even if this is the first time you are hearing about Docker!&#x20;

We highly encourage the use of all minority clients so the way this setup is designed will be very familiar to the `systemd` method used in this curriculum.

## Installing dependencies - Docker

The script below performs the following:

1. Download and run the official Docker installation script
2. Creates a new user group called "docker"
3. Adds your current Linux user account to this new docker group

```sh
curl -fsSL https://get.docker.com -o get-docker.sh
sudo sh get-docker.sh

sudo groupadd docker
sudo usermod -aG docker $USER
```

Log out and then back in again for the new user group settings to take effect.

```sh
exit
```

```sh
ssh <user>@<IP_address> -p <port_no.> -i <SSH_key> -v
```

## Create a new Lodestar user account

```sh
sudo useradd --no-create-home --shell /bin/false lodestar
```

## Preparing the Lodestar beacon directory

1\) Create a new folder to store the Lodestar consensus client data

2\) Change the owner of this new folder to the `lodestar` user

3\) Restrict permissions on this new folder such that only the owner is able to read, write, and execute files in this folder

4\) Retrieve the UID and GID of the `lodestar` user account to be used in your `docker-compose.yml` file in the next step

```sh
sudo mkdir -p /var/lib/lodestar_beacon
sudo chown -R lodestar:lodestar /var/lib/lodestar_beacon
sudo chmod 700 /var/lib/lodestar_beacon
id lodestar
```

***Example output:***

```
uid=1004(lodestar) gid=1005(lodestar) groups=1005(lodestar)
```

**\*Note:** your actual ids may be different here.&#x20;

## Downloading Lodestar

Create a new folder for the Lodestar consensus client.&#x20;

```sh
cd
sudo mkdir lodestar_beacon
```

Create a `docker-compose.yml` file in the Lodestar folder.

```sh
cd ~/lodestar_beacon
sudo nano docker-compose.yml
```

Paste the following configuration into the `docker-compose.yml` file. **Note:** This is similar to the `systemd` configuration file used in the setup of other clients in this curriculum.

```yaml
services:
  beacon_node:
    image: chainsafe/lodestar:latest
    container_name: lodestar_beacon
    user: <UID>:<GID>
    restart: unless-stopped
    volumes:
      - /var/lib/lodestar_beacon:/var/lib/lodestar_beacon
      - /var/lib/jwtsecret:/var/lib/jwtsecret
    command:
      - beacon
      - --dataDir
      - /var/lib/lodestar_beacon
      - --network
      - holesky
      - --checkpointSyncUrl
      - https://checkpoint-sync.holesky.ethpandaops.io
      - --jwt-secret
      - /var/lib/jwtsecret/jwt.hex
      - --execution.urls
      - http://host.docker.internal:8551
      - --builder
      - --builder.urls
      - http://host.docker.internal:18550
      - --port
      - "9000"
      - --rest
      - --rest.address
      - 0.0.0.0
      - --rest.port
      - "5052"
      - --metrics
      - --metrics.port
      - "8008"
    environment:
      NODE_OPTIONS: --max-old-space-size=8192
    ports:
      - "5052:5052"
      - "9000:9000"
      - "8009:8009"
    extra_hosts:
      - "host.docker.internal:host-gateway"
```

Once you're done, save with `Ctrl+O` and `Enter`, then exit with `Ctrl+X`.&#x20;

**Now, let's break down what we are configuring in this `yml` file.**

1. `image: chainsafe/lodestar:latest`: Pull and run the latest stable release of Lodestar
2. `container_name: lodestar_beacon`: Name given to this docker container, which can be up to you.
3. `restart: unless-stopped`: Automatically restarts this container when your device restarts unless explicitly stopped by the user.
4. `volumes:`: Binds the folders on your host machine to the folders in the docker container so that they are accessible by the docker container. Here, we are binding the folders used by the `--dataDir` and `--jwt-secret` flags
5. `network_mode: host`: Enables the docker container to share the network namespace with the host -&#x20;
   * i.e. `localhost` refers to both the host and the docker container, ports are shared between the host and the docker container
6. `command:`: The flags to run the Lodestar with. Similar to flags used in the systemd configuration method.
   * Each `-` indicates a line break
   * Variables with a `--` prefix are flags and the others are the values to the flags
   * The first value (`beacon`) instructs Lodestar to run only the consensus client and without the validator client&#x20;
   * `--dataDir`: Specify the directory for Lodestar to store data related to the consensus client
   * `--network`: Run the Consensus Client service on the ETH Holesky testnet
   * `--checkpointSyncUrl`: Enables nearly instant syncing of the Consensus Client by pointing to one of the checkpoint sync URLs here - <https://eth-clients.github.io/checkpoint-sync-endpoints/>
   * `--jwt-secret`: File path to locate the JWT secret we generated earlier
   * `--execution.urls`: URL to connect to the execution layer client
   * `--builder`: Enable connection to external block builders (e.g. via MEV relays)
   * `--builder.urls`: URL to connect to external block builders (e.g. via MEV relays)
   * `--port:` Sets the port for peer-to-peer communication. Defaults to 9000.
   * `--rest`: Allows the validator client to connect to this consensus client. Also allows monitoring endpoints to pull metrics from this service
   * `--rest.address`: Sets the IP address to connect to the REST API of the consensus client that will be used by the DVT clients. Use the internal IP address of your device here (check by running `ip a`) - e.g. `192.168.x.x`. Defaults to `127.0.0.1` otherwise
   * `--rest.port`: Sets the port to connect to the consensus client
   * `--metrics`: Enable monitoring of Consensus Client metrics
   * `--metrics.port`: Sets the port to pull metrics from
7. `environment`: Tells Node.js to allow a larger amount of memory to be used before it starts garbage collection processes to free up memory.
8. `ports:` Maps the ports used by the docker container to the ports of the host device so that they are reachable via the 127.0.0.1  or localhost name spaces.
9. `extra_hosts:` Maps the 127.0.0.1  or localhost name spaces of the host device to host.docker.internal

## Start the Lodestar Consensus Client

1\) Make sure you are in the same folder as the `docker-compose.yml` file you created earlier.

```sh
cd ~/lodestar_beacon
```

&#x20;2\) Start the docker container.

```sh
docker compose up -d
```

**Expected output:**

<figure><img src="/files/DgDE34oR2fE0kHQVHFyr" alt=""><figcaption></figcaption></figure>

3\) Make sure there are no error messages by monitoring the logs for a few minutes.

```sh
docker logs lodestar_beacon -f
```

<figure><img src="/files/IJaD0ShYghJwjdXuQsmc" alt=""><figcaption></figcaption></figure>

4\) Once you see the `info: Syncing` lines start to appear, you can test the beacon API endpoint directly to make sure the docker container is running correctly.&#x20;

```sh
curl "http://127.0.0.1:5052/eth/v1/node/identity" | jq
```

Expected output:

<figure><img src="/files/PkB5CRLM8U4WDqtlQWZC" alt=""><figcaption></figcaption></figure>

## Verify roots of Checkpoint Sync

* Checkpoint sync URL list: <https://eth-clients.github.io/checkpoint-sync-endpoints/>
* Go to [beaconcha.in](https://beaconcha.in/) on your browser and search for the slot number (`slot`)
* Verify the `State Root` with your output

<figure><img src="/files/gIqHsF8NwgpM0ks8yIn3" alt=""><figcaption></figcaption></figure>

## Resources

* Git repository: <https://github.com/ChainSafe/lodestar-quickstart.git>
* Documentation: <https://chainsafe.github.io/lodestar/>
* Discord: <https://discord.gg/7Gdb4nFh>


# Lighthouse BN

## Download Lighthouse

[Download](https://github.com/sigp/lighthouse/releases) the latest version of Lighthouse and run the checksum verification process to ensure that the downloaded file has not been tampered with.

```bash
cd
curl -LO https://github.com/sigp/lighthouse/releases/download/v5.3.0/lighthouse-v5.3.0-x86_64-unknown-linux-gnu.tar.gz
curl -LO https://github.com/sigp/lighthouse/releases/download/v5.3.0/lighthouse-v5.3.0-x86_64-unknown-linux-gnu.tar.gz.asc
```

Run the checksum verification process.

```sh
gpg --keyserver keyserver.ubuntu.com --recv-keys 15E66D941F697E28F49381F426416DC3F30674B0
gpg --verify lighthouse-v5.3.0-x86_64-unknown-linux-gnu.tar.gz.asc lighthouse-v5.3.0-x86_64-unknown-linux-gnu.tar.gz
```

Verify the release signing key (`--recv-keys`) in the first command above in the releases page [here](https://github.com/sigp/lighthouse/releases).

{% hint style="info" %}
Each downloadable file comes with it's own checksum. Replace the actual checksum and URL of the download link in the code block above.

{% hint style="info" %}
Make sure to choose the amd64 version. Right click on the linked text and select "copy link address" to get the URL of the download link to `curl`.
{% endhint %}
{% endhint %}

***Expected output:** Verify output of the checksum verification.*

```
gpg: Signature made Thu Mar 28 07:30:45 2024 UTC
gpg:                using RSA key 15E66D941F697E28F49381F426416DC3F30674B0
gpg: Good signature from "Sigma Prime <security@sigmaprime.io>" [unknown]
gpg: WARNING: This key is not certified with a trusted signature!
gpg:          There is no indication that the signature belongs to the owner.
Primary key fingerprint: 15E6 6D94 1F69 7E28 F493  81F4 2641 6DC3 F306 74B0
```

If checksum is verified, extract the files and move them into the `(/usr/local/bin)` directory for neatness and best practice. Then, clean up the duplicated copies.

<pre class="language-bash"><code class="lang-bash">tar xvf lighthouse-v5.3.0-x86_64-unknown-linux-gnu.tar.gz
sudo cp lighthouse /usr/local/bin
<strong>rm -r lighthouse*
</strong></code></pre>

## Configure the Lighthouse Consensus Client

{% hint style="info" %}
*We will be running the consensus client and validator client of Lighthouse as separate services so that there is more flexibility to configure a failover node for maximum uptime when you decide it is needed.*
{% endhint %}

Create an account (`lighthouse`) without server access for the Lighthouse Consensus Client & Validator Client to run as a background service. This type of user account will not have root access so it restricts potential attackers to only the Lighthouse Consensus Client & Validator Client services in the unlikely event that they manage to infiltrate via a compromised client update.

```bash
sudo useradd --no-create-home --shell /bin/false lighthousebeacon
```

Create a directory for Lighthouse to store the blockchain and validator data of the Consensus layer. Move the `validator_keys` directory into this folder. Then set the owner of this directory to the `lighthouse` so that this user can read and write to the directory.

```bash
sudo mkdir -p /var/lib/lighthouse_beacon
sudo chown -R lighthousebeacon:lighthousebeacon /var/lib/lighthouse_beacon
sudo chmod 700 /var/lib/lighthouse_beacon
```

If there are no errors, create a systemd configuration file for the Lighthouse Consensus Client service to run in the background.

```bash
sudo nano /etc/systemd/system/lighthousebeacon.service
```

Paste the configuration parameters below into the file:

```bash
[Unit]
Description=Lighthouse Beacon Node (Holesky)
Wants=network-online.target
After=network-online.target

[Service]
User=lighthousebeacon
Group=lighthousebeacon
Type=simple
Restart=always
RestartSec=5
ExecStart=/usr/local/bin/lighthouse bn \
  --network holesky \
  --datadir /var/lib/lighthouse_beacon \
  --execution-endpoint http://127.0.0.1:8551 \
  --execution-jwt /var/lib/jwtsecret/jwt.hex \
  --checkpoint-sync-url=https://holesky.beaconstate.ethstaker.cc/ \
  --metrics \
  --metrics-port 8008 \
  --validator-monitor-auto \
  --port 9000 \
  --http \
  --http-port 5052 \
  --http-address <Internal_IP_address> \
  --builder http://127.0.0.1:18550 

[Install]
WantedBy=multi-user.target
```

Once you're done, save with `Ctrl+O` and `Enter`, then exit with `Ctrl+X`. Understand and review your configuration summary below, and amend if needed.

**Lighthouse Consensus Client configuration summary:**

1. `--network`: Run the Consensus Client service on the ETH Holesky testnet
2. `--datadir`: Specify the directory for Lighthouse to store data related to the consensus client
3. `--execution-endpoint`: URL to connect to the execution layer client
4. `--execution-jwt`: File path to locate the JWT secret we generated earlier
5. `--checkpoint-sync-url`: Enables nearly instant syncing of the Consensus Client by pointing to one of the checkpoint sync URLs here - <https://eth-clients.github.io/checkpoint-sync-endpoints/>
6. `--metrics`: Enable monitoring of Consensus Client metrics
7. `--metrics-port`: Port to connect to the metrics server. Used by Prometheus & Grafana for monitoring.
8. `--validator-monitor-auto`: Provides additional logging and metrics for locally controlled validators
9. `--port:` Sets the port for peer-to-peer communication. Defaults to 9000.
10. `--http`: Allows the validator client to connect to this consensus client. Also allows monitoring endpoints to pull metrics from this service
11. `--http-port`: Sets the port to connect to the consensus client
12. `--http-address`: Sets the IP address to connect to the REST API of the consensus client that will be used by the DVT clients. Use the internal IP address of your device here (check by running `ip a`) - e.g. `192.168.x.x`. Defaults to `127.0.0.1` otherwise
13. `--builder`: URL to connect to external builders (e.g. MEV relays)

## Start the Lighthouse Consensus Client

Reload systemd to register the changes made, start the Lighthouse Consensus Client service, and check its status to make sure its running.

```bash
sudo systemctl daemon-reload
sudo systemctl start lighthousebeacon.service
sudo systemctl status lighthousebeacon.service
```

**Expected output:** The output should say Lighthouse Consensus Client is **“active (running)”.** Press `CTRL-C` to exit and Lighthouse Consensus Client will continue to run. It should take just a few minutes for Lighthouse to sync on Holesky.

<figure><img src="/files/jBJvxNueNL5ByQPJPLOW" alt=""><figcaption></figcaption></figure>

Use the following command to check the logs of Lighthouse Consensus Client’s syncing process. Watch out for any warnings or errors.

```bash
sudo journalctl -fu lighthousebeacon -o cat | ccze -A
```

**Expected output:**&#x20;

<figure><img src="/files/nNjJap0BNpjfRgI9MRwR" alt=""><figcaption></figcaption></figure>

Press `Ctrl+C` to exit monitoring.

If the Lighthouse Consensus Client service is running smoothly, we can now enable it to fire up automatically when rebooting the system.

```bash
sudo systemctl enable lighthousebeacon.service
```

## Verify the Initial State roots (Checkpoint Sync)

1. Go to <https://holesky.beaconcha.in/> on your browser and search for the slot number (`slot`).&#x20;
2. &#x20;Verify the `Block Root` and `State Roo`t with your `journalctl` output

   <figure><img src="/files/emXnjBAnnMexsi1Fwmd5" alt=""><figcaption><p>testnet example: prater.beaconcha.in</p></figcaption></figure>
3. `journalctl` output

<figure><img src="/files/84flkApjR78A4fbXTfmY" alt=""><figcaption></figcaption></figure>

## Resources

* Releases: <https://github.com/sigp/lighthouse/releases>
* Documentation: <https://lighthouse-book.sigmaprime.io/intro.html>
* Discord: <https://discord.com/invite/TX7HKfgJN3>


# Prysm BN

## Download Prysm

[Download](https://github.com/prysmaticlabs/prysm/releases) the latest version of Prysm beacon node (`beacon-chain`) and run the checksum verification process to ensure that the downloaded file has not been tampered with.

```bash
cd
curl -LO https://github.com/prysmaticlabs/prysm/releases/download/v5.1.2/beacon-chain-v5.1.2-linux-amd64
curl -LO https://github.com/prysmaticlabs/prysm/releases/download/v5.1.2/beacon-chain-v5.1.2-linux-amd64.sha256
```

Run the checksum verification process.

```sh
sha256sum --check beacon-chain-v5.1.2-linux-amd64.sha256
```

{% hint style="info" %}
Each downloadable file comes with it's own checksum. Replace the actual checksum and URL of the download link in the code block above.

{% hint style="info" %}
Make sure to choose the amd64 version. Right click on the linked text and select "copy link address" to get the URL of the download link to `curl`.
{% endhint %}
{% endhint %}

***Expected output:** Verify output of the checksum verification.*

```
beacon-chain-v5.1.2-linux-amd64: OK
```

If checksum is verified, extract the files and move them into the `(/usr/local/bin)` directory for neatness and best practice. Then, clean up the duplicated copies.

<pre class="language-bash"><code class="lang-bash">mv beacon-chain-v5.1.2-linux-amd64 prysmbeacon #rename the binary file for easy reference
chmod +x prysmbeacon
<strong>sudo cp prysmbeacon /usr/local/bin
</strong><strong>rm -r prysmbeacon beacon-chain-v5.1.2-linux-amd64.sha256
</strong></code></pre>

## Configure the Prysm Consensus Client

{% hint style="info" %}
*We will be running the consensus client and validator client of Prysm as separate services so that there is more flexibility to configure a failover node for maximum uptime when you decide it is needed.*
{% endhint %}

Create an account (`prysmbeacon`) without server access for the Prysm Consensus Client & Validator Client to run as a background service. This type of user account will not have root access so it restricts potential attackers to only the Prysm Consensus Client & Validator Client services in the unlikely event that they manage to infiltrate via a compromised client update.

```bash
sudo useradd --no-create-home --shell /bin/false prysmbeacon
```

Create a directory for Prysm Beacon to store the blockchain and validator data of the Consensus layer. Move the `validator_keys` directory into this folder. Then set the owner of this directory to the `prysmbeacon` so that this user can read and write to the directory.

```bash
sudo mkdir -p /var/lib/prysm_beacon
sudo chown -R prysmbeacon:prysmbeacon /var/lib/prysm_beacon
sudo chmod 700 /var/lib/prysm_beacon
```

If there are no errors, create a systemd configuration file for the Prysm Consensus Client to run in the background.

```bash
sudo nano /etc/systemd/system/prysmbeacon.service
```

Paste the configuration parameters below into the file:

```bash
[Unit]
Description=Prysm Beacon Node (Holesky)
Wants=network-online.target
After=network-online.target

[Service]
User=prysmbeacon
Group=prysmbeacon
Type=simple
Restart=always
RestartSec=5
ExecStart=/usr/local/bin/prysmbeacon \
  --accept-terms-of-use \
  --holesky \
  --datadir=/var/lib/prysm_beacon \
  --execution-endpoint=http://127.0.0.1:8551 \
  --jwt-secret=/var/lib/jwtsecret/jwt.hex \
  --checkpoint-sync-url=https://holesky.beaconstate.ethstaker.cc/ \
  --monitoring-port 8008 \
  --p2p-tcp-port 13000 \
  --p2p-udp-port 12000 \
  --rpc-port 4000 \
  --rpc-host <Internal_IP_address> \
  --grpc-gateway-port 5052 \
  --grpc-gateway-host <Internal_IP_address> \
  --http-mev-relay=http://127.0.0.1:18550 \
  --local-block-value-boost 0

[Install]
WantedBy=multi-user.target
```

Once you're done, save with `Ctrl+O` and `Enter`, then exit with `Ctrl+X`. Understand and review your configuration summary below, and amend if needed.

**Prysm Consensus Client configuration summary:**

1. `--accept-terms-of-use`: Accept the terms and conditions.
2. `--holesky`: Run the Consensus Client service on the ETH Holesky testnet
3. `--datadir`: Specify the directory for Prysm to store data related to the consensus client
4. `--execution-endpoint`: URL to connect to the execution layer client
5. `--jwt-secret`: File path to locate the JWT secret we generated earlier
6. `--checkpoint-sync-url`: Enables nearly instant syncing of the Consensus Client by pointing to one of the checkpoint sync URLs here - <https://eth-clients.github.io/checkpoint-sync-endpoints/>
7. `--monitoring-port`: Port to connect to the metrics server. Used by Prometheus & Grafana for monitoring.
8. `--p2p-tcp-port/--p2p-udp-port`: Sets the port for peer-to-peer communication. Defaults to 13000 & 12000 respectively.
9. `--rpc-port`: RPC port exposed by the Prysm beacon node (default: 4000) that will be used by the validator and DVT clients.
10. `--rpc-host`: Host on which the RPC server should listen (default: "127.0.0.1") that will be used by the validator and DVT clients.
11. `--grpc-gateway-port`: Sets the port to connect to the consensus client
12. `--grpc-gateway-host`: Sets the IP address to connect to the REST API of the consensus client that will be used by the validator and DVT clients. Use the internal IP address of your device here (check by running `ip a`) - e.g. `192.168.x.x`. Defaults to `127.0.0.1` otherwise
13. `--http-mev-relay`: URL to connect to external builders (e.g. MEV relays)
14. `--local-block-value-boost`: What is the multiplier (in %) of the value of externally-built blocks in order to outsource block building vs building blocks locally. Set to `100` to be indifferent. Default `=90`

## Start the Prysm Consensus Client

Reload systemd to register the changes made, start the Prysm Consensus Client service, and check its status to make sure its running.

```bash
sudo systemctl daemon-reload
sudo systemctl start prysmbeacon.service
sudo systemctl status prysmbeacon.service
```

**Expected output:** The output should say Prysm Consensus Client is **“active (running)”.** Press `CTRL-C` to exit and Prysm Consensus Client will continue to run. It should take just a few minutes for Prysm to sync on Holesky.

<figure><img src="/files/QbzZVE9SEqhdPM7aD9fU" alt=""><figcaption></figcaption></figure>

Use the following command to check the logs of Prysm Consensus Client’s syncing process. Watch out for any warnings or errors.

```bash
sudo journalctl -fu prysmbeacon -o cat | ccze -A
```

**Expected output:**&#x20;

<figure><img src="/files/Lk0oyMhqEj30Apv6i51Q" alt=""><figcaption></figcaption></figure>

Press `Ctrl+C` to exit monitoring.

If the Prysm Consensus Client service is running smoothly, we can now enable it to fire up automatically when rebooting the system.

```bash
sudo systemctl enable prysmbeacon.service
```

## Verify the Initial State roots (Checkpoint Sync)

1. Go to <https://holesky.beaconcha.in/> on your browser and search for the slot number (`slot`).&#x20;
2. &#x20;Verify the `Block Root` and `State Roo`t with your `journalctl` output

   <figure><img src="/files/emXnjBAnnMexsi1Fwmd5" alt=""><figcaption><p>testnet example: prater.beaconcha.in</p></figcaption></figure>
3. `journalctl` output

<figure><img src="/files/pwro8svxN9ufafTxVagL" alt=""><figcaption></figcaption></figure>

## Resources

* Releases: <https://github.com/prysmaticlabs/prysm/releases>
* Documentation: <https://docs.prylabs.network/docs/getting-started>
* Discord: <https://discord.gg/prysmaticlabs>


# Validator key generation

## Important

* It is highly recommended that you perform this step using an air-gapped machine - i.e. a device that has never connected to the public internet before. We will describe a few methods below.
*
* If this is not available, turn off all internet and wireless connection (e.g. Ethernet, WiFi, Bluetooth) before proceeding with the key generation step
* In both cases above, make sure you are in a safe environment (e.g. home or office) with a trusted WiFi network for building the validator key generation tool from source. Make sure to also physically block all camera devices - e.g. laptop cameras, Webcams, people standing behind you during this process

## Creating an air-gapped machine

1. The least technical way is to buy a cheap single board computer like the Raspberry Pi from official distributors for less than S$100 SGD
2. **"OS-on-a-stick":** For more technical workarounds, we can flash a new USB drive with TailsOS and run a completely fresh OS from this USB drive itself. This system will be completely isolated from your host device (e.g. working laptop) and the described method below will not store any files after you remove the USB drive

#### ***We will cover Method 2 in this guide.***&#x20;

## What you will need

1. 2 new and empty USB drives
2. A paper notebook and a pencil (Pens are not recommended)
3. ***100% FOCUS***

## Download the validator keystore generation file

{% tabs %}
{% tab title="Wagyu Keygen" %}
This is the easiest GUI-based method of generating your validator keystores, deposit data, and recovery seed (mnemonic).

Download the Linux executable file onto your working laptop here: <https://wagyu.gg/>

Load the Linux executable file of Wagyu Keygen into a new and empty USB drive.
{% endtab %}

{% tab title="Executable binaries" %}

### Downloading the executable binary file

Download the latest version of the Ethereum validator deposit key generation binary file **on your working laptop** [here](https://github.com/ethstaker/ethstaker-deposit-cli/releases) and verify the checksum of the downloaded zipped file.

```sh
cd
curl -LO https://github.com/eth-educators/ethstaker-deposit-cli/releases/download/v1.2.2/ethstaker_deposit-cli-b13dcb9-linux-amd64.tar.gz
echo "04af3f4fd2fdccf4ae060abde47637622a31114d9f2e53e62722a694a4d5b206 ethstaker_deposit-cli-b13dcb9-linux-amd64.tar.gz" | sha256sum --check
```

**Expected output:**

```
ethstaker_deposit-cli-b13dcb9-linux-amd64.tar.gz: OK
```

After the checksum verification, move the zipped file into a new and empty USB drive.
{% endtab %}

{% tab title="Build from source" %}
\*No action needed at this step.
{% endtab %}
{% endtabs %}

## Flash and install OS

1\) Download latest TailsOS [here](https://tails.net/install/download/) and follow the respective instructions to verify the checksums of the downloaded file.

2\) Download an ISO flasher (e.g. [BalenaEtcher](https://etcher.balena.io/)) and flash another new and empty USB drive with your preferred OS. Refer to the section below under steps (1) and (2) if needed.

{% content-ref url="/pages/vlGmTNb3mHmSGpD3Bs3N" %}
[Install and prepare the OS](/linux-os-networking-and-security/install-and-prepare-the-os)
{% endcontent-ref %}

3\) Once your USB drive is flashed with your preferred OS, plug it into your working device and reboot the device to go into the boot menu. Depending on your system, you might need to hold `F2`, `F10`, `F12`, or `ESC` during the rebooting process to bring up the boot menu.

<details>

<summary>For an extensive list of laptop models, refer to the links below:</summary>

1\) Non-Apple/Mac models:

<https://techofide.com/blogs/boot-menu-option-keys-for-all-computers-and-laptops-updated-list-2021-techofide/#:~:text=The%20keys%20that%20are%20generally,of%20the%20computers%20or%20motherboards.>

2\) Apple/Mac

<https://support.apple.com/en-sg/102603>

</details>

4\) Once you see the boot menu, select the option to boot up from your USB drive instead of your usual storage volume and you should see the following screen.

<figure><img src="/files/ZMWwgT8lHxQyMec8feT2" alt=""><figcaption></figcaption></figure>

5\) Select `*Try or Install Tails` and then `Try Tails`when you get to the next screen

<figure><img src="/files/CVsXzsBycpU5m2PeQ69z" alt=""><figcaption></figcaption></figure>

{% tabs %}
{% tab title="Wagyu Keygen" %}

## Generate your validator signing keys

### \*BEFORE PROCEEDING TO THE NEXT STEP

1. #### TURN OFF YOUR ETHERNET, WIFI, AND BLUETOOTH ACCESS&#x20;
2. #### PHYSICALLY COVER ALL CAMERA DEVICES - e.g. PHONES, WEBCAMS, LAPTOP CAMERAS, PEOPLE STANDING BEHIND YOU

Load the USB drive containing the Linux executable file of `Wagyu Keygen` onto the newly booted ***"OS-on-a-USB".***

Move the `Wagyu Keygen` file into the Desktop of your ***"OS-on-a-USB"*** and run it (double-click).

Follow the instructions on the `Wagyu Keygen` GUI to:

1. Create a new secret recovery phrase
2. Select the network (Mainnet, Hoodi, Sepolia)
3. Write down your secret recovery phrase
4. Type in your secret recovery phrase manually to confirm you have written it down correctly
5. Choose how many validator keys you want to generate
6. Encrypt your validator keystores with a strong password
7. **\[IMPORTANT]** Set your withdrawal address according to your setup ***(see below for options)***
   1. **Native Solo Staking Setup:** Use a secure Ethereum wallet address that you own--e.g., cold wallet address, SAFE multi-sig address
   2. **Diva Staking:** Skip this section. The validator key shares will be assigned to you by the Diva client.
   3. **Lido CSM:** Set your withdrawal address to the following.
      * **Mainnet:** [`0xB9D7934878B5FB9610B3fE8A5e441e8fad7E293f`](https://etherscan.io/address/0xb9d7934878b5fb9610b3fe8a5e441e8fad7e293f)
      * **Hoodi:** [`0x9b108015fe433F173696Af3Aa0CF7CDb3E104258`](https://hoodi.cloud.blockscout.com/address/0x9b108015fe433F173696Af3Aa0CF7CDb3E104258)&#x20;
   4. **RocketPool (WIP):**
   5. **Stader (WIP):**
8. Confirm password for validator keystores
9. Choose the folder to store the validator keystores and deposit data file that will be generated (choose the Desktop folder here)

**There will be 2 files generated.**&#x20;

1. A `keystore-m_<timestamp>.json` file: This is your validator signing keystore that your validator node will use to sign attestations. Keep this file extremely secure.
2. A `deposit_data-<timestamp>.json`: This is the file that links your ETH deposit to your validator. You will only use this once, during the deposit process.

Store both files on a new USB drive by copying the entire staking-deposit-cli folder into it.&#x20;

Restart your host device (e.g. working laptop) and remove the OS-on-a-stick. There will not be any persistent memory stored on it.
{% endtab %}

{% tab title="Executable binaries" %}
Load the USB drive containing the `keystore generation zipped file` onto the newly booted ***"OS-on-a-USB".***

Copy the `keystore generation zipped file` into the Desktop of your ***"OS-on-a-USB".***

Press `ALT+T`, then extract the contents of the zipped file and change directory into the extracted folder.

```sh
cd Desktop
tar xvf ethstaker_deposit-cli-b13dcb9-linux-amd64.tar.gz
cd ethstaker_deposit-cli-b13dcb9-linux-amd64
```

## Generate your validator signing keys

### \*BEFORE PROCEEDING TO THE NEXT STEP

1. #### TURN OFF YOUR ETHERNET, WIFI, AND BLUETOOTH ACCESS&#x20;
2. #### PHYSICALLY COVER ALL CAMERA DEVICES - e.g. PHONES, WEBCAMS, LAPTOP CAMERAS, PEOPLE STANDING BEHIND YOU

Run the following command to generate your validator keys. Replace `<number>` with the number of validators you want to set up and `<YourWithdrawalAddress>` with the actual withdrawal address depending on your setup choice.

```
./deposit new-mnemonic --num_validators <number> --chain <network> --eth1_withdrawal_address <YourWithdrawalAaddress>
```

**Options for Withdrawal Address:**

1. **Native Solo Staking Setup:** Use a secure Ethereum wallet address that you own--e.g., cold wallet address, SAFE multi-sig address
2. **Diva Staking:** Skip this section. The validator key shares will be assigned to you by the Diva client.
3. **Lido CSM:** Set your withdrawal address to the following.
   * **Mainnet:** [`0xB9D7934878B5FB9610B3fE8A5e441e8fad7E293f`](https://etherscan.io/address/0xb9d7934878b5fb9610b3fe8a5e441e8fad7e293f)
   * **Hoodi:** [`0x9b108015fe433F173696Af3Aa0CF7CDb3E104258`](https://hoodi.cloud.blockscout.com/address/0x9b108015fe433F173696Af3Aa0CF7CDb3E104258)&#x20;
4. **RocketPool (WIP):**
5. **Stader (WIP):**

You will be prompted to key in the following. Select accordingly.

1. Choose your language (for the session)
2. Confirm your execution address (your withdrawal address)
3. Choose the language of your mnemonic word list (seed phrase)
4. Create a password to encrypt your validator signing keystores
5. Confirm password created in step 4

**Expected output:**

<figure><img src="/files/nwnLrkP2dEEthyDvH0nS" alt=""><figcaption></figcaption></figure>

Next, your mnemonic word list will be generated. Write it down on a piece of paper or notebook  -\***Never store this online or on any device that is connected to the internet**.

&#x20;**Expected output:**

<figure><img src="/files/vlw6yp6MKgh1M20BVpxF" alt=""><figcaption></figcaption></figure>

Press any key once you have written your mnemonic down and the tool will prompt you to key in your mnemonic in the same order to verify that you have recorded it correctly.

If you typed in your mnemonic correctly, you will be greeted by an ASCII art of a Rhino!

**Expected output:**

<figure><img src="/files/Aov94jpAwbmSPgxjSLpG" alt=""><figcaption></figcaption></figure>

**There will be 2 files generated.**&#x20;

1. A `keystore-m_<timestamp>.json` file: This is your validator signing keystore that your validator node will use to sign attestations. Keep this file extremely secure.
2. A `deposit_data-<timestamp>.json`: This is the file that links your ETH deposit to your validator. You will only use this once, during the deposit process.

Store both files on a new USB drive by copying the entire staking-deposit-cli folder into it.&#x20;

Restart your host device (e.g. working laptop) and remove the OS-on-a-stick. There will not be any persistent memory stored on it.
{% endtab %}

{% tab title="Build from source" %}

## Building the validator key generation tool from source

Connect your ***OS-on-a-USB*** to a trusted WiFi network and fire up the Linux terminal using `Ctrl + Alt + T` .

Install system dependencies - `pip3` & `virtualenv`. ***Note:** Remove the `sudo` prefix for each line if your system returns an error.*

```bash
sudo apt-get update -y && sudo apt-get upgrade -y
sudo apt install python3-venv python3-pip
sudo apt install python3-virtualenv
sudo apt-get install git
```

Create a python virtual environment to run the tool under:

```bash
virtualenv venv
source venv/bin/activate
```

Install the dependency packages for running the tool:

```bash
python3 setup.py install
pip3 install -r requirements.txt
```

**Expected output:** You should see some progress bars after a few seconds.

<figure><img src="/files/JdkvOIB0n72pDTCIXA9Q" alt=""><figcaption></figcaption></figure>

### \*BEFORE PROCEEDING TO THE NEXT STEP

1. #### TURN OFF YOUR ETHERNET, WIFI, AND BLUETOOTH ACCESS&#x20;
2. #### PHYSICALLY COVER ALL CAMERA DEVICES - e.g. PHONES, WEBCAMS, LAPTOP CAMERAS, PEOPLE STANDING BEHIND YOU

## Generate your validator signing keys

Run the following command to generate your validator keys. Replace `<number>` with the number of validators you want to set up and `<YourWithdrawalAddress>` with the actual withdrawal address depending on your setup choice.

```bash
python -m ethstaker_deposit new-mnemonic --num_validators=<NUM_VALIDATORS> --mnemonic_language=english --chain=<CHAIN_NAME> --folder=<YOUR_FOLDER_PATH>
```

1. **Native Solo Staking Setup:** Use a secure Ethereum wallet address that you own--e.g., cold wallet address, SAFE multi-sig address
2. **Diva Staking:** Skip this section. The validator key shares will be assigned to you by the Diva client.
3. **Lido CSM:**&#x20;
   1. On `mainnet`, set your withdrawal address to the Lido CSM contract address [`0xB9D7934878B5FB9610B3fE8A5e441e8fad7E293f`](https://etherscan.io/address/0xb9d7934878b5fb9610b3fe8a5e441e8fad7e293f)&#x20;
   2. On the `Hoodi` testnet, set your withdrawal address to the Lido CSM contract address [`0x4473dCDDbf77679A643BdB654dbd86D67F8d32f2`](https://hoodi.cloud.blockscout.com/address/0x4473dCDDbf77679A643BdB654dbd86D67F8d32f2)
4. **RocketPool (WIP):**
5. **Stader (WIP):**

You will be prompted to key in the following. Select accordingly.

1. Choose your language (for the session)
2. Confirm your execution address (your withdrawal address)
3. Choose the language of your mnemonic word list (seed phrase)
4. Create a password to encrypt your validator signing keystores
5. Confirm password created in step 4

**Expected output:**

<figure><img src="/files/nwnLrkP2dEEthyDvH0nS" alt=""><figcaption></figcaption></figure>

Next, your mnemonic word list will be generated. Write it down on a piece of paper or notebook  -\***Never store this online or on any device that is connected to the internet**.

&#x20;**Expected output:**

<figure><img src="/files/vlw6yp6MKgh1M20BVpxF" alt=""><figcaption></figcaption></figure>

Press any key once you have written your mnemonic down and the tool will prompt you to key in your mnemonic in the same order to verify that you have recorded it correctly.

If you typed in your mnemonic correctly, you will be greeted by an ASCII art of a Rhino!

**Expected output:**

<figure><img src="/files/Aov94jpAwbmSPgxjSLpG" alt=""><figcaption></figcaption></figure>

**There will be 2 files generated.**&#x20;

1. A `keystore-m_<timestamp>.json` file: This is your validator signing keystore that your validator node will use to sign attestations. Keep this file extremely secure.
2. A `deposit_data-<timestamp>.json`: This is the file that links your ETH deposit to your validator. You will only use this once, during the deposit process.

Store both files on a new USB drive by copying the entire staking-deposit-cli folder into it.&#x20;

Restart your host device (e.g. working laptop) and remove the OS-on-a-stick. There will not be any persistent memory stored on it.
{% endtab %}
{% endtabs %}

## Add validator key to the Node

{% tabs %}
{% tab title="Command line" %}
Now that we have our validator signing keystore, we will need to place it in our validator node itself so that the node can sign attestations and propose blocks.

Plug in the USB drive with your validator signing keystores into your node device. Once the USB drive is plugged in, we will need to identify it. On the terminal of your node, run:

```
lsblk
```

**Expected output:**

<figure><img src="/files/82BcR2GsWzFgfuod98zj" alt=""><figcaption></figcaption></figure>

Look for your USB drive in the output list. It will take a name similar to the screenshot above - i.e. `sdx`.

After you find it, you can proceed to mount your USB drive onto the `/media` folder.

```sh
sudo mount /dev/sda1 /media
```

**Note:** Replace `sda1` with the actual name of your USB drive.

You will now be able to access your USB drive via the terminal by going into the `/media` folder.

Go into your USB drive and copy your validator signing keystore into the HOME directory of your node.

```sh
cd /media/ethstaker_deposit-cli-b13dcb9-linux-amd64
sudo cp -r validator_keys ~
```

Unmount and eject your USB drive.

```sh
cd
sudo umount /media
```

Now you need to create a plain text password file for your validator node to decrypt your validator signing keystores.

First let's print and copy the file name of your validator signing keystore.

```
cd ~/validator_keys
ls
```

With the `validator_signing_keystore_file_name` copied, create the password file.

<pre><code>sudo nano <a data-footnote-ref href="#user-content-fn-1">&#x3C;validator_signing_keystore_file_name></a>.txt
</code></pre>

Type in the password you used when generating your validator keys in the earlier step. Then save and exit the file with `CTRL + O, enter, CTRL + X`.
{% endtab %}

{% tab title="Dappnode" %}

## 32 ETH Solo Staking

Go to the Dappnode UI and navigate to the Stakers > Ethereum menu. Your Web3Signer will have a link saying `Upload Keystores` . If it doesn’t, make sure that you have waited enough time for all the packages to be installed (around 5 minutes) and refresh the page.

Then click on the `Import Keystores` button on the lower part of the Web3Signer UI.

Here browse for the keystore file(s) you generated in the previous step and enter them along with the password you chose to secure your keystores.

You are now ready to fund these validator accounts and start validating!

[Source here.](https://docs.dappnode.io/docs/user/staking/ethereum/solo/mainnet)

## Lido CSM

* Go to the Web3signer UI for [Ethereum](http://brain.web3signer.dappnode/) or [Holesky](http://brain.web3signer-holesky.dappnode/).
* Upload the keystores and tag them with "Lido".
* The fee recipient will be automatically set to `0xE73a3602b99f1f913e72F8bdcBC235e206794Ac8` for Holesky and `0x388C818CA8B9251b393131C08a736A67ccB19297` for Mainnet. **It is not editable.**

You are now ready to fund these validator accounts and start validating!

[Source here.](https://docs.dappnode.io/docs/user/staking/ethereum/lsd-pools/lido)
{% endtab %}
{% endtabs %}

[^1]:


# Set up and configure MEV-boost

### Install and configure MEV-boost

{% tabs %}
{% tab title="Build from source" %}
Install dependencies - Make, Git

```sh
sudo apt install make git
```

Install dependencies - Go (download page [here](https://go.dev/dl/)) - and make sure the latest version (1.22.0) is output at the end of this command batch.

```sh
curl -LO https://go.dev/dl/go1.22.0.linux-amd64.tar.gz
echo "f6c8a87aa03b92c4b0bf3d558e28ea03006eb29db78917daec5cfb6ec1046265 go1.22.0.linux-amd64.tar.gz" sha256sum --check
sudo tar xvf go1.22.0.linux-amd64.tar.gz -C /usr/local
export PATH=$PATH:/usr/local/go/bin
echo "export PATH=$PATH:/usr/local/go/bin"
go version
```

Download latest version of MEV-boost.

```sh
cd
git clone https://github.com/flashbots/mev-boost.git
cd mev-boost
git checkout tags/v1.7-alpha1
```

Build the executable file.

```sh
make build
```

Copy the executable file to the `/usr/local/bin` folder.

```sh
sudo cp mev-boost /usr/local/bin
```

{% endtab %}

{% tab title="Using binaries" %}
Download latest version of MEV-boost [here](https://github.com/flashbots/mev-boost/releases) and run the checksum verification process to ensure that the downloaded file has not been tampered with. The checksums can be found in the `checksums.txt` file - open it up and copy the `linux_amd64` version to use below.

```bash
cd 
curl -LO https://github.com/flashbots/mev-boost/releases/download/v1.8/mev-boost_1.8_linux_amd64.tar.gz
echo "18b8af03787a0a57557ab8f8c483fe5143d81208b28f813fd93ad256ad52e5db mev-boost_1.8_linux_amd64.tar.gz" | sha256sum --check
```

{% hint style="info" %}
Each downloadable file comes with it's own checksum. Replace the actual checksum and URL of the download link in the code block above.

{% hint style="info" %}
Make sure to choose the amd64 version. Right click on the linked text and select "copy link address" to get the URL of the download link to `curl`.
{% endhint %}
{% endhint %}

***Expected output:** Verify output of the checksum verification*

```
mev-boost_1.8_linux_amd64.tar.gz: Ok
```

If checksum is verified, extract the files and move them into the `(/usr/local/bin)` directory for neatness and best practice. Then, clean up the duplicated copies.

```bash
tar xvf mev-boost_1.8_linux_amd64.tar.gz
sudo cp mev-boost /usr/local/bin
rm mev-boost* LICENSE README.md
```

{% endtab %}
{% endtabs %}

Create an account (`mevboost`) without server access for MEV Boost to run as a background service. This restricts potential attackers to only the MEV Boost service in the unlikely event that they manage to infiltrate via a compromised client update.

```bash
sudo useradd --no-create-home --shell /bin/false mevboost
```

Create a systemd configuration file for the tekubeacon service to run in the background.

```bash
sudo nano /etc/systemd/system/mevboost.service
```

Paste the configuration parameters below into the file:

```bash
[Unit]
Description=mev-boost (Holesky)
Wants=network-online.target
After=network-online.target

[Service]
Type=simple
User=mevboost
Group=mevboost
Restart=always
RestartSec=5
ExecStart=/usr/local/bin/mev-boost \
    -holesky \
    -min-bid 0.07 \
    -relay-check \
    -relay <https://example.com> \
    -relay <https://example.com> \
    -relay <https://example.com> \
    -relay <https://example.com> 

[Install]
WantedBy=multi-user.target
```

Once you're done, save with `Ctrl+O` and `Enter`, then exit with `Ctrl+X`. Understand and review your configuration summary (flags) below, and amend if needed.

**MEV Boost configuration summary:**

1. `-holesky`: Run the MEV-boost service on the Holesky testnet
2. `-min-bid`: Set the threshold to accept blocks from relays if they bid above a chosen value, otherwise propose a locally-built block. This sacrifices a small \~0.1% APR in exchange for much better censorship resistance, allowing you to use OFAC-compliant relays guilt-free! More information [here](https://writings.flashbots.net/the-cost-of-resilience/)
3. `-relay-check`: check relay status on startup and on the status API call
4. `-relay`: A chosen relay URL. Choose your preferred ones here - <https://github.com/eth-educators/ethstaker-guides/blob/main/MEV-relay-list.md>

### Start the MEV Boost service

Reload the systemd daemon to register the changes made, start MEV Boost, and check its status to make sure its running.

```bash
sudo systemctl daemon-reload
sudo systemctl start mevboost
sudo systemctl status mevboost.service
```

**Expected output:** The output should say MEV Boost is **“active (running)”.** Press CTRL-C to exit and MEV Boost will continue to run.

<figure><img src="/files/Rw5Oos8lnD9jSaIVxsZC" alt=""><figcaption><p>sudo systemctl status mevboost.service</p></figcaption></figure>

Use the following command to check the logs for any warnings or errors:

```bash
sudo journalctl -fu mevboost -o cat | ccze -A
```

**Expected output:**

{% hint style="info" %}
Make sure you see the <mark style="background-color:yellow;">**`method=POST path=/eth/v1/builder/validators status=200`**</mark> lines in the logs and not <mark style="background-color:yellow;">**`method=GET`**</mark>
{% endhint %}

```
mev-boost-1  | time="2024-11-15T05:56:56.094Z" level=info msg="http: POST /eth/v1/builder/validators 200" duration=0.072986 method=POST path=/eth/v1/builder/validators status=200 version=v1.8.1
mev-boost-1  | time="2024-11-15T05:56:59.122Z" level=info msg="http: POST /eth/v1/builder/validators 200" duration=0.074820 method=POST path=/eth/v1/builder/validators status=200 version=v1.8.1
mev-boost-1  | time="2024-11-15T05:56:59.184Z" level=info msg="http: POST /eth/v1/builder/validators 200" duration=0.097007 method=POST path=/eth/v1/builder/validators status=200 version=v1.8.1
mev-boost-1  | time="2024-11-15T05:57:11.122Z" level=info msg="http: POST /eth/v1/builder/validators 200" duration=0.075100 method=POST path=/eth/v1/builder/validators status=200 version=v1.8.1
mev-boost-1  | time="2024-11-15T05:57:11.188Z" level=info msg="http: POST /eth/v1/builder/validators 200" duration=0.100271 method=POST path=/eth/v1/builder/validators status=200 version=v1.8.1
```

Press `CTRL-C` to exit.

If the MEV Boost service is running smoothly, we can now enable it to fire up automatically when rebooting the system.

```bash
sudo systemctl enable mevboost.service
```


# Validator client setup

{% content-ref url="/pages/jFsmhqOlrDPrnUn6k3vt" %}
[Teku VC](/native-solo-staking-setup/validator-client-setup/teku-vc)
{% endcontent-ref %}

{% content-ref url="/pages/NUMyAvDWdPNOQI5Z7DTx" %}
[Nimbus VC](/native-solo-staking-setup/validator-client-setup/nimbus-vc)
{% endcontent-ref %}

{% content-ref url="/pages/ToTN2ElnkRZKX7A77QvW" %}
[Lodestar VC](/native-solo-staking-setup/validator-client-setup/lodestar-vc)
{% endcontent-ref %}

{% content-ref url="/pages/c9Wa0RzqAGpZ7B3grnGF" %}
[Lighthouse VC](/native-solo-staking-setup/validator-client-setup/lighthouse-vc)
{% endcontent-ref %}

{% content-ref url="/pages/NhnKRkyjSg8iuPjzaGI2" %}
[Prysm VC](/native-solo-staking-setup/validator-client-setup/prysm-vc)
{% endcontent-ref %}


# Teku VC

### Download Teku

Follow the steps in this previous section to download Teku if you have not done so.

{% content-ref url="/pages/AKgUYUENlUB4t1pYnnmI" %}
[Teku BN](/installing-and-configuring-your-el+cl-clients/set-up-and-configure-consensus-layer-client/teku-bn)
{% endcontent-ref %}

### Create a new user account

```sh
sudo useradd --no-create-home --shell /bin/false teku_validator
```

### Prepare the validator keystores

1\) Create 3 new folders to store the validator client data, validator keystore, and the validator keystore password

2\) Copy the validator keystores and it's password file into their respective folders

3\) Change the owner of this folder to the teku user

4\) Restrict permissions on this new folder such that only the owner is able to read, write, and execute files in this folder

```sh
sudo mkdir -p /var/lib/teku_validator/validator_keystores /var/lib/teku_validator/keystore_password
sudo cp ~/validator_keys/<validator_keystore.json> /var/lib/teku_validator/validator_keystores
sudo cp ~/validator_keys/<validator_keystore_password.txt> /var/lib/teku_validator/keystore_password
sudo chown -R teku_validator:teku_validator /var/lib/teku_validator
sudo chmod 700 /var/lib/teku_validator
```

{% hint style="info" %}
**Aside from the file extension, the validator\_keystore\_password file will need to be named identically as the validator signing keystore file (e.g. keystore-m-123.json, keystore-m-123.txt)**
{% endhint %}

### Configure the validator client service

Create a systemd configuration file for the Teku Validator Client service to run in the background.

```bash
sudo nano /etc/systemd/system/tekuvalidator.service
```

Paste the configuration parameters below into the file:

```bash
[Unit]
Description=Teku Validator Client (Holesky)
Wants=network-online.target
After=network-online.target
[Service]
User=teku_validator
Group=teku_validator
Type=simple
Restart=always
RestartSec=5
Environment="JAVA_OPTS=-Xmx6g"
Environment="TEKU_OPTS=-XX:-HeapDumpOnOutOfMemoryError"
ExecStart=/usr/local/bin/teku/bin/teku vc \
  --network=holesky \
  --data-path=/var/lib/teku_validator \
  --validator-keys=/var/lib/teku_validator/validator_keystores:/var/lib/teku_validator/keystore_password \
  --beacon-node-api-endpoint=http://<Internal_IP_address>:5052 \
  --validators-proposer-default-fee-recipient=<your_designated_ETH_wallet address> \
  --validators-builder-registration-default-enabled=true \
  --validators-graffiti="<your_graffiti_of_choice>" \
  --metrics-enabled=true \
  --metrics-port=8108 \
  --doppelganger-detection-enabled=true 

[Install]
WantedBy=multi-user.target
```

Once you're done, save with `Ctrl+O` and `Enter`, then exit with `Ctrl+X`. Understand and review your configuration summary below, and amend if needed.

**Teku Validator Client configuration summary:**

1. `--network`: Run the validator client service on the ETH Holesky testnet
2. `--data-path`: Specify the directory for Teku to store the validator info
3. `--validator-keys`: File path to the directory where your validator signing keystore and corresponding plain text password file are stored. **Aside from the file extension (e.g. .json vs .txt), the password file will need to be named identically as the validator signing keystore file.** For example:

   <figure><img src="/files/4vCvYQLcu0jIQf317MCN" alt=""><figcaption></figcaption></figure>
4. `--beacon-node-api-endpoint`: URLs to connect to the main and backup consensus clients if any. This needs to be the same IP address set in your consensus client. Refer back [here](/installing-and-configuring-your-el+cl-clients/set-up-and-configure-consensus-layer-client) if you don't remember it.&#x20;
5. `--validators-proposer-default-fee-recipient`: ETH wallet address to receive rewards from block proposals and MEV bribes
6. `--validators-proposer-blinded-blocks-enabled`: Required when using external builders to build blocks (e.g. MEV relays)
7. `--validators-graffiti`: Optional text to display on-chain when your validator proposes a block
8. `--metrics-enabled`: Enable metrics for monitoring
9. `--metrics-port`: Port to retrieve metrics for monitoring
10. `--doppelganger-detection-enabled`: Helps prevents slashing due to double signing by checking if your validator keys are already active on the network. ***Not a fool-proof solution.***

### Start the Teku Validator Client service

Reload the systemd daemon to register the changes made, start the Teku Validator Client, and check its status to make sure its running.

```bash
sudo systemctl daemon-reload
sudo systemctl start tekuvalidator.service
sudo systemctl status tekuvalidator.service
```

The output should say the Teku Validator Client is **“active (running)”.** Press CTRL-C to exit and the Teku Validator Client will continue to run.

Use the following command to check the logs for any warnings or errors:

```bash
sudo journalctl -fu tekuvalidator -o cat | ccze -A
```

**Expected output:**

<figure><img src="/files/q7mhPZ3xmUQWT2CrC2mZ" alt=""><figcaption><p>Example output of the Teku VC running on the Goerli testnet. Look out for Holesky in your output.</p></figcaption></figure>

Press `CTRL-C` to exit.

If the Teku Validator Client service is running smoothly, we can now enable it to fire up automatically when rebooting the system.

```bash
sudo systemctl enable tekuvalidator
```

**Expected output:**

```
Created symlink /etc/systemd/system/multi-user.target.wants/tekuvalidator.service → /etc/s
```

### Remove duplicates of validator keystores

To prevent configuration mistakes leading to double signing in the future, remove duplicate copies of the validator signing keystores once everything is running smoothly.

```sh
sudo rm -r ~/validator_keys
```

## Resources

* Releases: <https://github.com/Consensys/teku/releases>
* Documentation: <https://docs.teku.consensys.io/introduction>
* Discord: <https://discord.gg/consensys> (Select the Teku channel)


# Nimbus VC

### Download Nimbus

Follow the steps in this previous section to download Nimbus if you have not done so.

{% content-ref url="/pages/J13y2wNXbcJ5WQrAry47" %}
[Nimbus BN](/installing-and-configuring-your-el+cl-clients/set-up-and-configure-consensus-layer-client/nimbus-bn)
{% endcontent-ref %}

### Create a new user account

```sh
sudo useradd --no-create-home --shell /bin/false nimbusvalidator
```

### Prepare the validator data directory

1\) Create a new folders to store the validator client data, validator keystore, and the validator keystore password

```sh
sudo mkdir -p /var/lib/nimbus_validator
```

2\) Run the validator key import process.

<pre class="language-sh"><code class="lang-sh"><strong>sudo /usr/local/bin/nimbus_beacon_node deposits import --data-dir:/var/lib/nimbus_validator/ ~/validator_keys
</strong></code></pre>

3\) Change the owner of this new folder to the `nimbus_validator` user

4\) Restrict permissions on this new folder such that only the owner is able to read, write, and execute files in this folder

```sh
sudo chown -R nimbusvalidator:nimbusvalidator /var/lib/nimbus_validator
sudo chmod 700 /var/lib/nimbus_validator
```

### Configure the validator client service

Create a systemd configuration file for the Nimbus Validator Client service to run in the background.

```bash
sudo nano /etc/systemd/system/nimbusvalidator.service
```

Paste the configuration parameters below into the file:

```
[Unit]
Description=Nimbus Validator Client (Holesky)
Wants=network-online.target
After=network-online.target

[Service]
User=nimbusvalidator
Group=nimbusvalidator
Type=simple
Restart=always
RestartSec=5
ExecStart=/usr/local/bin/nimbus_validator_client \
  --data-dir=/var/lib/nimbus_validator \
  --payload-builder=true \
  --beacon-node=http://<Internal_IP_address>:5052 \
  --metrics \
  --metrics-port=8108 \
  --suggested-fee-recipient=<your_designated_ETH_wallet address> \
  --graffiti="<your_graffiti_of_choice>" \
  --doppelganger-detection

[Install]
WantedBy=multi-user.target
```

Once you're done, save with `Ctrl+O` and `Enter`, then exit with `Ctrl+X`. Understand and review your configuration summary below, and amend if needed.

**Nimbus Validator Client configuration summary:**

1. `--data-dir`: Specify the directory for Nimbus to store the validator info
2. `--payload-builder`: Required when using external builders to build blocks (e.g. MEV relays)
3. `--beacon-node`: URLs to connect to the main and backup consensus clients if any. This needs to be the same IP address set in your consensus client. Refer back [here](/installing-and-configuring-your-el+cl-clients/set-up-and-configure-consensus-layer-client) if you don't remember it.&#x20;
4. `--metrics`: Enable metrics for monitoring
5. `--metrics-port`: Set the port for retrieving metrics
6. `--suggested-fee-recipient`: ETH wallet address to receive rewards from block proposals and MEV bribes
7. `--graffiti`: Optional text to display on-chain when your validator proposes a block
8. `--doppelganger-detection`: Helps prevents slashing due to double signing by checking if your validator keys are already active on the network. ***Not a fool-proof solution.***

### Start the Nimbus Validator Client service

Reload the systemd daemon to register the changes made, start the Nimbus Validator Client, and check its status to make sure its running.

```bash
sudo systemctl daemon-reload
sudo systemctl start nimbusvalidator.service
sudo systemctl status nimbusvalidator.service
```

The output should say the Nimbus Validator Client is **“active (running)”.** Press CTRL-C to exit and the Nimbus Validator Client will continue to run.

Use the following command to check the logs for any warnings or errors:

```bash
sudo journalctl -fu nimbusvalidator -o cat | ccze -A
```

**Expected output:**

<figure><img src="/files/k0HjUt2rIpsJe1QVwaKM" alt=""><figcaption></figcaption></figure>

Press `CTRL-C` to exit.

If the Nimbus Validator Client service is running smoothly, we can now enable it to fire up automatically when rebooting the system.

```bash
sudo systemctl enable nimbusvalidator
```

**Expected output:**

```
Created symlink /etc/systemd/system/multi-user.target.wants/nimbusvalidator.service → /etc/systemd/system/nimbusvalidator.service.
```

### Remove duplicates of validator keystores

To prevent configuration mistakes leading to double signing in the future, remove duplicate copies of the validator signing keystores once everything is running smoothly.

```sh
sudo rm -r ~/validator_keys
```

## Resources

* Releases: <https://github.com/status-im/nimbus-eth2/releases>
* Documentation: <https://nimbus.guide/install.html>
* Discord: <https://discord.gg/BWKx5Xta>


# Lodestar VC

### Create a new user account

```sh
sudo useradd --no-create-home --shell /bin/false lodestar_validator
```

## Installing dependencies - Docker

The script below performs the following:

1. Download and run the official Docker installation script
2. Creates a new user group called "docker"
3. Adds your current Linux user account to this new docker group

```sh
curl -fsSL https://get.docker.com -o get-docker.sh
sudo sh get-docker.sh

sudo groupadd docker
sudo usermod -aG docker $USER
```

Log out and then back in again for the new user group settings to take effect.

```sh
exit
```

```sh
ssh <user>@<IP_address> -p <port_no.> -i <SSH_key> -v
```

## Create a new Lodestar user account

\*Skip this step if you are using the Lodestar consensus client.

```sh
sudo useradd --no-create-home --shell /bin/false lodestar_validator
```

## Prepare the validator data directory

1\) Create 3 new folders to store the validator client data, validator keystore, and the validator keystore password

2\) Copy the validator keystores and it's password file into their respective folders

3\) Change the owner of these new folders to the `lodestar` user

4\) Restrict permissions on this new folder such that only the owner is able to read, write, and execute files in this folder

5\) Retrieve the UID and GID of the `lodestar` user account to be used in your `docker-compose.yml` file in the next step

<pre class="language-sh"><code class="lang-sh">sudo mkdir -p /var/lib/lodestar_validator/validator_keystores /var/lib/lodestar_validator/keystore_password
<strong>sudo cp ~/validator_keys/&#x3C;validator_keystore.json> /var/lib/lodestar_validator/validator_keystores
</strong>sudo cp ~/validator_keys/&#x3C;validator_keystore_password.txt> /var/lib/lodestar_validator/keystore_password
sudo chown -R lodestar_validator:lodestar_validator /var/lib/lodestar_validator
sudo chmod 700 /var/lib/lodestar_validator
id lodestar_validator
</code></pre>

{% hint style="info" %}
**Aside from the file extension, the validator\_keystore\_password file will need to be named identically as the validator signing keystore file (e.g. keystore-m-123.json, keystore-m-123.txt)**
{% endhint %}

***Expected output:***

```
uid=1004(lodestar) gid=1005(lodestar) groups=1005(lodestar)
```

***New folders created:***

```
/var/lib/lodestar_validator/
/var/lib/lodestar_validator/validator_keystores
/var/lib/lodestar_validator/keystore_password
```

## Downloading Lodestar

Create a new folder for the Lodestar validator client.&#x20;

```sh
cd
sudo mkdir lodestar_validator
```

Create a `docker-compose.yml` file in the Lodestar folder.

```sh
cd ~/lodestar_validator
sudo nano docker-compose.yml
```

Paste the following configuration into the `docker-compose.yml` file. **Note:** This is similar to the `systemd` configuration file used in the setup of other clients in this curriculum.

```yaml
services:
  validator_client:
    image: chainsafe/lodestar:latest
    container_name: lodestar_validator
    user: <UID>:<GID>
    restart: unless-stopped
    volumes:
      - /var/lib/lodestar_validator:/var/lib/lodestar_validator
    command:
      - validator
      - --dataDir
      - /var/lib/lodestar_validator
      - --importKeystores
      - /var/lib/lodestar_validator/validator_keystores
      - --importKeystoresPassword
      - /var/lib/lodestar_validator/keystore_password/<validator_signing_keystore_password_file_name>.txt
      - --network
      - holesky
      - --beaconNodes
      - http://<Internal_IP_address>:5052
      - --builder
      - --suggestedFeeRecipient
      - "<your_designated_ETH_wallet_address>"
      - --doppelgangerProtection
      - --metrics
      - --metrics.port
      - "5064"
      - --graffiti
      - "your_graffiti_of_choice"
    environment:
      NODE_OPTIONS: --max-old-space-size=2048
    ports:
      - "5064:5064"
```

Once you're done, save with `Ctrl+O` and `Enter`, then exit with `Ctrl+X`.&#x20;

**Now, let's break down what we are configuring in this `yml` file.**

1. `image: chainsafe/lodestar:latest`: Pull and run the latest stable release of Lodestar
2. `container_name: lodestar_validator`: Name given to this docker container, which can be up to you.
3. `restart: unless-stopped`: Automatically restarts this container when your device restarts unless explicitly stopped by the user.
4. `volumes:`: Binds the folders on your host machine to the folders in the docker container so that they are accessible by the docker container. Here, we are binding the folders used by the `--dataDir,` `--importKeystores`, and `--importKeystoresPassword` flags
5. `network_mode: host`: Enables the docker container to share the network namespace with the host -&#x20;
   * i.e. `localhost` refers to both the host and the docker container, ports are shared between the host and the docker container
6. `command:`: The flags to run the Lodestar with. Similar to flags used in the systemd configuration method.
   * Each `-` indicates a line break
   * Variables with a `--` prefix are flags and the others are the values to the flags
   * The first value (`validator`) instructs Lodestar to run only the consensus client and without the validator client&#x20;
   * `--dataDir`: Specify the directory for Lodestar to store data related to the validator client
   * `--network`: Run the Validator Client service on the ETH Holesky testnet.
   * `--beacon-nodes`: URLs to connect to the main and backup consensus clients if any. This needs to be the same IP address set in your consensus client. Refer back [here](/installing-and-configuring-your-el+cl-clients/set-up-and-configure-consensus-layer-client) if you don't remember it.&#x20;
   * `--builder`: Required when using external builders to build blocks (e.g. MEV relays)
   * `--suggestedFeeRecipient`: ETH wallet address to receive rewards from block proposals and MEV bribes
   * `--doppelganger-detection`: Helps prevents slashing due to double signing by checking if your validator keys are already active on the network. ***Not a fool-proof solution.***
   * `--metrics`: Enable metrics for monitoring
   * `--metrics.port`: Set the port for retrieving metrics
   * `--graffiti`: Optional text to display on-chain when your validator proposes a block
7. `environment`: Tells Node.js to allow a larger amount of memory to be used before it starts garbage collection processes to free up memory.
8. `ports:` Maps the ports used by the docker container to the ports of the host device so that they are reachable via the 127.0.0.1  or localhost name spaces.

### Start the Lodestar Validator Client container

1\) Make sure you are in the same folder as the `docker-compose.yml` file you created earlier.

```sh
cd ~/lodestar_validator
```

&#x20;2\) Start the docker container.

```sh
docker compose up -d
```

**Expected output:**

<figure><img src="/files/Na3e8ThYycKk6QafdMwS" alt=""><figcaption></figcaption></figure>

3\) Make sure there are no error messages by monitoring the logs for a few minutes.

```sh
docker logs lodestar_validator -f
```

<figure><img src="/files/1cfWn9FO3WiEugURXwZy" alt=""><figcaption></figcaption></figure>

## Remove duplicates of validator keystores

To prevent configuration mistakes leading to double signing in the future, remove duplicate copies of the validator signing keystores once everything is running smoothly.

```sh
sudo rm -r ~/validator_keys
```

## Resources

* Git repository: <https://github.com/ChainSafe/lodestar-quickstart.git>
* Documentation: <https://chainsafe.github.io/lodestar/>
* Discord: <https://discord.gg/7Gdb4nFh>


# Lighthouse VC

### Download Lighthouse

Follow the steps in this previous section to download Lighthouse if you have not done so.

{% content-ref url="/pages/SBhehJ2kGIL4O4mmG7gj" %}
[Lighthouse BN](/installing-and-configuring-your-el+cl-clients/set-up-and-configure-consensus-layer-client/lighthouse-bn)
{% endcontent-ref %}

### Create a new user account

```sh
sudo useradd --no-create-home --shell /bin/false lighthousevalidator
```

### Prepare the validator data directory

1\) Create a new folders to store the validator client data, validator keystore, and the validator keystore password

```sh
sudo mkdir -p /var/lib/lighthouse_validator
```

2\) Run the validator key import process.

```sh
sudo lighthouse account validator import --network holesky --datadir /var/lib/lighthouse_validator --directory=$HOME/validator_keys
```

**Expected output:**

<figure><img src="/files/rDBi3v21yaLspgjluc6Q" alt=""><figcaption></figcaption></figure>

3\) Change the owner of this new folder to the `lighthousevalidator` user

4\) Restrict permissions on this new folder such that only the owner is able to read, write, and execute files in this folder

```sh
sudo chown -R lighthousevalidator:lighthousevalidator /var/lib/lighthouse_validator
sudo chmod 700 /var/lib/lighthouse_validator
```

### Configure the validator client service

Create a systemd configuration file for the Lighthouse Validator Client service to run in the background.

```bash
sudo nano /etc/systemd/system/lighthousevalidator.service
```

Paste the configuration parameters below into the file:

```
[Unit]
Description=Lighthouse Validator Client (Holesky)
Wants=network-online.target
After=network-online.target

[Service]
User=lighthousevalidator
Group=lighthousevalidator
Type=simple
Restart=always
RestartSec=5
ExecStart=/usr/local/bin/lighthouse vc \
  --network holesky \
  --datadir /var/lib/lighthouse_validator \
  --builder-proposals \
  --beacon-nodes http://<Internal_IP_address>:5052 \
  --metrics \
  --metrics-port 8108 \
  --suggested-fee-recipient <your_designated_ETH_wallet address> \
  --graffiti="<your_graffiti>" \
  --enable-doppelganger-protection

[Install]
WantedBy=multi-user.target
```

Once you're done, save with `Ctrl+O` and `Enter`, then exit with `Ctrl+X`. Understand and review your configuration summary below, and amend if needed.

**Lighthouse Validator Client configuration summary:**

1. `--network`: Run the validator client on the Holesky testnet
2. `--data-dir`: Specify the directory for Lighthouse to store the validator info
3. `--builder-proposals`: Required when using external builders to build blocks (e.g. MEV relays)
4. `--beacon-nodes`: URLs to connect to the main and backup consensus clients if any. This needs to be the same IP address set in your consensus client. Refer back [here](/installing-and-configuring-your-el+cl-clients/set-up-and-configure-consensus-layer-client) if you don't remember it. Use multiple comma-separated endpoints here to configure fallback beacon nodes for your validator.&#x20;
5. `--metrics`: Enable metrics for monitoring
6. `--metrics-port`: Set the port for retrieving metrics
7. `--suggested-fee-recipient`: ETH wallet address to receive rewards from block proposals and MEV bribes
8. `--graffiti`: Optional text to display on-chain when your validator proposes a block
9. `--enable-doppelganger-protection`: Helps prevents slashing due to double signing by checking if your validator keys are already active on the network. ***Not a fool-proof solution.***

### Start the Lighthouse Validator Client service

Reload the systemd daemon to register the changes made, start the Lighthouse Validator Client, and check its status to make sure its running.

```bash
sudo systemctl daemon-reload
sudo systemctl start lighthousevalidator.service
sudo systemctl status lighthousevalidator.service
```

The output should say the Lighthouse Validator Client is **“active (running)”.** Press CTRL-C to exit and the Lighthouse Validator Client will continue to run.

Use the following command to check the logs for any warnings or errors:

```bash
sudo journalctl -fu lighthousevalidator -o cat | ccze -A
```

**Expected output:**

<figure><img src="/files/BQDFFNbD95VzqUv0Wvgx" alt=""><figcaption></figcaption></figure>

{% hint style="info" %}
You will see some warnings if your beacon node (consensus client) is not yet synced.
{% endhint %}

Press `CTRL-C` to exit.

If the Lighthouse Validator Client service is running smoothly, we can now enable it to fire up automatically when rebooting the system.

```bash
sudo systemctl enable lighthousevalidator
```

**Expected output:**

```
Created symlink /etc/systemd/system/multi-user.target.wants/lighthousevalidator.service → /etc/systemd/system/lighthousevalidator.service.
```

### Remove duplicates of validator keystores

To prevent configuration mistakes leading to double signing in the future, remove duplicate copies of the validator signing keystores once everything is running smoothly.

```sh
sudo rm -r ~/validator_keys
```

## Resources

* Releases: <https://github.com/sigp/lighthouse/releases>
* Documentation: <https://lighthouse-book.sigmaprime.io/intro.html>
* Discord: <https://discord.com/invite/TX7HKfgJN3>


# Prysm VC

{% hint style="info" %}
The Prysm validator client only works with a Prysm Consensus Client.
{% endhint %}

### Download Prysm

[Download](https://github.com/prysmaticlabs/prysm/releases) the latest version of the Prysm validator client.

```bash
cd
curl -LO https://github.com/prysmaticlabs/prysm/releases/download/v5.1.2/validator-v5.1.2-linux-amd64
curl -LO https://github.com/prysmaticlabs/prysm/releases/download/v5.1.2/validator-v5.1.2-linux-amd64.sha256
```

Run the checksum verification process.

```sh
sha256sum --check validator-v5.1.2-linux-amd64.sha256
```

{% hint style="info" %}
Each downloadable file comes with it's own checksum. Replace the actual checksum and URL of the download link in the code block above.

{% hint style="info" %}
Make sure to choose the amd64 version. Right click on the linked text and select "copy link address" to get the URL of the download link to `curl`.
{% endhint %}
{% endhint %}

***Expected output:** Verify output of the checksum verification.*

```
validator-v5.1.2-linux-amd64: OK
```

If checksum is verified, extract the files and move them into the `(/usr/local/bin)` directory for neatness and best practice. Then, clean up the duplicated copies.

<pre class="language-bash"><code class="lang-bash">mv validator-v5.1.2-linux-amd64 prysmvalidator #rename the binary file for easy reference
chmod +x prysmvalidator
<strong>sudo cp prysmvalidator /usr/local/bin
</strong><strong>rm -r prysmvalidator validator-v5.1.2-linux-amd64.sha256
</strong></code></pre>

### Create a new user account

```sh
sudo useradd --no-create-home --shell /bin/false prysmvalidator
```

### Prepare the validator data directory

1\) Create a new folders to store the validator client data, validator keystore, and the validator keystore password

```sh
sudo mkdir -p /var/lib/prysm_validator
```

2\) Run the validator key import process.

```sh
sudo /usr/local/bin/prysmvalidator accounts import --keys-dir=$HOME/validator_keys --wallet-dir=/var/lib/prysm_validator --holesky
```

**Note:** You will be prompted to accept the terms of use, create a new password for the Prysm wallet, and enter the password of your validator keystore.

**Expected output:**

<figure><img src="/files/HVnjlX2XIzsNl8tAxfIi" alt=""><figcaption></figcaption></figure>

3\) Create a plain text password file for the Prysm wallet

```sh
sudo nano /var/lib/prysm_validator/password.txt
```

Enter the password you set during the validator keystore import process. Then, save + exit with `CTRL+O`, `ENTER`, `CTRL+C`.

4\) Change the owner of this new folder to the `prysmvalidator` user

5\) Restrict permissions on this new folder such that only the owner is able to read, write, and execute files in this folder

```sh
sudo chown -R prysmvalidator:prysmvalidator /var/lib/prysm_validator
sudo chmod 700 /var/lib/prysm_validator
```

### Configure the validator client service

Create a systemd configuration file for the Lighthouse Validator Client service to run in the background.

```bash
sudo nano /etc/systemd/system/prysmvalidator.service
```

Paste the configuration parameters below into the file:

```
[Unit]
Description=Prysm Validator Client (Holesky)
Wants=network-online.target
After=network-online.target

[Service]
User=prysmvalidator
Group=prysmvalidator
Type=simple
Restart=always
RestartSec=5
ExecStart=/usr/local/bin/prysmvalidator \
  --accept-terms-of-use \
  --holesky \
  --datadir=/var/lib/prysm_validator \
  --enable-builder \
  --beacon-rpc-provider=<Internal_IP_address>:4000 \
  --beacon-rpc-gateway-provider=<Internal_IP_address>:5052 \
  --wallet-dir=/var/lib/prysm_validator \
  --wallet-password-file=/var/lib/prysm_validator/password.txt \
  --monitoring-port=8108 \
  --suggested-fee-recipient=<your_designated_ETH_wallet address> \
  --graffiti="<your_graffiti>" \
  --enable-doppelganger

[Install]
WantedBy=multi-user.target
```

Once you're done, save with `Ctrl+O` and `Enter`, then exit with `Ctrl+X`. Understand and review your configuration summary below, and amend if needed.

**Lighthouse Validator Client configuration summary:**

1. `--accept-terms-of-use`: Accept the terms and conditions.
2. `--holesky`: Run the validator client on the Holesky testnet
3. `--datadir`: Specify the directory for Lighthouse to store the validator info
4. `--enable-builder`: Required when using external builders to build blocks (e.g. MEV relays)
5. `--beacon-rpc-provider/beacon-rpc-gateway-provider`: URLs to connect to the main and backup ***Prysm*** consensus clients if any. This needs to be the same IP address set in your ***Prysm*** consensus client. Refer back [here](/installing-and-configuring-your-el+cl-clients/set-up-and-configure-consensus-layer-client) if you don't remember it. Use multiple comma-separated endpoints here to configure fallback beacon nodes for your validator. &#x20;
6. `--wallet-dir`: Path to a wallet directory on-disk for Prysm validator accounts
7. `--wallet-password-file`: Path to a plain-text, .txt file containing your wallet password
8. `--monitoring-port`: Set the port for retrieving metrics
9. `--suggested-fee-recipient`: ETH wallet address to receive rewards from block proposals and MEV bribes
10. `--graffiti`: Optional text to display on-chain when your validator proposes a block
11. `--enable-doppelganger`: Helps prevents slashing due to double signing by checking if your validator keys are already active on the network. ***Not a fool-proof solution.***

### Start the Prysm Validator Client service

Reload the systemd daemon to register the changes made, start the Prysm Validator Client, and check its status to make sure its running.

```bash
sudo systemctl daemon-reload
sudo systemctl start prysmvalidator.service
sudo systemctl status prysmvalidator.service
```

The output should say the Prysm Validator Client is **“active (running)”.** Press CTRL-C to exit and the Prysm Validator Client will continue to run.

Use the following command to check the logs for any warnings or errors:

```bash
sudo journalctl -fu prysmvalidator -o cat | ccze -A
```

**Expected output:**

<figure><img src="/files/sVkbP1IfqFbsyosMqVEa" alt=""><figcaption></figcaption></figure>

{% hint style="info" %}
You will see some warnings if your beacon node (consensus client) is not yet synced.
{% endhint %}

Press `CTRL-C` to exit.

If the Prysm Validator Client service is running smoothly, we can now enable it to fire up automatically when rebooting the system.

```bash
sudo systemctl enable prysmvalidator
```

**Expected output:**

```
Created symlink /etc/systemd/system/multi-user.target.wants/prysmvalidator.service → /etc/systemd/system/prysmvalidator.service.
```

### Remove duplicates of validator keystores

To prevent configuration mistakes leading to double signing in the future, remove duplicate copies of the validator signing keystores once everything is running smoothly.

```sh
sudo rm -r ~/validator_keys
```

## Resources

* Releases: <https://github.com/prysmaticlabs/prysm/releases>
* Documentation: <https://docs.prylabs.network/docs/getting-started>
* Discord: <https://discord.gg/prysmaticlabs>


# Depositing 32 ETH into your validator

## Warnings

* Follow the instructions of this section closely. We will be using Metamask to connect to the Ethereum Launchpad website to complete the deposit process
* **DO NOT TRANSFER ETH DIRECTLY INTO THE BEACON DEPOSIT CONTRACT ADDRESS**
* Spare no effort in checking (and double checking) all details before making the transaction - *e.g. public keys of validator signing keys and the deposit data file matches, verify smart contract address of the deposit contract from multiple sources*
* Make sure both your execution and consensus layer clients are fully synced and running without errors before you make the deposit

## Whitelist your wallet with ETHStaker&#x20;

1. First, go to <https://holesky-faucet.pk910.de/> to try mining the full 32 testnet ETH.&#x20;
   * If successful, skip to the next section
   * If not, just mine a small amount and continue on the following steps.
2. Join the discord server here - <https://discord.gg/ethstaker>
3. Join the #cheap-holesky-validator channel
4. Type “/cheap-holeskysky-deposit `<your ETH address>` ” in the text box and press enter
5. Click on the link generated (ie. the [**Signer.is**](http://Signer.is) text shown below)&#x20;

   <figure><img src="/files/pr7ndTci400sDKfwfLm5" alt=""><figcaption></figcaption></figure>
6. Connect your Metamask wallet and sign the message
7. Copy the URL and paste it in the Enter Signature box.

## Reviewing mandatory disclaimers

Go to <https://holesky.launchpad.ethstaker.cc/> on your browser and click on **"Become a validator"**

<figure><img src="/files/otv37ARitQjS01XxdnLr" alt=""><figcaption></figcaption></figure>

Click through and read all disclaimers carefully.

<figure><img src="/files/e1pU41VYAIPqLvezsNWE" alt=""><figcaption></figcaption></figure>

Continue clicking through until you reach the **"Upload deposit data"** section. Don't worry about the "Choose client" and "Generate keys" sections as you would already have dealt with those if you followed this guide in order.&#x20;

<figure><img src="/files/Hbz3dXRc5H2pQiujp6mH" alt=""><figcaption></figcaption></figure>

## Making the deposit

Upload your `deposit_data-<timestamp>.json` file you generated during the earlier section of the guide into the box above and click through until you see the following page.

<figure><img src="/files/OrSoPqF3v8bLMBFIRwAb" alt=""><figcaption></figcaption></figure>

Here you will need to check all disclaimer boxes before you can proceed. ***But before that,** make sure you are not being phished by* *clicking on **"Learn here how to do it safely"** as highlighted above.*

You will be brought to a page where you can reveal the address of the Ethereum Beacon Deposit Contract. Check that the address displayed in your wallet is the same before you execute the transaction approval.&#x20;

Additionally, you can also check the address against the following sources:

1. [Etherscan](https://etherscan.io/address/0x00000000219ab540356cBB839Cbe05303d7705Fa)
2. [Consensys](https://consensys.net/blog/news/eth2-phase-0-deposit-contract-address/)
3. [Ethereum Foundation](https://ethereum.org/en/staking/deposit-contract/)

{% hint style="info" %}
The checks you perform above will point you to the deposit contract address for Mainnet. The deposit contract address on Holesky is:

**`0x4242424242424242424242424242424242424242`**
{% endhint %}

Once you are ready, click on **"Send Deposit"** and follow the instructions on Metamask or your other wallets.

<figure><img src="/files/vsPisNMijGcr9qCFVFc6" alt=""><figcaption></figcaption></figure>

Once your transaction goes through, you will be able to click on the external links highlighted in yellow to track the activation progress and performance of your validator. Bookmark these links so that you can come back to them easily.

<figure><img src="/files/fblyi6nulEwdGv95MX9g" alt=""><figcaption></figcaption></figure>

Don't panic if it doesn't show up initially! Give it some time to update itself :)&#x20;

<figure><img src="/files/HxFJvMaCM0gkfN7s2L7u" alt=""><figcaption></figcaption></figure>

**Congratulations! You are now a proud contributor to the decentralisation of the Ethereum network** :vulcan:


# Exiting your validator

Follow the dedicated guide to exit your validators below put together by Remy Roy.&#x20;

{% embed url="<https://github.com/eth-educators/ethstaker-guides/blob/main/voluntary-exit.md>" %}


# Set up monitoring suite

We will be using the following monitoring suite:

1. **Prometheus** - Expose runtime data from the Execution and Consensus clients
2. **Node Exporter** - Expose OS metrics for the Ubuntu server
3. **Grafana** - Creates dashboards from Prometheus and Node Exporter data
4. **Google Uptime Check** - Periodically pings your node to make sure it is running and alerts you when it doesn't get a response
5. **Beaconcha.in App API** - Alerts you when your node misses attestations, proposes a new block, or (touch wood) gets slashed. Also able to monitor device level diagnostics and other useful metrics such as CPU usage, RAM usage, disk space usage, networking throughput, peer count, and status of your execution & consensus layer clients
6. **Backup beacon node** - You can use the Google Cloud GUI to monitor this node


# Installing & configuring Prometheus

### Download and install Prometheus

[Download](https://prometheus.io/download/) the latest version of Prometheus and run the checksum verification process to ensure that the downloaded file has not been tampered with.

```bash
cd
curl -LO https://github.com/prometheus/prometheus/releases/download/v2.55.0/prometheus-2.55.0.linux-amd64.tar.gz
echo "7a6b6d5ea003e8d59def294392c64e28338da627bf760cf268e788d6a8832a23 prometheus-2.55.0.linux-amd64.tar.gz" | sha256sum --check
```

{% hint style="info" %}
Each downloadable file comes with it's own checksum. Replace the actual checksum and URL of the download link in the code block above.

{% hint style="info" %}
Make sure to choose the amd64 version. Right click on the linked text and select "copy link address" to get the URL of the download link to `curl`.
{% endhint %}
{% endhint %}

***Expected output:** Verify output of the checksum verification*

```
prometheus-2.55.0.linux-amd64.tar.gz: OK
```

If checksum is verified, extract the files and move them into the `/usr/local/bin` and `/etc/prometheus` directories for neatness and best practice. Then, clean up the duplicated copies.

```bash
tar xvf prometheus-2.55.0.linux-amd64.tar.gz
sudo cp prometheus-2.55.0.linux-amd64/prometheus /usr/local/bin/
sudo cp prometheus-2.55.0.linux-amd64/promtool /usr/local/bin/
sudo cp -r prometheus-2.55.0.linux-amd64/consoles /etc/prometheus
sudo cp -r prometheus-2.55.0.linux-amd64/console_libraries /etc/prometheus
sudo rm -r prometheus-2.55.0.linux-amd64 prometheus-2.55.0.linux-amd64.tar.gz
```

### Configure Prometheus&#x20;

Create an account (`prometheus`) without server access for Prometheus to run as a background service. This restricts potential attackers to only the Prometheus service in the unlikely event that they manage to infiltrate via a compromised client update.

```bash
sudo useradd --no-create-home --shell /bin/false prometheus
```

Create a directory for Prometheus to store the monitoring data. Then set the owner of this and the `/etc/prometheus` directory to `prometheus` so that this user can read and write to the directories.

```bash
sudo mkdir -p /var/lib/prometheus
sudo chown -R prometheus:prometheus /var/lib/prometheus
sudo chown -R prometheus:prometheus /etc/prometheus
```

Create a configuration file so that Prometheus knows where to pull data from.

```bash
sudo nano /etc/prometheus/prometheus.yml
```

Paste the configuration parameters below into the file:

**1) General + execution client parameters:**

{% tabs %}
{% tab title="Nethermind" %}

```
global:
  scrape_interval: 15s
scrape_configs:
  - job_name: prometheus
    static_configs:
      - targets:
          - localhost:9090
  - job_name: node_exporter
    static_configs:
      - targets:
          - localhost:9100
  - job_name: nethermind
    static_configs:
      - targets:
          - localhost:6060
```

{% endtab %}

{% tab title="Besu" %}

```
global:
  scrape_interval: 15s
scrape_configs:
  - job_name: prometheus
    static_configs:
      - targets:
          - localhost:9090
  - job_name: node_exporter
    static_configs:
      - targets:
          - localhost:9100
  - job_name: 'besu'
    scrape_interval: 15s
    scrape_timeout: 10s
    metrics_path: /metrics
    scheme: http
    static_configs:
      - targets:
          - localhost:9545 
```

{% endtab %}

{% tab title="Geth" %}

```
global:
  scrape_interval: 15s
scrape_configs:
  - job_name: prometheus
    static_configs:
      - targets:
          - localhost:9090
  - job_name: node_exporter
    static_configs:
      - targets:
          - localhost:9100
  - job_name: 'geth'
    scrape_interval: 15s
    scrape_timeout: 10s
    metrics_path: /debug/metrics/prometheus
    scheme: http
    static_configs:
      - targets:
          - localhost:6060 
```

{% endtab %}

{% tab title="Erigon" %}

```
global:
  scrape_interval: 15s
scrape_configs:
  - job_name: prometheus
    static_configs:
      - targets:
          - localhost:9090
  - job_name: node_exporter
    static_configs:
      - targets:
          - localhost:9100
  - job_name: 'erigon'
    scrape_interval: 15s
    scrape_timeout: 10s
    metrics_path: /debug/metrics/prometheus
    scheme: http
    static_configs:
      - targets:
          - localhost:6060 
```

{% endtab %}

{% tab title="Reth" %}

```
global:
  scrape_interval: 15s
scrape_configs:
  - job_name: prometheus
    static_configs:
      - targets:
          - localhost:9090
  - job_name: node_exporter
    static_configs:
      - targets:
          - localhost:9100
  - job_name: 'reth'
    scrape_interval: 15s
    scrape_timeout: 10s
    metrics_path: "/"
    scheme: http
    static_configs:
      - targets:
         - localhost:6060 
```

{% endtab %}
{% endtabs %}

**2) Consensus client parameters:**

According to your selected consensus client, append the following block to the general + execution client parameters above.

{% tabs %}
{% tab title="Teku" %}

```
  - job_name: "teku_beacon" #for consensus client
    scrape_timeout: 10s
    metrics_path: /metrics
    scheme: http
    static_configs:
      - targets: ["localhost:8009"]
  - job_name: "teku_validator" #for validator client
    scrape_timeout: 10s
    metrics_path: /metrics
    scheme: http
    static_configs:
      - targets: ["localhost:8108"]

```

{% endtab %}

{% tab title="Nimbus" %}

<pre><code><strong>  - job_name: 'Nimbus_beacon' #for consensus client
</strong>    metrics_path: /metrics
    static_configs:
      - targets: ['localhost:8009']
  - job_name: 'Nimbus_validator' #for validator client
    metrics_path: /metrics
    static_configs:
      - targets: ['localhost:8108']
</code></pre>

{% endtab %}

{% tab title="Lodestar" %}

```
  - job_name: 'lodestar_beacon' #for consensus client
    metrics_path: /metrics
    static_configs:
      - targets: ['localhost:8009']
  - job_name: 'lodestar_validator' #for validator client
    metrics_path: /metrics
    static_configs:
      - targets: ['localhost:5064']
```

{% endtab %}

{% tab title="Lighthouse" %}

<pre><code><strong>  - job_name: 'lighthouse_beacon' #for consensus client
</strong>    metrics_path: /metrics    
    static_configs:
      - targets: ['localhost:8009']
  - job_name: 'lighthouse_validator' #for validator client
    metrics_path: /metrics
    static_configs:
      - targets: ['localhost:8108']
</code></pre>

{% endtab %}

{% tab title="Prysm" %}

```
  - job_name: 'prysm_beacon' #for consensus client   
    metrics_path: /metrics
    static_configs:
      - targets: ['localhost:8009']
  - job_name: 'prysm_validator' #for validator client
    metrics_path: /metrics  
    static_configs:
      - targets: ['localhost:8108']
```

{% endtab %}
{% endtabs %}

Once you're done, save with `Ctrl+O` and `Enter`, then exit with `Ctrl+X`.

Next, create a systemd configuration file for the Prometheus service to run in the background.

```bash
sudo nano /etc/systemd/system/prometheus.service
```

Paste the configuration parameters below into the file:

```bash
[Unit]
Description=Prometheus
Wants=network-online.target
After=network-online.target
[Service]
Type=simple
User=prometheus
Group=prometheus
Restart=always
RestartSec=5
ExecStart=/usr/local/bin/prometheus \
  --config.file=/etc/prometheus/prometheus.yml \
  --storage.tsdb.path=/var/lib/prometheus \
  --web.console.templates=/etc/prometheus/consoles \
  --web.console.libraries=/etc/prometheus/console_libraries
[Install]
WantedBy=multi-user.target
```

Once you're done, save with `Ctrl+O` and `Enter`, then exit with `Ctrl+X`.

### Start the Prometheus service

Reload the systemd daemon to register the changes made, start Prometheus, and check its status to make sure its running.

```bash
sudo systemctl daemon-reload
sudo systemctl start prometheus.service
sudo systemctl status prometheus.service
```

**Expected output:** The output should say Prometheus is **“active (running)”.** Press CTRL-C to exit and Prometheus will continue to run.

<figure><img src="/files/MZboV9PqIgCrZUo7AF5b" alt=""><figcaption><p>sudo systemctl status prometheus.service</p></figcaption></figure>

Use the following command to check the logs for any warnings or errors:

```bash
sudo journalctl -fu prometheus -o cat | ccze -A
```

**Expected output:**

<figure><img src="/files/zKXxcMBHtByOwqY0fe2A" alt=""><figcaption></figcaption></figure>

Press `CTRL-C` to exit.

If the Prometheus service is running smoothly, we can now enable it to fire up automatically when rebooting the system.

```bash
sudo systemctl enable prometheus.service
```


# Installing & configuring Node Exporter

### Download and install Node Exporter

[Download](https://prometheus.io/download/#node_exporter) the latest version of Node Exporter and run the checksum verification process to ensure that the downloaded file has not been tampered with.

```bash
cd
curl -LO https://github.com/prometheus/node_exporter/releases/download/v1.8.2/node_exporter-1.8.2.linux-amd64.tar.gz
echo "6809dd0b3ec45fd6e992c19071d6b5253aed3ead7bf0686885a51d85c6643c66 node_exporter-1.8.2.linux-amd64.tar.gz" | sha256sum --check
```

{% hint style="info" %}
Each downloadable file comes with it's own checksum. Replace the actual checksum and URL of the download link in the code block above.

{% hint style="info" %}
Make sure to choose the amd64 version. Right click on the linked text and select "copy link address" to get the URL of the download link to `curl`.
{% endhint %}
{% endhint %}

***Expected output:** Verify output of the checksum verification*

```
node_exporter-1.8.2.linux-amd64.tar.gz: OK
```

If checksum is verified, extract the files and move them into the `(/usr/local/bin)` directory for neatness and best practice. Then, clean up the duplicated copies.

```bash
tar xvf node_exporter-1.8.2.linux-amd64.tar.gz
sudo cp node_exporter-1.8.2.linux-amd64/node_exporter /usr/local/bin
rm -r node_exporter-1.8.2.linux-amd64 node_exporter-1.8.2.linux-amd64.tar.gz
```

### Configure the Node Exporter service

Create an account (`node_exporter`) without server access for Node Exporter to run as a background service. This restricts potential attackers to only the Node Exporter service in the unlikely event that they manage to infiltrate via a compromised client update.

```bash
sudo useradd --no-create-home --shell /bin/false node_exporter
```

Create a systemd configuration file for the Node Exporter service to run in the background.

```bash
sudo nano /etc/systemd/system/node_exporter.service
```

Paste the configuration parameters below into the file:

```bash
[Unit]
Description=Node Exporter
Wants=network-online.target
After=network-online.target
[Service]
User=node_exporter
Group=node_exporter
Type=simple
Restart=always
RestartSec=5
ExecStart=/usr/local/bin/node_exporter
[Install]
WantedBy=multi-user.target
```

Once you're done, save with `Ctrl+O` and `Enter`, then exit with `Ctrl+X`.

### Start the Node Exporter service

Reload systemd to register the changes made, start the Node Exporter service, and check its status to make sure its running.

```bash
sudo systemctl daemon-reload
sudo systemctl start node_exporter.service
sudo systemctl status node_exporter.service
```

**Expected output:** The output should say Node Exporter is **“active (running)”.** Press CTRL-C to exit and Node Exporter will continue to run.

<figure><img src="/files/BJU9vN4rv6NDNjKKAYIs" alt=""><figcaption><p>sudo systemctl status node_exporter.service</p></figcaption></figure>

Use the following command to check the logs of Teku Beacon Node’s syncing process. Watch out for any warnings or errors.

```bash
sudo journalctl -fu node_exporter -o cat | ccze -A
```

**Expected output:**

<figure><img src="/files/RFGHIdsx1JZ30xebpznp" alt=""><figcaption></figcaption></figure>

Press `Ctrl+C` to exit monitoring.

If the Node Exporter service is running smoothly, we can now enable it to fire up automatically when rebooting the system.

```bash
sudo systemctl enable node_exporter.service
```


# Installing & configuring Grafana

### Download and install Grafana

Install Grafana using the APT package manager - Download the Grafana GPG key, add Grafana to the APT sources, refresh the apt cache, and check that Grafana has been added to the APT repository.

```bash
wget -q -O - https://packages.grafana.com/gpg.key | sudo apt-key add -
sudo add-apt-repository "deb https://packages.grafana.com/oss/deb stable main"
sudo apt update
apt-cache policy grafana
```

**Expected output:** Ensure the top-most version matches with latest version here - <https://grafana.com/grafana/download>

```bash
grafana:
  Installed: (none)
  Candidate: 10.0.3
  Version table:
     10.0.3 500
        500 <https://packages.grafana.com/oss/deb> stable/main amd64 Packages
     10.0.2 500
        500 <https://packages.grafana.com/oss/deb> stable/main amd64 Packages
     10.0.1 500
        500 <https://packages.grafana.com/oss/deb> stable/main amd64 Packages
```

Run the installation command.

```bash
sudo apt install -y grafana
```

### Start the Grafana server.

```bash
sudo systemctl start grafana-server
sudo systemctl status grafana-server
```

The output should say Grafana is **“active (running)”.** Press CTRL-C to exit and Grafana will continue to run.

Use the following command to check the logs for any warnings or errors:

```bash
sudo journalctl -fu grafana-server -o cat | ccze -A
```

Press `CTRL-C` to exit.

If the Grafana service is running smoothly, we can now enable it to fire up automatically when rebooting the system.

```bash
sudo systemctl enable grafana-server
```

### Configure the Grafana Dashboard

1. go to `http://<yourserverip>:3000/`
2. Enter `admin` for both username and password
3. Select `Data Sources` and click on `Add data source` , then choose **Prometheus** and enter [**http://localhost:9090**](http://localhost:9090) for the URL
4. Setup dashboards - On the left menu bar, click on **Dashboards >> Import**
   * Execution client dashboard&#x20;
     * **Nethermind:** Paste the JSON text from [here](https://raw.githubusercontent.com/NethermindEth/metrics-infrastructure/master/grafana/provisioning/dashboards/nethermind.json)
     * **Besu:** Enter the dashboard ID - `10273`
     * **Geth:** Enter the dashboard ID - `13877`
   * Consensus client dashboard&#x20;
     * **Teku:** Enter the dashboard ID - `16737`
       * **Nimbus:** Paste the JSON text from the options below
         * [Nimbus Github](https://raw.githubusercontent.com/status-im/nimbus-eth2/stable/grafana/beacon_nodes_Grafana_dashboard.json)
         * [Metanull](https://github.com/metanull-operator/eth2-grafana/blob/master/nimbus/eth2-grafana-nimbus-dashboard.json)
       * **Lodestar:** Paste the JSON text from [here](https://raw.githubusercontent.com/ChainSafe/lodestar/stable/dashboards/lodestar_summary.json)
       * **Lighthouse**: Paste the JSON text from [here](https://raw.githubusercontent.com/sigp/lighthouse-metrics/master/dashboards/Summary.json)
       * **Prysm:** Paste the JSON text from [here](https://raw.githubusercontent.com/GuillaumeMiralles/prysm-grafana-dashboard/master/less_10_validators.json)
   * Node Exporter dashboard - Paste the JSON text [here](https://github.com/samuelclk/ETH_full_home_staking_guide/blob/main/monitoring-maintenance-and-updates/set-up-monitoring-suite/Node-exporter-grafana-json)
5. Select `Prometheus` from the "Select a Prometheus data source here" drop down field.

### Screenshot samples of Grafana Dashboard

#### Execution client:

<figure><img src="/files/4Qxt73XK0sucmbguDTZo" alt=""><figcaption></figcaption></figure>

#### Consensus client:

<figure><img src="/files/UcEw4pHvHhYVG9Dnb7jY" alt=""><figcaption></figcaption></figure>

#### Node Exporter:

<figure><img src="/files/RLnMPsKSQuGlrcq7SWwC" alt=""><figcaption></figcaption></figure>

### \[Optional] Pushgateway

{% hint style="info" %}
This dependency is specific to the Nethermind execution layer client to enable the Grafana monitoring dashboard to work properly if you are following along the Nethermind documentation.
{% endhint %}

[Download ](https://prometheus.io/download/#pushgateway)the latest version and the checksums list.

```sh
curl -LO https://github.com/prometheus/pushgateway/releases/download/v1.10.0/pushgateway-1.10.0.linux-amd64.tar.gz
echo "e2310c978da19362f2c7f91668550fdbbbb7421f7dfc8eb81a927e017f7b8d17  pushgateway-1.10.0.linux-amd64.tar.gz" | sha256sum --check
```

***Expected output:** Verify output of the checksum verification*

```
pushgateway-1.10.0.linux-amd64.tar.gz: OK
```

If checksum is verified, extract the files and move them into the `(/usr/local/bin)` directory for neatness and best practice.&#x20;

```sh
tar xvf pushgateway-1.10.0.linux-amd64.tar.gz
cd pushgateway-1.10.0.linux-amd64
sudo cp pushgateway /usr/local/bin
```

Then, clean up the duplicated copies.

```sh
cd
rm -r pushgateway-1.10.0.linux-amd64 pushgateway-1.10.0.linux-amd64.tar.gz
```

Create an account (`pushgateway`) without server access for Pushgateway to run as a background service.

```sh
sudo useradd --no-create-home --shell /bin/false pushgateway
```

Create the systemd configuration file to run Pushgateway.

```sh
sudo nano /etc/systemd/system/pushgateway.service
```

Paste the following contents into the configuration file.

```
[Unit]
Description=Prometheus Pushgateway
After=network.target
Wants=network.target

[Service]
User=pushgateway
Group=pushgateway
Type=simple
Restart=always
RestartSec=5
ExecStart=/usr/local/bin/pushgateway

[Install]
WantedBy=default.target
```

Once you're done, save with `Ctrl+O` and `Enter`, then exit with `Ctrl+X`.

Start the Pushgateway service.

```sh
sudo systemctl daemon-reload
sudo systemctl start pushgateway
sudo systemctl enable pushgateway
sudo systemctl status pushgateway
```

**Expected output:** The output should say Pushgateway is **“active (running)”.** Press CTRL-C to exit and Pushgateway will continue to run.

Monitor for causes of error messages otherwise.&#x20;

```sh
sudo journalctl -fu pushgateway -o cat | ccze -A
```


# Beaconcha.in App API

## Beaconcha.in website settings

1\) Go to <https://holesky.beaconcha.in> on your browser and sign up for an account.

2\) Download the beaconcha.in app on your mobile phone.

3\) Once you are logged in, click on your User icon on the top right corner and select ***"Settings".***

<figure><img src="/files/BIw9TV1jS3KL22oAWdP4" alt=""><figcaption></figcaption></figure>

Click on the ***"Mobile App"*** tab and select ***"Desktop"*** as the Architecture option.

<figure><img src="/files/sEE3QUOcFEnWvrqUvdE0" alt=""><figcaption></figcaption></figure>

Select your consensus layer client from the list and copy the resulting flag with your own unique API key. As you can see, I have redacted my API key below and you should also make sure not to reveal yours.

<figure><img src="/files/CLx0S1PxDGqBczG4x6T1" alt=""><figcaption></figcaption></figure>

## Validator node settings

Next, you will SSH into your validator node and add this flag into your Teku (or other CL) client.

Once you are logged in to your validator node, run the following command to open the configuration file of your Teku Beacon Node:

```bash
sudo nano /etc/systemd/system/tekubeacon.service
```

Add in the flag you copied earlier into the configuration file.

```bash
[Unit]
Description=Teku Beacon Node (Holesky)
Wants=network-online.target
After=network-online.target
[Service]
User=teku
Group=teku
Type=simple
Restart=always
RestartSec=5
Environment="JAVA_OPTS=-Xmx6g"
Environment="TEKU_OPTS=-XX:-HeapDumpOnOutOfMemoryError"
ExecStart=/usr/local/bin/teku/bin/teku \
  --network=holesky \
  --data-path=/var/lib/teku \
  --ee-endpoint=http://127.0.0.1:8551 \
  --ee-jwt-secret-file=/var/lib/jwtsecret/jwt.hex \
  --initial-state=https://beaconstate.ethstaker.cc \
  --metrics-enabled=true \
  --rest-api-enabled=true \
  --builder-endpoint=http://127.0.0.1:18550 \
  --validators-builder-registration-default-enabled=true \
  --metrics-publish-endpoint 'https://beaconcha.in/api/v1/client/metrics?apikey=<your_API_key>
  
[Install]
WantedBy=multi-user.target
```

Press `CRTL + O`, `ENTER`, then `CTRL + X` to save and exit.

Next, do the same for the Teku validator client.

```bash
sudo nano /etc/systemd/system/tekuvalidator.service
```

Add in the same flag you copied earlier into the configuration file.

```
[Unit]
Description=Teku Validator Client (Holesky)
Wants=network-online.target
After=network-online.target
[Service]
User=teku
Group=teku
Type=simple
Restart=always
RestartSec=5
Environment="JAVA_OPTS=-Xmx6g"
Environment="TEKU_OPTS=-XX:-HeapDumpOnOutOfMemoryError"
ExecStart=/usr/local/bin/teku/bin/teku vc \
  --network=holesky \
  --data-path=/var/lib/teku \
  --validators-external-signer-public-keys=<validator pubkeys> \
  --validators-external-signer-url=http://<external_signer_IP_address> \
  --beacon-node-api-endpoint=http://localhost:5051,http://<backup_beacon_node>:<http/rest_port_number> \
  --validators-proposer-default-fee-recipient=<designated wallet address> \
  --validators-proposer-blinded-blocks-enabled=true\
  --validators-graffiti="<yourgraffiti>" \
  --metrics-enabled=true \
  --doppelganger-detection-enabled=true \
  --metrics-publish-endpoint 'https://beaconcha.in/api/v1/client/metrics?apikey=<your_API_key>
  
[Install]
WantedBy=multi-user.target
```

Press `CRTL + O`, `ENTER`, then `CTRL + X` to save and exit.

Reload the systemd daemon, then restart the Teku beacon node and Teku validator client service. Check that both services are **“active (running)”.**

```bash
sudo systemctl daemon-reload
sudo systemctl restart tekubeacon.service tekuvalidator.service
sudo systemctl status tekubeacon.service tekuvalidator.service
```

Monitor the journal logs of each service for any error messages.

* &#x20;**For Teku Beacon Node:**

```bash
sudo journalctl -fu tekubeacon -o cat | ccze -A
```

* **For Teku Validator Client:**

```bash
sudo journalctl -fu tekuvalidator -o cat | ccze -A
```

## Beaconcha.in App settings

Open up the Beaconcha.in mobile up and play around with it:&#x20;

* 1st tab - Summary of validators in your watchlist
* 2nd tab - Search for your Validator ID or public key and check the flag on the right to add it to your watchlist
* 3rd tab -  View more device level diagnostics like CPU, RAM, disk space, networking throughput, peer count etc
* 4th tab - Configure your notification preferences for your validator on the settings

![](/files/hfzjMT7dKslNai07btwV)![](/files/UMPmHtyqlof2gKjlxhDF)![](/files/4fFKC7afuMlchc8ruCZE)<img src="/files/JXMCEJdAVSJHGHjcgQ3E" alt="" data-size="original">


# Client Uptime Check

Sometimes, simply monitoring on-chain performance of your validators may not be sufficient.&#x20;

However, this method no longer works well for solo stakers running DVTs because your nodes could be offline without causing missed attestations - Recall that a cluster of X nodes is responsible for hosting Y validator keys.

This means that we either need to manually check on our nodes periodically (tedious) or act when the cluster fails to achieve consensus, leading to missed attestations, which can lead to free-rider problems.

## Custom Checker Chatbot (Free)

{% embed url="<https://github.com/samuelclk/ETH-node-alerts-TG-bot>" %}

This is a simple and lightweight uptime checker chatbot for Solo DVT operators to monitor as many nodes as you want (Like Google Uptime Check but free).

## Google Uptime Check (Not Free)

### Pre-requisites

You must configure port forwarding to ports 30303 and 9000 of your validator node in order for Google Uptime Check to work.

Refer to the [Preparing your virtual machine](/linux-os-networking-and-security/install-and-prepare-the-os) sub-section of this guide to understand how to.

### Setup

Log in to your google cloud console and type ***"monitoring"*** into the search bar. Then select the ***"Monitoring - Infrastructure and application quality checks"*** result.&#x20;

<figure><img src="/files/kG8v3GhhTisEOAw0aIuX" alt=""><figcaption></figcaption></figure>

Select ***"Uptime checks"*** on the left hand panel.

<figure><img src="/files/7iTDoTik5fKVbS8LPpxr" alt=""><figcaption></figcaption></figure>

Click on +CREATE UPTIME CHECK located at the top panel.

<figure><img src="/files/TCEZctixFDKTa71FEOJl" alt=""><figcaption></figcaption></figure>

You will be prompted to enter the following:

1. Protocol: `TCP`
2. Resource type: `URL`
3. Hostname: `<the external IP address of your beacon node>`
4. Port: `30303`&#x20;

***\*Port 30303 checks for the uptime of the execution layer client. Repeat this step for Port 9000 as well to check for the uptime of the consensus layer client.***

<figure><img src="/files/7NLIQug2kDlJWGRGeOQz" alt=""><figcaption></figcaption></figure>

Click through the default settings until ***Step 3 - Alert & Notification***. Then click on the ***"Notification channels"*** drop down and then ***"MANAGE NOTIFICATION CHANNELS"***

<figure><img src="/files/EBSEHu1IcGiAmJH8iPNY" alt=""><figcaption></figcaption></figure>

Set up your favourite notification channels. I like to keep it simple by using email as my alerts channel.&#x20;

<figure><img src="/files/iscWniN8kDqNBZw8woJH" alt=""><figcaption></figcaption></figure>

Next, key in the name of the alert you created and test the service. If the connection is successful, you will see a "success" message.

<figure><img src="/files/41u9NnZZ7eGBRfEJSE5B" alt=""><figcaption></figcaption></figure>

Go ahead and click ***"CREATE"***  to complete the setup.

*\*Repeat the same steps for ports 9000 and 3000.*

***Congrats! You have set up an alerts tool to check if each of your clients are running. This is useful to identify out-of-memory, database corruption, power/internet, or hardware issues.***

{% hint style="info" %}
This is not a free tool so monitor your usage after a month and adjust your uptime check duration accordingly.
{% endhint %}


# Maintenance & Updates


# Nethermind

## Updating Nethermind

### Download Nethermind and configure the service

[Download](https://downloads.nethermind.io/) the latest version of Nethermind and run the checksum verification process to ensure that the downloaded file has not been tampered with.

```bash
cd
curl -LO https://github.com/NethermindEth/nethermind/releases/download/1.25.4/nethermind-1.25.4-20b10b35-linux-x64.zip
echo "05848eaab4b1b621054ff507e8592d17 nethermind-1.25.4-20b10b35-linux-x64.zip" | md5sum --check
```

{% hint style="info" %}
Each downloadable file comes with it's own checksum (see below). Replace the actual checksum and URL of the download link in the code block above.

{% hint style="info" %}
Make sure to choose the amd64 version. Right click on the linked text and select "copy link address" to get the URL of the download link to `curl`.
{% endhint %}
{% endhint %}

<figure><img src="/files/kDo6RNo5C7HPM4HnI3QW" alt=""><figcaption></figcaption></figure>

***Expected output:** Verify output of the checksum verification*

```
nethermind-1.25.4-20b10b35-linux-x64.zip: OK
```

If checksum is verified, extract the files and move them into the `(/usr/local/bin)` directory for neatness and best practice. Then, clean up the duplicated copies.

```bash
unzip nethermind-1.25.4-20b10b35-linux-x64.zip -d nethermind
sudo cp -a nethermind /usr/local/bin/nethermind
rm -r nethermind-1.25.4-20b10b35-linux-x64.zip nethermind
```

### Restart the Nethermind service

Reload the systemd daemon to register the changes made, start Nethermind, and check its status to make sure its running.

```bash
sudo systemctl start nethermind.service
sudo systemctl status nethermind.service
```

**Expected output:** The output should say Nethermind is **“active (running)”.** Press `CTRL-C` to exit and Nethermind will continue to run.&#x20;

Use the following command to check the logs of Nethermind’s syncing process. Watch out for any warnings or errors.

```bash
sudo journalctl -fu nethermind -o cat | ccze -A
```

Press `CTRL-C` to exit.

## Pruning Nethermind

### Activating pruning mode

Your ETH validator node will use up the available disk space over time as the state grows. In order to avoid out-of-storage errors, it is advisable to prune your execution clients periodically.

Nethermind is able to run its pruning process in the background without interrupting it's operations but it is very heavy task so you will experience some performance degradation  during this time (\~20 - 30 hours).

To enable the pruning process for Nethermind, open up the `systemd` configuration file:

```bash
sudo nano /etc/systemd/system/nethermind.service
```

and append the following flags into the `[Service]` section of the file depending on your preference of pruning method.

{% tabs %}
{% tab title="Manual" %}

```
[Service]
<existing_flags> \
--Pruning.Mode=Hybrid \
--Pruning.FullPruningTrigger=Manual
```

This will start the pruning process once you reload the daemon and restart the service.
{% endtab %}

{% tab title="By remaining disk space" %}

<pre><code><strong>[Service]
</strong>&#x3C;existing_flags> \
--Pruning.Mode=Hybrid \
--Pruning.FullPruningTrigger=VolumeFreeSpace \
--Pruning.FullPruningThresholdMb=300000
</code></pre>

This will instruct Nethermind to activate its pruning mechanism once the amount of available free space on your disk falls below 300GB.

***Note:** The recommended threshold is 250GB but lets be a little more prudent.*
{% endtab %}

{% tab title="By disk space used" %}

```
[Service]
<existing_flags> \
--Pruning.Mode=Hybrid \
--Pruning.FullPruningTrigger=StateDbSize \
--Pruning.FullPruningThresholdMb=1200000
```

This will instruct Nethermind to activate its pruning process once the state size grows beyond 1.2TB.
{% endtab %}
{% endtabs %}

Save with `Ctrl+O` and `Enter`, then exit with `Ctrl+X`.

Restart the daemon and the Nethermind service.&#x20;

```
sudo systemctl daemon-reload
sudo systemctl restart nethermind.service
sudo systemctl status nethermind.service
```

**Expected output:** The status should say Nethermind is **"active (running)".**

### Monitoring pruning progress

If you have configured the pruning mode correctly, you should see the following logs&#x20;

**At initiation:**

> Full Pruning Ready to start: pruning garbage before state BLOCK\_NUMBER with root ROOT\_HASH.\
> **WARN**: Full Pruning Started on root hash ROOT\_HASH: do not close the node until finished or progress will be lost.

***\*As the warning states, do not restart your node from here on until the pruning process is completed.** Else you will have to restart the whole pruning process, or worse, end up with a corrupted database.*&#x20;

After a few minutes, you will start to see some progress logs:

> Full Pruning In Progress: 00:00:57.0603307 1.00 mln nodes mirrored.\
> Full Pruning In Progress: 00:01:40.3677103 2.00 mln nodes mirrored.\
> Full Pruning In Progress: 00:02:25.6437030 3.00 mln nodes mirrored.

When the pruning process is completed, you will see the following output:

> Full Pruning Finished: 15:25:59.1620756 1,560.29 mln nodes mirrored.

### Tips

The pruning process can take **more than 30 hours** to complete (depending on CPU and IO speeds). During this time, you may experience degraded performance on your validator node - i.e. missing \~10% of attestations.&#x20;

Hence, it is important to time your pruning schedule to avoid coinciding with your scheduled sync committee or block proposer duties. You can check for these below.

* [Check scheduled sync committee duties](https://www.coincashew.com/coins/overview-eth/guide-or-how-to-setup-a-validator-on-eth2-mainnet/part-ii-maintenance/checking-my-eth-validators-sync-committee-duties)
* [Check scheduled block proposal duties](https://wenmerge.com/block-proposer-schedule/)

If you want to trigger the pruning process immediately, set the threshold of the following flag to whatever amount your available disk space is left with.

> `--Pruning.FullPruningThresholdMb=<bytes>`

Run `df -h` on your terminal to find out how much available disk space you have remaining.&#x20;


# Besu

## Updating Besu

### Download Besu and configure the service

[Download](https://github.com/hyperledger/besu/releases) the latest version of Besu and run the checksum verification process to ensure that the downloaded file has not been tampered with.

```bash
cd
curl -LO https://hyperledger.jfrog.io/artifactory/besu-binaries/besu/24.1.2/besu-24.1.2.tar.gz
echo "082db8cf4fb67527aa0dd757e5d254b3b497f5027c23287f9c0a74a6a743bf08 besu-24.1.2.tar.gz" | sha256sum --check
```

{% hint style="info" %}
Each downloadable file comes with it's own checksum (see below). Replace the actual checksum and URL of the download link in the code block above.

{% hint style="info" %}
Make sure to verify the correct checksum according to the downloaded version. Right click on the linked text and select "copy link address" to get the URL of the download link to `curl`.
{% endhint %}
{% endhint %}

<figure><img src="/files/lFGV5KCz6hWTVL21OpC0" alt=""><figcaption></figcaption></figure>

***Expected output:** Verify output of the checksum verification*

```
besu-24.1.2.tar.gz: OK
```

If checksum is verified, extract the files and move them into the `(/usr/local/bin)` directory for neatness and best practice. Then, clean up the duplicated copies.

```bash
tar xvf besu-24.1.2.tar.gz
sudo cp -a besu-24.1.2 /usr/local/bin/besu
sudo rm -r besu-24.1.2.tar.gz besu-24.1.2
```

### Restart the Besu service

Reload the systemd daemon to register the changes made, start Besu, and check its status to make sure its running.

```bash
sudo systemctl start besu.service
sudo systemctl status besu.service
```

Use the following command to check the logs of Besu’s syncing process. Watch out for any warnings or errors.

```bash
sudo journalctl -fu besu -o cat | ccze -A
```

Press `CTRL-C` to exit.

## Pruning Besu

Besu does not provide a pruning mode and requires a full resync when your node runs out of space. Disk consumption grows by \~8GB/week.

Fortunately, Besu is able to sync in a very short time (\~1.5 days) if you have at least 32GB of RAM by enabling the `--Xplugin-rocksdb-high-spec-enabled` flag.

To resync, simply delete the existing Besu database and restart the service.

```sh
sudo systemctl stop besu.service
sudo rm -r /var/lib/besu/*
sudo systemctl start besu.service
```

Monitor logs for errors.

```sh
sudo journalctl -fu besu -o cat | ccze -A
```


# Teku

## Download Teku

[Download](https://github.com/ConsenSys/teku/releases) the latest version of Teku and run the checksum verification process to ensure that the downloaded file has not been tampered with.

```bash
cd
curl -LO https://artifacts.consensys.net/public/teku/raw/names/teku.tar.gz/versions/24.2.0/teku-24.2.0.tar.gz
echo "f7da4109b180e1f1118d6fa13e4d48a964d0f58724d1e6d3fd4a92ddccabab58 teku-24.2.0.tar.gz" | sha256sum --check
```

{% hint style="info" %}
Each downloadable file comes with it's own checksum. Replace the actual checksum and URL of the download link in the code block above.

{% hint style="info" %}
Make sure to choose the amd64 version. Right click on the linked text and select "copy link address" to get the URL of the download link to `curl`.
{% endhint %}
{% endhint %}

***Expected output:** Verify output of the checksum verification.*

```
teku-24.2.0.tar.gz: OK
```

If checksum is verified, extract the files and move them into the `(/usr/local/bin)` directory for neatness and best practice. Then, clean up the duplicated copies.

```bash
tar xvf teku-24.2.0.tar.gz
sudo cp -a teku-24.2.0 /usr/local/bin/teku
rm -r teku-24.2.0.tar.gz teku-24.2.0
```

### Restart the Teku services

```bash
sudo systemctl start tekubeacon.service tekuvalidator.service
sudo systemctl status tekubeacon.service tekuvalidator.service
```

Monitor journal logs using

```bash
sudo journalctl -fu tekubeacon -o cat | ccze -A
sudo journalctl -fu tekuvalidator -o cat | ccze -A
```

## Pruning Teku

Consensus clients take up a small amount of disk space when compared to execution clients. However, you can still free up \~200GB by pruning it if your validator node has been running for a while.

To prune consensus clients, simply delete the existing database and restart the beacon service with `checkpoint sync` enabled.&#x20;

```sh
sudo systemctl stop tekubeacon.service
sudo rm -r /var/lib/teku_beacon/*
sudo systemctl start tekubeacon.service
sudo systemctl status tekubeacon.service
```

Monitor logs for errors.

```sh
sudo journalctl -fu tekubeacon -o cat | ccze -A
```


# Nimbus

## Updating Nimbus

## Download Nimbus

[Download](https://github.com/status-im/nimbus-eth2/releases) the latest version of Nimbus, extract the zipped file, and then run the checksum verification process to ensure that the "nimbus\_beacon\_node" and "nimbus\_validator\_client" files have not been tampered with during download.

<pre class="language-bash"><code class="lang-bash">cd
curl -LO https://github.com/status-im/nimbus-eth2/releases/download/v24.2.2/nimbus-eth2_Linux_amd64_24.2.2_fc9c72f0.tar.gz
<strong>tar xvf nimbus-eth2_Linux_amd64_24.2.2_fc9c72f0.tar.gz
</strong><strong>cd nimbus-eth2_Linux_amd64_24.2.2_fc9c72f0/build
</strong>echo "ad062a475edbabb79882a85e1ba93d739d6614fdece382b65381211d07b9dc11487aedca15df0d540ba384866ed0ff0044989ce8d7c39054b2cad40d92022719 nimbus_beacon_node" | sha512sum --check
echo "1a5bfc3e5ba6e8b682572b8c7f74894b785191a4ba1ebf3d59203dc9dc1ec47b49c4d128aa433b0b44315ac574cbb7d924ab4241d60e2b9b141c61e504ab8dab  nimbus_validator_client" | sha512sum --check
</code></pre>

{% hint style="info" %}
Each downloadable file comes with it's own checksum. Replace the actual checksum and URL of the download link in the code block above.

{% hint style="info" %}
Make sure to choose the amd64 version. Right click on the linked text and select "copy link address" to get the URL of the download link to `curl`.
{% endhint %}
{% endhint %}

***Expected output:** Verify output of the checksum verification.*

```
nimbus_beacon_node: OK
nimbus_validator_client: OK
```

If checksum is verified, extract the consensus client and validator client binaries into the `(/usr/local/bin)` directory (as a best practice). Then, clean up the duplicated copies.

```bash
cd ~/nimbus-eth2_Linux_amd64_24.2.2_fc9c72f0/build
sudo cp nimbus_beacon_node nimbus_validator_client /usr/local/bin
cd
rm -r nimbus-eth2_Linux_amd64_24.2.2_fc9c72f0 nimbus-eth2_Linux_amd64_24.2.2_fc9c72f0.tar.gz
```

### Restart the Nimbus services

```bash
sudo systemctl start nimbusbeacon.service nimbusvalidator.service
sudo systemctl status nimbusbeacon.service nimbusvalidator.service
```

Monitor journal logs using

```bash
sudo journalctl -fu nimbusbeacon -o cat | ccze -A
sudo journalctl -fu nimbusvalidator -o cat | ccze -A
```

## Pruning Nimbus

Consensus clients take up a small amount of disk space when compared to execution clients. However, you can still free up \~200GB by pruning it if your validator node has been running for a while.

To prune consensus clients, simply delete the existing database and restart the beacon service with `checkpoint sync` enabled.&#x20;

```sh
sudo systemctl stop nimbusbeacon.service
sudo rm -r /var/lib/nimbus_beacon/*
sudo systemctl start nimbusbeacon.service
sudo systemctl status nimbusbeacon.service
```

Monitor logs for errors.

```sh
sudo journalctl -fu tekubeacon -o cat | ccze -A
```


# Lodestar

## Updating Lodestar

As we are running the Lodestar services via docker containers, we will automatically be using the latest version simply by restarting the docker containers if we are using `image: chainsafe/lodestar:latest` in our `docker-compose.yml` file (which we are in this guide).

```sh
docker restart lodestar_beacon lodestar_validator
```

To check your docker compose files,&#x20;

{% tabs %}
{% tab title="beacon" %}

```
cd ~/lodestar_beacon
sudo nano docker-compose.yml
```

{% endtab %}

{% tab title="validator" %}

```
cd ~/lodestar_validator
sudo nano docker-compose.yml
```

{% endtab %}
{% endtabs %}

## Pruning Lodestar

Consensus clients take up a small amount of disk space when compared to execution clients. However, you can still free up \~200GB by pruning it if your validator node has been running for a while.

To prune consensus clients, simply delete the existing database and restart the beacon service with `checkpoint sync` enabled.&#x20;

```sh
cd ~/lodestar_beacon
docker compose down
sudo rm -r /var/lib/lodestar_beacon/*
docker compose up -d
```

Monitor logs for errors.

```sh
docker logs lodestar_beacon -f
```


# Updating the monitoring suite

## Updating Prometheus

### Download the latest version

[Download](https://prometheus.io/download/) the latest version of Prometheus and run the checksum verification process to ensure that the downloaded file has not been tampered with.

```bash
cd
curl -LO https://github.com/prometheus/prometheus/releases/download/v2.45.0/prometheus-2.45.0.linux-amd64.tar.gz
echo "1c7f489a3cc919c1ed0df2ae673a280309dc4a3eaa6ee3411e7d1f4bdec4d4c5 prometheus-2.45.0.linux-amd64.tar.gz" | sha256sum --check
```

***Expected output:** Verify output of the checksum verification*

```
prometheus-2.45.0.linux-amd64.tar.gz: OK
```

### Replace existing version

If checksum is verified, extract the files and move them into the `/usr/local/bin` and `/etc/prometheus` directories for neatness and best practice. Then, clean up the duplicated copies.

```bash
tar xvf prometheus-2.45.0.linux-amd64.tar.gz
sudo cp prometheus-2.45.0.linux-amd64/prometheus /usr/local/bin/
sudo cp prometheus-2.45.0.linux-amd64/promtool /usr/local/bin/
sudo cp -r prometheus-2.45.0.linux-amd64/consoles /etc/prometheus
sudo cp -r prometheus-2.45.0.linux-amd64/console_libraries /etc/prometheus
sudo rm prometheus-2.45.0.linux-amd64.tar.gz
sudo rm -r prometheus-2.45.0.linux-amd64
```

### Restart the service

Reload the systemd daemon, restart the service, and monitor the journal logs.

```bash
sudo systemctl daemon-reload
sudo systemctl restart prometheus.service
sudo systemctl status prometheus.service
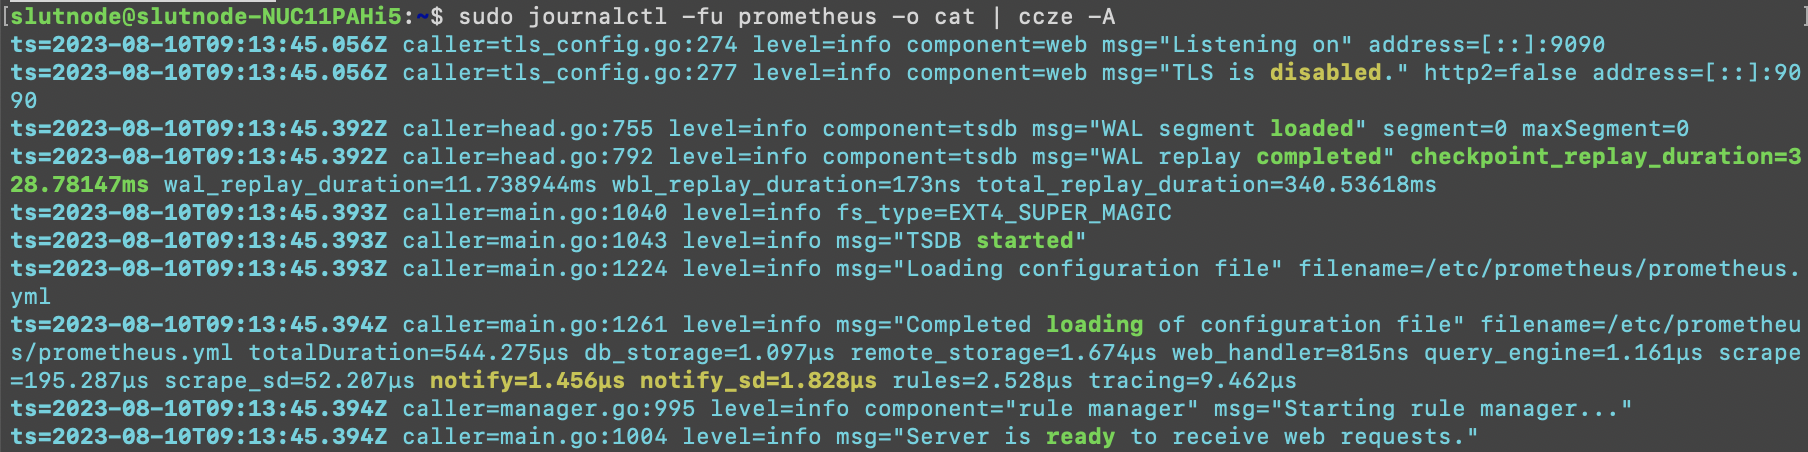
```

**Expected output:** The service should say it is **"active (running)".**

Check the journal logs to make sure there are no error messages.

```bash
sudo journalctl -fu prometheus -o cat | ccze -A
```

## Updating Node Exporter

### Download the latest version

[Download](https://prometheus.io/download/#node_exporter) the latest version of Node Exporter and run the checksum verification process to ensure that the downloaded file has not been tampered with.

```bash
cd
curl -LO https://github.com/prometheus/node_exporter/releases/download/v1.6.1/node_exporter-1.6.1.linux-amd64.tar.gz
echo "ecc41b3b4d53f7b9c16a370419a25a133e48c09dfc49499d63bcc0c5e0cf3d01 node_exporter-1.6.1.linux-amd64.tar.gz" | sha256sum --check
```

***Expected output:** Verify output of the checksum verification*

```
node_exporter-1.6.1.linux-amd64.tar.gz: OK
```

If checksum is verified, extract the files and move them into the `(/usr/local/bin)` directory for neatness and best practice. Then, clean up the duplicated copies.

```bash
tar xvf node_exporter-1.6.1.linux-amd64.tar.gz
sudo cp node_exporter-1.6.1.linux-amd64/node_exporter /usr/local/bin
rm node_exporter-1.6.1.linux-amd64.tar.gz
rm -r node_exporter-1.6.1.linux-amd64
```

### Restart the service

Reload the systemd daemon, restart the service, and monitor the journal logs.

```bash
sudo systemctl daemon-reload
sudo systemctl restart node_exporter.service
sudo systemctl status node_exporter.service

```

**Expected output:** The service should say it is **"active (running)".**

Check the journal logs to make sure there are no error messages.

```bash
sudo journalctl -fu node_exporter -o cat | ccze -A
```

## Updating Grafana

Updating Grafana is done via the Linux APT packages as part of the overall OS update. Run the following command:

```bash
sudo apt update -y && sudo apt upgrade -y
```

Then, reboot the system.

```bash
sudo reboot
```


# Preparing for Pectra

## Core Clients: EL, CL, VC, MEV-Boost

### Eth Docker

```sh
ethd down
ethd update
ethd up
```

### EthPillar

Run `ethpillar`. Navigate to each client (EL, CL, VC, MEV-Boost) and select **"update to latest release"**

### Dappnode

Under **Dashboard,** available updates for each Package will be shown if auto-updates are not enabled. Update EL, CL, VC, MEV-Boost clients to the latest versions.

<figure><img src="/files/qkRSk13DWGzA9Li239xG" alt=""><figcaption></figcaption></figure>

### Systemd

Follow the respective guides in this section to download and run the latest client versions.

{% content-ref url="/pages/Gn3f6RbGX1SiotZzzipg" %}
[Maintenance & Updates](/monitoring-maintenance-and-updates/maintenance-and-updates)
{% endcontent-ref %}

## SSV

### ssv-stack Users

```sh
cd ~/ssv-stack #change the file path according to your ssv directory
docker pull ssvlabs/ssv-node:v2.3.1
docker compose down && docker compose up -d
```

### Eth Docker Users

```
ethd down
ethd update
ethd up
```

## Obol

### Obol CDVN Users

```sh
cd ~/charon-distributed-validator-node #change the file path according to your ssv directory
docker compose down
git stash
git pull
git checkout v0.1.16
git stash apply
docker compose up -d
```

### Eth Docker Users

```
ethd down
ethd update
ethd up
```


# Diva Staking

{% content-ref url="/pages/10RJtH2h2OByvoFscgls" %}
[Diva Staking client setup](/dvt-setup/diva-staking/diva-staking-client-setup)
{% endcontent-ref %}

{% content-ref url="/pages/tFGN0shEhKA4JmbXizPA" %}
[Registering your Diva node](/dvt-setup/diva-staking/registering-your-diva-node)
{% endcontent-ref %}

{% content-ref url="/pages/sDiUViJFnsbdIeKSIJRk" %}
[Updating your Diva client](/dvt-setup/diva-staking/updating-your-diva-client)
{% endcontent-ref %}

{% content-ref url="/pages/QCEVccWSVZhi1tRQJALb" %}
[Monitoring your Diva Node](/dvt-setup/diva-staking/monitoring-your-diva-node)
{% endcontent-ref %}


# Diva Staking client setup

## Important update:

The recommended setup method for the Holesky testnet version is the **"Default - All-in-one"** method for the smoothest experience. This method requires you to stop your external execution and consensus clients and run Geth + Prysm consensus + Prysm validator clients as part of Diva's docker stack.&#x20;

{% content-ref url="/pages/ZkTijc28D8UWwdlEkFWO" %}
[Default - All-in-one setup](/dvt-setup/diva-staking/diva-staking-client-setup/default-all-in-one-setup)
{% endcontent-ref %}

However, the more technically advanced may proceed with the Experimental method and share your feedback with the Diva Staking team. This will help the team identify potential issues for the less technically adept that will come after you!

This setup method includes a standalone Lodestar validator client as part of Diva's docker stack so you do not need to stop any of your existing clients.  &#x20;

{% content-ref url="/pages/r6CH98ugmlKKn11toT9H" %}
[Advanced - with standalone Lodestar VC](/dvt-setup/diva-staking/diva-staking-client-setup/advanced-with-standalone-lodestar-vc)
{% endcontent-ref %}


# Default - All-in-one setup

## Overview

1. You will be running a series of docker containers that collective forms the Diva service with the command: `docker compose up -d`
   * [Diva client](https://hub.docker.com/r/diva/diva) written in Golang
   * A Prysm validator client
   * A Prysm consensus client&#x20;
   * A Geth execution client
   * [Reloader script](https://hub.docker.com/r/diva/reloader) service that syncs the public keys between the validator client and Diva
   * [Diva Operator](https://hub.docker.com/r/diva/operator-ui) web UI for the Diva client API
   * [Prometheus](https://prometheus.io/), [Grafana](https://grafana.com/), [Jaeger](https://www.jaegertracing.io/) and [Vector](https://vector.dev/) for monitoring the testnet
2. The system instructions for running the above is captured in the `docker-compose.yml` and `.env`files of the git repository you will be downloading
3. Open the ports used by the Diva service on your device&#x20;
4. &#x20;The Diva client comes together with a Prysm validator client - indicated as "Diva client" in the diagram below.&#x20;
5. You will configure this connection via the `.env` file

<figure><img src="/files/y0hBAPI7vIHbzX3gv8CZ" alt="" width="375"><figcaption></figcaption></figure>

## Installing dependencies - Docker

It is recommended to run the Diva service from a Docker container. To do that, we first have to install Docker - the script below performs the following:

1. Download and run the official Docker installation script
2. Creates a new user group called "docker"
3. Adds your current Linux user account to this new docker group

```sh
curl -fsSL https://get.docker.com -o get-docker.sh
sudo sh get-docker.sh

sudo groupadd docker
sudo usermod -aG docker $USER
```

Log out and then back in again for the new user group settings to take effect.

```sh
exit
```

```sh
ssh <user>@<IP_address> -p <port_no.> -i <SSH_key> -v
```

{% hint style="info" %}
An automated option is provided by Diva Staking [here](https://docs.shamirlabs.org/diva/testnet/install/scripts/docker). However, we highly recommend going through the manual process for a maximum learning outcome.
{% endhint %}

## Installing the Diva client

First, make sure your OS is up to date by running general updates.

```sh
sudo apt update -y && sudo apt upgrade -y
```

Next, download the latest Diva Staking repository (testnet) here - <https://github.com/shamirlabs/diva-alpha-net> - by running:

```shell
cd
git clone https://github.com/shamirlabs/diva-alpha-net.git
```

{% hint style="info" %}
An automated option is provided by Diva Staking [here](https://docs.shamirlabs.org/diva/testnet/install/scripts/diva). However, we highly recommend going through the manual process for a maximum learning outcome.
{% endhint %}

## Preparing the Docker environment (.env) file

Now, enter into the directory, rename the .env.example file to .env, and then open it up for editing.

```sh
cd diva-alpha-net
sudo mv .env.example .env
sudo nano .env
```

#### Make the following changes:

1\) Amend the COMPOSE\_FILE and COMPOSE\_PROFILES to the following values. This will enable metrics for monitoring and telemetry for the Diva team to help you with troubleshooting.

```
COMPOSE_FILE=docker-compose.yml 
COMPOSE_PROFILES=clients,metrics,telemetry 
```

2\) Connect your Diva client to your execution client via WebSocket&#x20;

```
EXECUTION_CLIENT_URL=ws://geth:8546 
```

3\) Connect your Diva client to your Prysm consensus client via REST API

```
CONSENSUS_CLIENT_URL=http://beacon:3500 
```

```
BEACON_RPC_PROVIDER=beacon:4000 
```

4\) Choose a strong password to log into your Diva node API.

```
DIVA_API_KEY=changeThis  # Change this (API key for the operator UI)
```

5\) Choose another strong password to encrypt the database of your node. This will also be useful for restoring your node in the future.

**\*Note:** Once this parameter is set during the first start-up of the node, you won't be able to change it until such functionality is implemented. For that reason we recommend that you back it up in a safe place.

```
DIVA_VAULT_PASSWORD=vaultPassword # Change this (password for the encrypted vault)
```

6\) Set a username for the logs to help developers debug issues you might find. You can choose any username you'd like, but we recommend you use the Discord username so we can reach out to you more efficiently if necessary..

Replace the value `discordusername-operatoraddress` of the `TESTNET_USERNAME` with the discord username that you want to use in the testnet and your operator address (for instance, `prada-0x0000000000000000000000000000000000000000`). This information is only available to the Shamir Labs development team and is not publicly available. It could be used to contact testnet participants if the team needs debugging information (such as logs), a database file, or to communicate an important patch/update.

Your username has no functional importance and is purely to label your node with a human-readable name.

```
TESTNET_USERNAME=discordusername-operatoraddress  # Change this (recommended to discord username and ethereum address of the operator)
```

Save your changes and exit by pressing `CTRL+O, ENTER, & CTRL+X`

## Open required ports

Your Diva client needs to talk to other nodes in order to perform signatures, receive duties, and find peers.&#x20;

As such, the following port configurations are needed.

1. Port `5050` used for P2P communication **MUST** be open on your machine and exposed to the public internet
2. Port `80` is used by the Operator UI and you **SHOULD** open it if you want to serve the Operator UI
3. Port `30000` is used to access the swagger API of your node and you **SHOULD** keep it open if you want to use the Operator UI

#### Open ports on your firewall rules

```sh
sudo ufw allow 5050
sudo ufw allow 80
sudo ufw allow 30000
```

If you are running a machine on a local network, remember to also configure port forwarding on your router to port 5050 on your node. Refer to the port forwarding section on how to do this.

{% content-ref url="/pages/tbZ1z2fKwHTUGm4dNmFj" %}
[Advanced networking](/tips/advanced-networking)
{% endcontent-ref %}

## Preparing the docker compose file

Open up the `docker-compose.yml` file.

```sh
cd diva-alpha-net
sudo nano docker-compose.yml
```

Amend the `ports:` section of the `grafana` service to `"3001:3000".` This is so that the Grafana service running on docker does not clash with your native Grafana service.

```
# Metrics
  grafana:
    image: grafana/grafana:10.2.5
    user: root
    container_name: grafana
    profiles:
      - metrics
    hostname: grafana
    restart: unless-stopped
    ports:
      - "3001:3000"
    volumes:
      - ${DIVA_DATA_FOLDER:-.}/grafana/config:/etc/grafana/provisioning
      - ${DIVA_DATA_FOLDER:-.}/grafana/data:/var/lib/grafana
      - ${DIVA_DATA_FOLDER:-.}/grafana/config/grafana.ini:/etc/grafana/grafana.ini
```

You will then be able to run both Grafana services without conflicts. Access each of the dashboards via:&#x20;

1. Native Grafana: \<IP\_address:3000>
2. Docker Grafana: \<IP\_address:3001>&#x20;

## Run the Diva client

After editing the `.env` file, you can now fire up the Diva Staking service using docker.

```sh
cd ~/diva-alpha-net
docker compose up -d
```

**\*Note:** Make sure you are in the same directory as where the `docker-compose.yml` file is. By default, this is in the `diva-alpha-net` directory.

Monitor the logs of the Diva service container:

```sh
docker logs -f diva
```

**Expected output:** There are 3 things to look out for - "connected to execution client", "consensus client available", and "running diva client".

<figure><img src="/files/QV1OJgCAZRxWmKe4QJPf" alt=""><figcaption></figcaption></figure>

**Note:** There will be a warning that says "cannot start p2p network without identity". This is expected as your Diva node is yet to be registered at this point.

## Troubleshooting

If you encounter any errors, perform the following steps sorted by priority to troubleshoot:

1\)  Check your `.env` files to make sure that all of your input details are correct. Check against the configuration files of your execution and consensus clients.&#x20;

Then, restart the docker containers.

```sh
docker restart $(docker ps -a -q)
```

2\) Stop and remove the docker containers. Then repeat the steps on this page.

```sh
docker rm -f $(docker ps -a -q)
```

3\) Perform (2) + delete the Diva git repository. Then repeat the steps on this page.

```sh
cd
sudo rm -r diva-alpha-net
```


# Advanced - with standalone Lodestar VC

## Overview

1. You will be running a series of docker containers that collective forms the Diva service with the command: `docker compose up -d`
   * [Diva client](https://hub.docker.com/r/diva/diva) written in Golang
   * A Lodestar validator client
   * [Reloader script](https://hub.docker.com/r/diva/reloader) service that syncs the public keys between the validator client and Diva
   * [Diva Operator](https://hub.docker.com/r/diva/operator-ui) web UI for the Diva client API
   * [Prometheus](https://prometheus.io/), [Grafana](https://grafana.com/), [Jaeger](https://www.jaegertracing.io/) and [Vector](https://vector.dev/) for monitoring the testnet
2. The system instructions for running the above is captured in the `docker-compose.yml` and `.env`files of the git repository you will be downloading
3. Open the ports used by the Diva service on your device&#x20;
4. &#x20;The Diva client comes together with a Prysm validator client - indicated as "Diva client" in the diagram below. Together, they sit on top of and connects to your execution + consensus client set via the , replacing the need for you to run your own validator client for this purpose
5. You will configure this connection via the `.env` file

<figure><img src="/files/y0hBAPI7vIHbzX3gv8CZ" alt="" width="375"><figcaption></figcaption></figure>

{% hint style="info" %}
You can run the Diva service on top of your existing home staking hardware to boost your yields by being assigned validator keys from Diva Staking!
{% endhint %}

## Installing dependencies - Docker

It is recommended to run the Diva service from a Docker container. To do that, we first have to install Docker - the script below performs the following:

1. Download and run the official Docker installation script
2. Creates a new user group called "docker"
3. Adds your current Linux user account to this new docker group

```sh
curl -fsSL https://get.docker.com -o get-docker.sh
sudo sh get-docker.sh

sudo groupadd docker
sudo usermod -aG docker $USER
```

Log out and then back in again for the new user group settings to take effect.

```sh
exit
```

```sh
ssh <user>@<IP_address> -p <port_no.> -i <SSH_key> -v
```

{% hint style="info" %}
An automated option is provided by Diva Staking [here](https://docs.shamirlabs.org/diva/testnet/install/scripts/docker). However, we highly recommend going through the manual process for a maximum learning outcome.
{% endhint %}

## Installing the Diva client

First, make sure your OS is up to date by running general updates.

```sh
sudo apt update -y && sudo apt upgrade -y
```

Next, download the latest Diva Staking repository (testnet) here - <https://github.com/shamirlabs/diva-alpha-net> - by running:

```shell
cd
git clone https://github.com/shamirlabs/diva-alpha-net.git
```

{% hint style="info" %}
An automated option is provided by Diva Staking [here](https://docs.shamirlabs.org/diva/testnet/install/scripts/diva). However, we highly recommend going through the manual process for a maximum learning outcome.
{% endhint %}

## Preparing the Docker environment (.env) file

Now, enter into the directory, rename the .env.example file to .env, and then open it up for editing.

```sh
cd diva-alpha-net
sudo mv .env.example .env
sudo nano .env
```

#### Make the following changes:

1\) Amend the COMPOSE\_FILE and COMPOSE\_PROFILES to the following values. This will enable metrics for monitoring and telemetry for the Diva team to help you with troubleshooting.

```
COMPOSE_FILE=docker-compose.yml # Change this (docker compose file name)
COMPOSE_PROFILES=telemetry,metrics # Change this (docker profiles: clients, metrics, telemetry)
```

2\) Connect your Diva client to your execution client via WebSocket&#x20;

Replace the value `ws://HOST_IP:PORT` of `EXECUTION_CLIENT_URL` with the WebSocket endpoint of your execution client.

```
EXECUTION_CLIENT_URL=ws://HOST_IP:8547 
```

**\*Note:** You have to use the IP address assigned by your ethernet port (eth0) or Wifi (wlo1) and not the loopback address (127.0.0.1) here.

3\) Connect your Diva client to your consensus client via REST API

Replace the value `http://HOST_IP:PORT` of `CONSENSUS_CLIENT_URL` with the REST API provider endpoint of your consensus client.

```
CONSENSUS_CLIENT_URL=http://HOST_IP:5051

```

4\) Choose a strong password to log into your Diva node API.

```
DIVA_API_KEY=changeThis  # Change this (API key for the operator UI)
```

5\) Choose another strong password to encrypt the database of your node. This will also be useful for restoring your node in the future.

**\*Note:** Once this parameter is set during the first start-up of the node, you won't be able to change it until such functionality is implemented. For that reason we recommend that you back it up in a safe place.

```
DIVA_VAULT_PASSWORD=vaultPassword # Change this (password for the encrypted vault)
```

6\) Set a username for the logs to help developers debug issues you might find. You can choose any username you'd like, but we recommend you use the Discord username so we can reach out to you more efficiently if necessary..

Replace the value `discordusername-operatoraddress` of the `TESTNET_USERNAME` with the discord username that you want to use in the testnet and your operator address (for instance, `prada-0x0000000000000000000000000000000000000000`). This information is only available to the Shamir Labs development team and is not publicly available. It could be used to contact testnet participants if the team needs debugging information (such as logs), a database file, or to communicate an important patch/update.

Your username has no functional importance and is purely to label your node with a human-readable name.

```
TESTNET_USERNAME=discordusername-operatoraddress  # Change this (recommended to discord username and ethereum address of the operator)
```

Save your changes and exit by pressing `CTRL+O, ENTER, & CTRL+X`

## Preparing the docker compose file

Open up the `docker-compose-lodestar-vc.yml` file.

```sh
cd diva-alpha-net
sudo nano docker-compose-lodestar-vc.yml
```

1\) Change the `goerli` flag to `holesky` under the `--network` flag of the `chainsafe/lodestar:latest` image

<pre><code>version: '3.8'

services:

  diva:
    extends:
      file: docker-compose.yml
      service: diva

  validator:
    image: chainsafe/lodestar:latest
    platform: linux/amd64
    container_name: validator
    hostname: validator
    restart: unless-stopped
    command:
      - validator
      - --dataDir
      - /var/lib/lodestar/validators
      - --beaconNodes
      - ${CONSENSUS_CLIENT_URL}
      - --keymanager
      - --keymanager.address
      - 0.0.0.0
      - --keymanager.port
      - "7500"
      - --network
      <a data-footnote-ref href="#user-content-fn-1">- </a>holesky
      - --externalSigner.url
      - http://diva:9000
      - --externalSigner.fetch
    volumes:
      - ${DIVA_DATA_FOLDER:-.}/lodestar/validators:/var/lib/lodestar/validators
    networks:
      default:
        aliases:
          - vc-rkm
</code></pre>

2\)  Append the following contents in this file

```
# Monitoring configuration
  prometheus:
    extends:
      file: docker-compose.yml
      service: prometheus

  node-exporter:
    extends:
      file: docker-compose.yml
      service: node-exporter

  grafana:
    extends:
      file: docker-compose.yml
      service: grafana
```

These configurations sets the stage to allow you to use the Lodestar validator client instead of Prysm, which will enable you to use any minority consensus clients with your Diva node.

Next, open up the `docker-compose.yml` file.&#x20;

```sh
cd diva-alpha-net
sudo nano docker-compose.yml
```

Amend the `ports:` section of the `grafana` service to `"3001:3000".` This is so that the Grafana service running on docker does not clash with your native Grafana service.

```
# Metrics
  grafana:
    image: grafana/grafana:10.2.5
    user: root
    container_name: grafana
    profiles:
      - metrics
    hostname: grafana
    restart: unless-stopped
    ports:
      - "3001:3000"
    volumes:
      - ${DIVA_DATA_FOLDER:-.}/grafana/config:/etc/grafana/provisioning
      - ${DIVA_DATA_FOLDER:-.}/grafana/data:/var/lib/grafana
      - ${DIVA_DATA_FOLDER:-.}/grafana/config/grafana.ini:/etc/grafana/grafana.ini
```

## Open required ports

Your Diva client needs to talk to other nodes in order to perform signatures, receive duties, and find peers.&#x20;

As such, the following port configurations are needed.

1. Port `5050` used for P2P communication **MUST** be open on your machine and exposed to the public internet
2. Port `80` is used by the Operator UI and you **SHOULD** open it if you want to serve the Operator UI
3. Port `30000` is used to access the swagger API of your node and you **SHOULD** keep it open if you want to use the Operator UI

#### Open ports on your firewall rules

```sh
sudo ufw allow 5050
sudo ufw allow 80
sudo ufw allow 30000
```

If you are running a machine on a local network, remember to also configure port forwarding on your router to port 5050 on your node. Refer to the port forwarding section on how to do this.

{% content-ref url="/pages/tbZ1z2fKwHTUGm4dNmFj" %}
[Advanced networking](/tips/advanced-networking)
{% endcontent-ref %}

## Run the Diva client

After editing the `.env` file, you can now fire up the Diva Staking service using docker.

```sh
cd ~/diva-alpha-net
docker compose -f docker-compose-lodestar-vc.yml up -d
```

**\*Note:** Make sure you are in the same directory as where the `docker-compose.yml` file is. By default, this is in the `diva-alpha-net` directory.

Monitor the logs of the Diva service container:

```sh
docker logs -f diva
```

**Expected output:** There are 3 things to look out for - "connected to execution client", "consensus client available", and "running diva client".

<figure><img src="/files/QV1OJgCAZRxWmKe4QJPf" alt=""><figcaption></figcaption></figure>

**Note:** There will be a warning that says "cannot start p2p network without identity". This is expected as your Diva node is yet to be registered at this point.

## Troubleshooting

If you encounter any errors, perform the following steps sorted by priority to troubleshoot:

1\)  Check your `.env` files to make sure that all of your input details are correct. Check against the configuration files of your execution and consensus clients.&#x20;

Then, restart the docker containers.

```sh
docker restart $(docker ps -a -q)
```

2\) Stop and remove the docker containers. Then, repeat the steps on this page.

```sh
docker rm -f $(docker ps -a -q)
```

3\) Perform (2) + rename the Diva git repository to serve as a "backup". Then repeat the steps on this page.

<pre class="language-sh"><code class="lang-sh"><strong>cd
</strong><strong>mv diva-alpha-net diva-alpha-net_bak
</strong></code></pre>

{% hint style="info" %}
Always make sure to back up your existing local Diva git repository if you have already registered your **Diva Node** previously. Your node identity is located in the `.diva` folder - i.e., `diva-alpha-net/.diva`
{% endhint %}

[^1]: change this to "holesky"


# Registering your Diva node

You will need to access the web UI of the Diva client to register your Diva node.&#x20;

## Open required ports

But first, we need to temporarily open the 2 additional ports for this.

* The port `80` is used by the Operator UI and you **SHOULD** open it if you want to serve the Operator UI.

```sh
sudo ufw allow 80
```

* The port `30000` is used to access the swagger API of your node and you **SHOULD** keep it open if you want to use the Operator UI.

```sh
sudo ufw allow 30000
```

## Accessing the Web UI

2 ways to do this.

#### Local network access:

This can be used if you are in the same network as your node device - e.g. at home.

1. Connect your laptop to the same WiFi network as the one your node device is connected to
2. Enter the internal IP address of your node device into your browser using the `http://` prefix. Make sure not to use `https` here
3. Follow the steps in this short video below

{% embed url="<https://www.youtube.com/watch?ab_channel=ShamirLabs&v=efkyU2oEygo>" %}

#### Remote access:

This is used when you are not in the same network as your node device - e.g. away from home.

Open a new terminal window on your client machine (e.g. laptop) and perform an SSH tunnel. This maps port 8080 and 30000 on your client machine into ports 80 and 30000 of your node device.

```sh
ssh -L 8080:<internal_ip_address>:80 -L 30000:<internal_ip_address>:30000 <user>@<external_IP_address> -p <port_number> -i <ssh_key> -v
```

Once you are logged in, you can now open a new browser on your laptop and key in `http://127.0.0.1:8080` to access the Web UI.

## Register your node

Once you are able to access the Web UI, follow the steps in this short video below.

{% embed url="<https://www.youtube.com/watch?ab_channel=ShamirLabs&v=efkyU2oEygo>" %}

Key in the Diva API URL according to your method of access below.

* **Local network access:** Use `http://<internal IP address>:30000`&#x20;
* **Remote access:** Use `http://127.0.0.1:30000`

Key in the Diva Auth Token using the `DIVA_API_KEY` variable you set in your `.env` file during the Diva client setup step.

Complete the rest of the steps to register your Diva node on-chain.


# Updating your Diva client

## Update automatically

**Note:** This is only available for those with the latest versions of the docker compose for diva-alpha-net.

Run the installation script by executing:

```
cd ~/diva-alpha-net
./run.sh
```

Inside the `diva-alpha-net` folder, and select option `2. Update Diva`:

<figure><img src="/files/8CgxtP16IP2ce9MeP0K1" alt="" width="318"><figcaption></figcaption></figure>

## Update manually

### 1. Stop the current Diva client

Navigate to the Diva directory containing the docker-compose.yml file and bring the service down.

```sh
cd diva-alpha-net
docker compose down
```

### 2. Backup the current Diva directory

Move all contents in the original Diva directory into a new directory `diva-alpha-net-bak`.

```sh
mv ~/diva-alpha-net ~/diva-alpha-net-bak
```

### 3. Download the new version&#x20;

Clone the latest version of the diva-alpha-net git repository into the original parent folder on your system.

```sh
git clone https://github.com/shamirlabs/diva-alpha-net ~/diva-alpha-net
```

### 4. Create a new `.env` file

```sh
cp ~/diva-alpha-net/.env.example ~/diva-alpha-net/.env 
```

### 5. Edit the new `.env` file

Open up the old `.env` file,

```sh
sudo nano ~/diva-alpha-net-bak/.env
```

and retrieve the following environment variables...

1. EXECUTION\_CLIENT\_URL
2. CONSENSUS\_CLIENT\_URL
3. DIVA\_API\_KEY
4. DIVA\_VAULT\_PASSWORD
5. TESTNET\_USERNAME

and enter them into the corresponding variables in your new `.env` file.

```sh
sudo nano ~/diva-alpha-net/.env
```

### 6. Migrate the data

Copy the `.diva` folder from the `~/diva-alpha-net-bak` folder to the new folder `~/diva-alpha-net`:

```sh
cp -r ~/diva-alpha-net-bak/.diva ~/diva-alpha-net/.diva
```

### 7. Preparing the docker compose file

Open up the `docker-compose.yml` file.

```sh
cd diva-alpha-net
sudo nano docker-compose.yml
```

Amend the `ports:` section of the `grafana` service to `"3001:3000".` This is so that the Grafana service running on docker does not clash with your native Grafana service.

```
# Metrics
  grafana:
    image: grafana/grafana:10.2.5
    user: root
    container_name: grafana
    profiles:
      - metrics
    hostname: grafana
    restart: unless-stopped
    ports:
      - "3001:3000"
    volumes:
      - ${DIVA_DATA_FOLDER:-.}/grafana/config:/etc/grafana/provisioning
      - ${DIVA_DATA_FOLDER:-.}/grafana/data:/var/lib/grafana
      - ${DIVA_DATA_FOLDER:-.}/grafana/config/grafana.ini:/etc/grafana/grafana.ini
```

You will then be able to run both Grafana services without conflicts. Access each of the dashboards via:&#x20;

1. Native Grafana: \<IP\_address:3000>
2. Docker Grafana: \<IP\_address:3001>&#x20;

### 8. Prepare the Lodestar docker compose file

{% hint style="info" %}
Skip this Step 8 for the Default (All-in-one) method.
{% endhint %}

Open up the `docker-compose-lodestar-vc.yml` file.

```sh
sudo nano ~/diva-alpha-net/docker-compose-lodestar-vc.yml
```

Append the following contents in this file.

```
# Monitoring configuration
  prometheus:
    extends:
      file: docker-compose.yml
      service: prometheus

  node-exporter:
    extends:
      file: docker-compose.yml
      service: node-exporter

  grafana:
    extends:
      file: docker-compose.yml
      service: grafana
```

### 9. Remove previous containers

**Note:** You must stop and delete all Diva containers before starting the services again.

So first, make sure all Diva containers are stopped and removed identify their container IDs. &#x20;

```sh
cd ~/diva-alpha-net
docker compose down
docker ps -a
```

**Expected output:** You should see an empty list.&#x20;

<figure><img src="/files/pAtHiXWnmgHlgs0cP4ZN" alt=""><figcaption></figcaption></figure>

If you still see a list of Diva related containers like below,

<figure><img src="/files/oNB4l8CkuDqoakDPoANY" alt=""><figcaption></figcaption></figure>

then you can remove all Diva containers listed using one of the following methods:

* One by one using the`CONTAINER ID` if you have other non-Diva docker containers running

```sh
docker stop <CONTAINER ID>
docker rm <CONTAINER ID>
```

* All at once if you only have Diva containers running

```sh
docker rm -f $(docker ps -a -q)
```

### 9. Run the new Diva containers

<pre class="language-sh"><code class="lang-sh">cd ~/diva-alpha-net
<strong># Choose one of the following to run according to the setup method you are on 
</strong>docker compose -f up -d #For Default method
docker compose -f docker-compose-lodestar-vc.yml up -d #For Experimental method
</code></pre>

Monitor the logs to make sure there are no errors.

```sh
docker logs diva -f
```

**Expected output:** There are 3 things to look out for - "connected to execution client", "consensus client available", and "running diva client".

<figure><img src="/files/QV1OJgCAZRxWmKe4QJPf" alt=""><figcaption></figcaption></figure>


# Monitoring your Diva Node

There will be 3 levels of metrics you as the Diva operator will be monitoring on.

1. **On-chain metrics:** How effective you are as an operator in maximising uptime and performance for the validator keys assigned to you - e.g. attestation effectiveness, active/inactive status, rewards & penalties
2. **Device-level metrics:** How does the health of your hardware look like? - e.g. internal temperature, CPU/RAM/storage usage, read/write speeds, network latency
3. **Client-level metrics:** Are there any warnings or errors due to misconfigurations or anomalies? - e.g. database corruption, out-of-memory errors, no auto-restart, undiscoverable endpoints, potential slashing violations

## Monitoring On-chain metrics

### Operator UI

You will be able to see all the validator key shares you have been assigned by accessing your Operator UI via a browser.

<figure><img src="/files/kdRGk9eCw2pbGRsHvR1X" alt=""><figcaption></figcaption></figure>

Recap on how to access the Operator UI if needed below.

{% content-ref url="/pages/tFGN0shEhKA4JmbXizPA" %}
[Registering your Diva node](/dvt-setup/diva-staking/registering-your-diva-node)
{% endcontent-ref %}

### Divascan

Divascan (<https://divascan.io/>) is an on-chain explorer similar to Etherscan that provides metrics on all operators, nodes, activated validator keys, and stakers of Diva Staking. This is a community-contributed project and is not an official product of Diva Staking.

The tabs you will be interested in as a Diva node operator are **"Operators"** and **"Nodes".** Each operator can operate multiple nodes and each node can in turn be assigned multiple validator key shares.

<figure><img src="/files/UvgdPDc4mzF9b7InzQ48" alt=""><figcaption></figcaption></figure>

Under these tabs, you will be able to look for your operator ID - which is the wallet address you used when registering your node during the [Registering your Diva node](/dvt-setup/diva-staking/registering-your-diva-node) step.

<figure><img src="/files/Q6ANJKrVWJBmS60dcZpe" alt=""><figcaption></figcaption></figure>

Clicking into your operator ID will bring you to a page showing all of the nodes that have been registered to your operator ID, along with how many validator key shares have been assigned to each node.&#x20;

<figure><img src="/files/vPfyOddCIkEwY1SRVuUe" alt=""><figcaption></figcaption></figure>

Clicking into a Node ID here will show you a summary of all validator key shares assigned to that node, along with their corresponding public keys on the beacon chain.

<figure><img src="/files/b7iYOXd8uLvWWrSYlaKi" alt=""><figcaption></figcaption></figure>

It is worth noting that this method merely provides a very high level overview.

Negative performance does not immediately mean that there is something wrong with your node because each validator key has a fault tolerance rate of 5/16 - e.g. if more than 11 nodes are offline, the validator key assigned will be offline even if your node is online.

The reverse is true as well. Just because your assigned validator keys are chugging along, it does not mean that your nodes are performing up to standards.

The Diva Staking team will monitor the performance of each operator in a trust-less manner via the use of Zero-Knowledge Proof oracles and you will be penalised or ejected from the network for low performance.

For this reason, we will need other methods of monitoring your performance.

### Beaconcha.in & Rated.Network

This method is used to monitor the performance of your assigned validator keys individually.&#x20;

Although it may not be practical to do this for large amounts of key shares, it is still an extremely useful tool for monitoring alerts and troubleshooting.

#### Beaconcha.in

1\) Go to [https://holesky.beaconcha.in/](https://beaconcha.in/) and search for the validator pubkey you want to inspect. The validator pubkey can be found using Divascan (see above section)

<figure><img src="/files/nR1z5RvGlqzJZwbl3Kcm" alt=""><figcaption></figcaption></figure>

2\) You will then be able to see the status, the summary performance, and individual attestations of the validator you want to inspect. However, the industry defers to another explorer for the "Effectiveness" metric.

<figure><img src="/files/juZ2yuY1Unf84wgLUFTs" alt=""><figcaption></figcaption></figure>

#### Rated.Network

Rated.Network provides a more wholistic measure of "Effectiveness" (more details [here](https://docs.rated.network/methodologies/ethereum-beacon-chain/rated-effectiveness-rating)) and you use it in the same way as Beaconcha.in - by searching for the validator pubkey or ID that you want to inspect.

<figure><img src="/files/tgW1Sz4qinYCRADT3Czp" alt=""><figcaption></figcaption></figure>

## Monitoring device performance with Grafana

The Diva service comes with a pre-configured docker container running Grafana, a highly extensible system/device-level monitoring dashboard.

<figure><img src="/files/R0mMFPiDmqHVFZUgEHhT" alt=""><figcaption><p>Example of a pre-configured Diva dashboard on Grafana</p></figcaption></figure>

**Here's how you can access this dashboard:**

1\) First, make sure the Grafana docker container is running and exposing port 3000.

```sh
docker ps -a
```

&#x20;**Expected output:**

<figure><img src="/files/QlVp3ky5vD8sV9F2AT2i" alt=""><figcaption></figcaption></figure>

2\) Open port 3000 on your device-level firewall

```sh
sudo ufw allow 3000
```

3\) Identify the internal IP address of your node device.

```sh
ip a
```

**Expected output:** Look for an IP address that is similar to the format - 192.168.xx.xx. That will be the internal IP address.

<figure><img src="/files/eN8jgyI8Y1Z99yl4Iph0" alt=""><figcaption></figcaption></figure>

4\) Choose one of the following methods to access the Grafana dashboard depending on your network access.

**Local (e.g. at home):**

Connect your working laptop to the same router as your node device and enter `http://<internal_IP_address>:3000` of the node device (e.g. 192.168.1.45) in your browser.

**Remote (e.g. out of home):**

Create an SSH tunnel into your node device. **Note:** Your SSH port needs to be open/forwarded from your modem/router into your node device. Check out the port forwarding section below if needed.

{% content-ref url="/pages/tbZ1z2fKwHTUGm4dNmFj" %}
[Advanced networking](/tips/advanced-networking)
{% endcontent-ref %}

```
ssh -L 3000:<internal_IP_address:3000 <user>@<external_ip_address> -p <SSH_port> -i <SSH_key> -v 
```

Once you are logged in to your node device, you can now enter `http://127.0.0.1:3000` into the browser on your working laptop.

{% hint style="info" %}
Make sure you enter`http` and not `https here`
{% endhint %}

## Monitoring client performance with system logs

1\) Check that all docker containers are active and running

```sh
docker ps -a
```

**Expected output:**

<figure><img src="/files/NnfKBbOjdPoaMHRBEZl5" alt=""><figcaption></figcaption></figure>

2\) Check and follow logs of individual containers

```sh
docker logs <CONTAINER_ID> -f --tail 5
```

This prints out the last 5 lines of the monitoring logs and new lines as they appear. You can change the number of lines as needed. Check the output for warnings or errors and troubleshoot them against the list of common errors in the next section.

If none of the scenarios matches your issue, you can raise them in the [Diva Staking discord channel](https://discord.gg/A4tfy6t3) for targeted support.

### Expected outputs

**Main containers:**

{% tabs %}
{% tab title="Diva" %}

<figure><img src="/files/DbWx6S286dyHrH7chVi4" alt=""><figcaption></figcaption></figure>
{% endtab %}

{% tab title="Lodestar/Prysm VC" %}

<figure><img src="/files/JUW92vRxqmsrqYBXCVrB" alt=""><figcaption><p>Lodestar VC</p></figcaption></figure>

**Note:** suggestedFeeRecipeint is set to the "zero" address and burnt during this testnet phase but will be set to a designated pooling address on the mainnet.
{% endtab %}

{% tab title="Operator UI" %}

<figure><img src="/files/F1WzEBi5HKgsVN0utX6W" alt=""><figcaption></figcaption></figure>
{% endtab %}

{% tab title="Diva Reloader" %}
\*Before being assigned any validator key shares from Diva Staking

<figure><img src="/files/yNfwEYsnw6pTPRK9Y2JY" alt=""><figcaption></figcaption></figure>
{% endtab %}
{% endtabs %}

**Monitoring/Telemetry containers:**

{% tabs %}
{% tab title="Node Exporter" %}

<figure><img src="/files/E4smX138fhTDSYxKLKom" alt=""><figcaption></figcaption></figure>
{% endtab %}

{% tab title="Prometheus" %}

<figure><img src="/files/H6OBqKMeWVNWFZWP2lKP" alt=""><figcaption></figcaption></figure>
{% endtab %}

{% tab title="Grafana" %}

<figure><img src="/files/0qQm6amSp1K5oJ5OPsBV" alt=""><figcaption></figcaption></figure>
{% endtab %}

{% tab title="Jaegar" %}

<figure><img src="/files/AwF9yoj5zNLqYKJ7N1pp" alt=""><figcaption></figcaption></figure>
{% endtab %}

{% tab title="Vector" %}

<figure><img src="/files/QF48XWbK3tGY4iJtxZu3" alt=""><figcaption></figcaption></figure>
{% endtab %}
{% endtabs %}

## Common errors

### Diva Client

1\) Warning that says "cannot start p2p network without identity". This means you have not [registered your Diva node via the Operator UI](/dvt-setup/diva-staking/registering-your-diva-node)

<figure><img src="/files/QV1OJgCAZRxWmKe4QJPf" alt=""><figcaption></figcaption></figure>

### Lodestar Client

1\) Unable to connect to Diva container endpoint.

```
Dec-16 15:34:07.791[]                 info: Lodestar network=goerli, version=v1.12.1/85e44ef, commit=85e44efe73d1ad5228486c73ea9b1fcf3f036193
Dec-16 15:34:07.793[]                 info: Connecting to LevelDB database path=/var/lib/lodestar/validators/validator-db
 ✖ FetchError: Request to http://diva:9000/api/v1/eth2/publicKeys failed, reason: connect ECONNREFUSED 172.27.0.4:9000
    at wrappedFetch (file:///usr/app/packages/api/src/utils/client/fetch.ts:10:11)
    at processTicksAndRejections (node:internal/process/task_queues:95:5)
    at externalSignerGetKeys (file:///usr/app/packages/validator/src/util/externalSignerClient.ts:111:15)
    at getRemoteSigners (file:///usr/app/packages/cli/src/cmds/validator/signers/index.ts:170:54)
    at Object.validatorHandler [as handler] (file:///usr/app/packages/cli/src/cmds/validator/handler.ts:91:19)
```

#### **Fixes:**&#x20;

* Make sure your Diva client is active by running `docker ps -a`
* Ensure that you have [registered your Diva node via the Operator UI](/dvt-setup/diva-staking/registering-your-diva-node)


# Obol


# Techne Bronze Speedrun (Launchpad)

## Requirements

Obol Techne Bronze Credentials require node operators to run 50 testnet validator keys as a distributed validator cluster for 3 weeks, where Obol will fund the testnet ETH required to activate the validator keys.

### Hardware (Holesky)

* CPU: 4 cores
* RAM: 16GB
* SSD: 350GB
* OS: Ubuntu 24.04

## Install dependencies

Install Docker.

```sh
curl -fsSL https://get.docker.com -o get-docker.sh
sudo sh get-docker.sh

sudo groupadd docker
sudo usermod -aG docker $USER
```

Exit and re-login.

```sh
exit
```

## Generate your Obol ENR

```sh
cd
# Use docker to create an ENR. Backup the file `.charon/charon-enr-private-key`.
docker run --rm -v "$(pwd):/opt/charon" -u $(id -u):$(id -g) obolnetwork/charon:v1.8.1 create enr
```

You should expect to see a console output like this:

```
Created ENR private key: .charon/charon-enr-private-key
enr:-JG4QGQpV4qYe32QFUAbY1UyGNtNcrVMip83cvJRhw1brMslPeyELIz3q6dsZ7GblVaCjL_8FKQhF6Syg-O_kIWztimGAYHY5EvPgmlkgnY0gmlwhH8AAAGJc2VjcDI1NmsxoQKzMe_GFPpSqtnYl-mJr8uZAUtmkqccsAx7ojGmFy-FY4N0Y3CCDhqDdWRwgg4u
```

Save the `ENR public key` in a text file on your laptop. You will need to use this in the next section.&#x20;

The `ENR public key` is denoted as `enr:-JG4QGQpV4qYe32QFUAbY1UyGNtNcrVMip83cvJRhw1brMslPeyELIz3q6dsZ7GblVaCjL_8FKQhF6Syg-O_kIWztimGAYHY5EvPgmlkgnY0gmlwhH8AAAGJc2VjcDI1NmsxoQKzMe_GFPpSqtnYl-mJr8uZAUtmkqccsAx7ojGmFy-FY4N0Y3CCDhqDdWRwgg4u` in the example output above.

### Restarting from scratch

If you want to redo the whole process, remove the existing `charon-distributed-validator-node` folder before re-running the set of commands above.&#x20;

```sh
cd
sudo rm -r .charon
```

## Register your ENRs

Appoint a cluster leader among your cluster.

The cluster leader will collect the wallet addresses of all members and configure the parameters of your cluster on the[ Obol Launchpad](https://hoodi.launchpad.obol.org/).

{% embed url="<https://hoodi.launchpad.obol.org/>" %}

1. Select Create a cluster with a group >> read, click through, & sign the disclaimers with your wallet
2. Choose your cluster name and size (4, 7, or 10)
3. Input the wallet address of each operator
4. Set validators field to 50 (i.e., generate 50 validator keys)
5. Select `SPLIT ONLY REWARDS` under Withdrawal Configuration.&#x20;
   1. Set the `Principal Recipient` to `0x17E6F6270A101dc7687Cc9899889819EeAF8253f` because we want Obol to fund our testnet validators.
   2. Input the wallet addresses and the percentage split of each operator&#x20;
6. `Deploy 'Split Rewards' Contract` (1 transaction) >> `Confirm and sign` (3 transactions)

<details>

<summary>Screenshots</summary>

<img src="/files/Ynks9boDE2xkphetzOwo" alt="" data-size="original">

![](/files/uVwMVZMHon1R3CDzh7K0)

![](/files/d2KycFiBqACIckLyLpF6)

![](/files/KizHMThA26PFKzecWOoM)

</details>

Copy the group invite link and share it with your other cluster members.

<figure><img src="/files/L0JGAMgsiu2Gc1Zfntvc" alt=""><figcaption></figcaption></figure>

They will need to accept the cluster configuration, input their respective `ENR Public Keys` , and then sign a message (2 transactions) with their respective wallet addresses set during the cluster creation step.

## DKG Ceremony

Once all members have accepted the cluster configuration, everyone can now proceed to the distributed key generation (DKG) phase.

<figure><img src="/files/9GUrz5bM97DU1tkJnPap" alt=""><figcaption></figcaption></figure>

Each cluster member copies the DKG command generated for them and runs it on their own machine.

<figure><img src="/files/KBf6q0oda3t8YSo5n605" alt=""><figcaption></figcaption></figure>

{% hint style="info" %}
All cluster members need to run the DKG service within 30 minutes of one another and keep it running until the ceremony is complete.
{% endhint %}

Once the DKG ceremony is completed, **back up the `.charon` folder containing the following important files:**&#x20;

* charon-enr-private-key
* cluster-lock.json
* validator\_keys/
* deposit-data.json

**Back up using one of the 2 methods below.**

{% tabs %}
{% tab title="secure copy" %}
This is the most secure method but requires having SSH access to your server from your laptop's terminal (i.e., after manually adding SSH public keys to your server).&#x20;

```sh
scp -i PATH_TO_SSH_PRIVATE_KEY -r USER@EXTERNAL_IP_ADDRESS:~/.charon $HOME/Documents
```

Your .charon folder will now be found on your laptop's `Documents` folder. Note that `.charon` is a hidden folder so you will not see it being displayed in your file system.
{% endtab %}

{% tab title="base64" %}
This is an alternative method if you have not set up SSH access to your server from your laptop's terminal. It is less secure as you will expose your files temporarily on your terminal.

* Zip up the .charon folder and convert the zipped file into a base64 string. Then print out the resulting contents.

```sh
sudo tar -czvf - $HOME/.charon | base64 > dot_charon.tar.gz.b64
cat dot_charon.tar.gz.b64
```

* Copy the entire output carefully and save it in a text editor on your laptop.&#x20;
* Clear your terminal and remove the bash history of your server to minimise exposure of these important files

```sh
clear
history -c
```

#### Restoring the files

To restore base64 encoded files, we basically need to reverse the process above.

Convert the base64 string back into a zipped file and then unzip the resulting archive.

```sh
base64 -d dot_charon.tar.gz.b64 > dot_charon.tar.gz
tar xvf dot_charon.tar.gz
```

The `.charon` folder will be found in the folder you ran the above command in. Run `ls -la` to see it.
{% endtab %}
{% endtabs %}

Then, set the following permissions.&#x20;

```sh
sudo chmod +x ~/.charon
sudo chmod 755 ~/.charon
sudo chmod 644 ~/.charon/charon-enr-private-key
```

## Set up ETH Docker

Each cluster member needs to spin up a "vanilla" validator node.

{% content-ref url="/pages/c8hStsV6JG56qLSk8fhB" %}
[ETH Docker](/automation-tools/eth-docker)
{% endcontent-ref %}

**Changes to note:**

* Set the `Reward Address` to your cluster's Splitter contract.

### Edit the configuration file

Edit the `.env` file in the `eth-docker` folder.

```sh
cd 
nano ~/eth-docker/.env
```

* Append `:lido-obol.yml` in the `COMPOSE_FILE` line.

**Example:**

<figure><img src="/files/xE6ElKFFSvGb6zx96HSW" alt=""><figcaption></figcaption></figure>

* Change the `CL_NODE` line to **<http://charon:3600>** (from <http://consensus:5052>)

**Example:**

<figure><img src="/files/srPxoahinE0jLsbcEnvJ" alt=""><figcaption></figcaption></figure>

`CTRL+O`, `ENTER`, `CTRL+X` to save and exit.

## Start your Obol-enabled validator node

Migrate .charon contents into ETHDocker.

```sh
cd
sudo cp -r .charon/* eth-docker/.eth
sudo chown -R $USER:$USER eth-docker/.eth/validator_keys
```

Start ETH Docker.

```sh
ethd up
```

After all your services running via Docker "warmed up" for \~5 minutes, import your validator key shards.&#x20;

```
ethd keys import
```

## Monitoring Charon

Print Obol's Charon logs.

```sh
ethd logs charon -f --tail 20
```

Other monitoring commands under "View Logs" section of the overall ETH Docker page.

{% content-ref url="/pages/c8hStsV6JG56qLSk8fhB" %}
[ETH Docker](/automation-tools/eth-docker)
{% endcontent-ref %}

### Grafana Dashboards

Open up a browser webpage and enter the following URL.

```
http://<VM_external_IP>:3000
```

* Enter **"admin"** for both the username and password.
* Navigate to `Dashboards`. The 2 most common dashboards when running Obol DVTs are `Charon Log Dashboard` and `Charon Overview`&#x20;

## Register your cluster for funding

Cluster leader to fill up the Obol Techne Credentials registration form [here](https://airtable.com/apphbfJ552v5mHpo4/pag7JX1gSNIMzvELA/form).

Copy and paste the `cluster-lock.json` and `deposit-data.json` files from your node to a text editor your laptop so that you can upload them easily onto the form.

```sh
sudo cat ~/.charon/cluster-lock.json
```

```sh
sudo cat ~/.charon/deposit-data.json
```

## Add Obol monitoring credentials

You will receive your monitoring credentials after registrering your cluster with Obol Techne Credentials Progamme and you will need to add it into your ETH Docker configuration.

Open up the `obol-prom.yml` file for editing.

```sh
nano ~/eth-docker/prometheus/obol-prom.yml
```

Replace the `credentials` field with your actual monitoring credentials.

<figure><img src="/files/L4vVyiRhNjFVBjMJoyNN" alt=""><figcaption><p>e.g., Replace OBOL_PROM_REMOTE_WRITE_TOKEN</p></figcaption></figure>

`CTRL+O`, `ENTER`, `CTRL+X` to save and exit.

Copy the contents over into the `custom-prom.yml` file that is empty by default but already incorporated in the default ETH Docker configurations.&#x20;

```sh
cp ~/eth-docker/prometheus/obol-prom.yml ~/eth-docker/prometheus/custom-prom.yml
```

Then, restart your ETH Docker services.

```sh
ethd down
ethd up
```

## Securing your device

### Firewall Rules

```sh
sudo ufw default deny incoming
sudo ufw default allow outgoing
sudo ufw allow 22/tcp # for SSH
sudo ufw allow 30303 # for the EL
sudo ufw allow 9000 # for the CL
sudo ufw allow 3000 # for the native Grafana
sudo ufw allow 3610 # for Obol P2P
sudo ufw enable
```

Make sure to also configure port forwarding on the ports allowed above.&#x20;

{% content-ref url="/pages/tbZ1z2fKwHTUGm4dNmFj" %}
[Advanced networking](/tips/advanced-networking)
{% endcontent-ref %}

### Other Security SOPs

{% content-ref url="/pages/0cy4sNAS3WVzQgOT6Iaj" %}
[Networking & network security](/linux-os-networking-and-security/networking-and-network-security)
{% endcontent-ref %}

{% content-ref url="/pages/7JHbPUcfxcSFhooQGjlF" %}
[Device level security setup](/linux-os-networking-and-security/device-level-security-setup)
{% endcontent-ref %}

## Exiting your DV

I'm still working on the way to exit for each CL client. For now I only managed to test it successfully with Lodestar & Teku so we will switch to the those CLs before signing the exit messages.

Delete all the validator keyshards currently imported onto validator client and export their slashing protection databases.

```
ethd keys delete all
```

Bring down your ETH Docker services.

```
ethd down
```

Open the `.env` file for editing and switch your CL client to `lodestar.yml` or `teku.yml` in the `COMPOSE_FILE` line.

```
nano ~/eth-docker/.env
```

Bring your ETH Docker back up.

```
ethd up
```

**Wait for 15 minutes** before re-importing your validator keyshards into the new validator client (comes with the new CL). **Note:** Select ***"N"*** for "Do all keys have the same password.

{% hint style="info" %}
**IMPORTANT:** DO NOT IMPORT YOUR KEYS BEFORE WAITING FOR 15 MINUTES. If everyone does not wait before importing, your cluster may be slashed.
{% endhint %}

```
ethd keys import
```

Then run the following

{% tabs %}
{% tab title="Lodestar" %}

```sh
docker exec -it eth-docker-validator-1 node /usr/app/packages/cli/bin/lodestar validator voluntary-exit \
--beaconNodes="http://charon:3600" \
--dataDir="/var/lib/lodestar/validators" \
--exitEpoch=256 \
--network=hoodi \
--yes
```

{% endtab %}

{% tab title="Teku" %}

```sh
#WIP
docker exec -it eth-docker-validator-1 /opt/teku/bin/teku voluntary-exit \
--beacon-node-api-endpoint="http://charon:3600/" \
--confirmation-enabled=false \
--validator-keys="/var/lib/teku/validator/key-manager/local:/var/lib/teku/validator/key-manager/local-passwords" \
--epoch=256
```

{% endtab %}

{% tab title="Nimbus" %}

```sh
#WIP
docker exec -it eth-docker-validator-1 /bin/bash -c ' \
    mkdir -p /var/lib/nimbus/wd && \
    cp -r /var/lib/nimbus/ /var/lib/nimbus/wd && \
    /usr/local/bin/nimbus_beacon_node deposits exit --all --epoch=256 \
    --rest-url=http://charon:3600/ --data-dir=/var/lib/nimbus/wd
```

{% endtab %}
{% endtabs %}

## Support

{% embed url="<https://t.me/stakesaurus>" %}

## Donations

#### If you found this helpful, consider supporting Stakesaurus in one of few ways [here](https://dvt-homestaker.stakesaurus.com/#if-you-found-this-helpful-consider-supporting-stakesaurus-in-one-of-two-ways-below)!


# Techne Bronze Speedrun (CLI)

## Requirements

Obol Techne Bronze Credentials require node operators to run 50 testnet validator keys as a distributed validator cluster for 3 weeks, where Obol will fund the testnet ETH required to activate the validator keys.

{% hint style="warning" %}
Obol encourages DVT operators to contribute 1% of their staking rewards to their [retroactive funding program](https://obol.org/contributions) (RAF) which supports the decentralisation of Ethereum. This CLI flow bypasses the RAF mechanism so only use this method if really needed.&#x20;
{% endhint %}

### Hardware (Holesky)

* CPU: 4 cores
* RAM: 16GB
* SSD: 350GB
* OS: Ubuntu 24.04

## Set up Splitter contract

Choose your cluster members and form your cluster members by creating a Splitter contract that splits the execution layer rewards among all operators.

{% embed url="<https://splits.org/>" %}

## Install dependencies

Install Docker.

```sh
curl -fsSL https://get.docker.com -o get-docker.sh
sudo sh get-docker.sh

sudo groupadd docker
sudo usermod -aG docker $USER
```

Exit and re-login.

```sh
exit
```

## Generate your Obol ENR

```sh
cd

# Use docker to create an ENR. Backup the file `.charon/charon-enr-private-key`.
docker run --rm -v "$(pwd):/opt/charon" -u $(id -u):$(id -g) obolnetwork/charon:v1.1.0 create enr
```

You should expect to see a console output like this:

```
Created ENR private key: .charon/charon-enr-private-key
enr:-JG4QGQpV4qYe32QFUAbY1UyGNtNcrVMip83cvJRhw1brMslPeyELIz3q6dsZ7GblVaCjL_8FKQhF6Syg-O_kIWztimGAYHY5EvPgmlkgnY0gmlwhH8AAAGJc2VjcDI1NmsxoQKzMe_GFPpSqtnYl-mJr8uZAUtmkqccsAx7ojGmFy-FY4N0Y3CCDhqDdWRwgg4u
```

Save the `ENR public key` in a text file on your laptop. You will need to use this in the next section.&#x20;

The `ENR public key` is denoted as `enr:-JG4QGQpV4qYe32QFUAbY1UyGNtNcrVMip83cvJRhw1brMslPeyELIz3q6dsZ7GblVaCjL_8FKQhF6Syg-O_kIWztimGAYHY5EvPgmlkgnY0gmlwhH8AAAGJc2VjcDI1NmsxoQKzMe_GFPpSqtnYl-mJr8uZAUtmkqccsAx7ojGmFy-FY4N0Y3CCDhqDdWRwgg4u` in the example output above.

### Restarting from scratch

If you want to redo the whole process, remove the existing `charon-distributed-validator-node` folder before re-running the set of commands above.&#x20;

```sh
cd
sudo rm -r .charon
```

## Create the Cluster Definition file

Appoint a cluster leader among your cluster.&#x20;

The cluster leader will collect everyone's `ENR public key` and run the following command.

**Replace:**

* `--name` flag with your choice of name for your cluster
* `--fee-recipient-addresses` flag with your cluster's actual `Splitter contract address`&#x20;
* `--operator-enrs` flag with the actual `ENR public key` of your cluster members

<pre class="language-sh"><code class="lang-sh"><strong>cd
</strong><strong>docker run --rm -v "$(pwd):/opt/charon" -u $(id -u):$(id -g) obolnetwork/charon:v1.1.0 create dkg \
</strong>--name="&#x3C;Cluster_name>" --num-validators=50 \
--fee-recipient-addresses="&#x3C;Splitter_contract_address>" \
--withdrawal-addresses="0x17E6F6270A101dc7687Cc9899889819EeAF8253f" \
--network="holesky" \
--operator-enrs=\
"enr:-HW4QO5ci0ykiIxKD9CPoK0DzqrtV85jaXRgHeUKJyX8KmAhOxe5lD5MBGTNf9vJClUIeLzqj9awJtXsxWGciTI8BgSAgmlkgnY0iXNlY3AyNTZrMaEDivyOXAZbkL8sqbSuCQ0NBa3qiGxgrU_3pda02C1A0HQ",\
"enr:-HW4QFOFj99TaauvirkSRmEphR1UkevkegYJYkBzzLK3b2kwLmEHxE_E8q_BTJY0pN1vIBPq4rZ2Kih-K11MOAC6VimAgmlkgnY0iXNlY3AyNTZrMaECV0SXHBiWDjucuAdRPbJA19ExP73EvDlYJGEwyr4fYZY",\
"enr:-HW4QFRRhXE1aBufxYYqXLp5_QTCpAmct6UsKt-MMqbaNNCcNpVMC-icRYwAwXalh0Y2cIIhVocLVRPcZSQrev8osJyAgmlkgnY0iXNlY3AyNTZrMaECerwvVkvu8ZM_vALT10Rtp0YiFth7R5JrqP-iTmXwzAk",\
"enr:-HW4QIq63_axsvYq3D24gcZSFTKjrSl0nWwXVeYc29mJV-avEzVMKUcaxjM9wYnz4GWIT4JQqASJfu6M-HK5RH-zE8aAgmlkgnY0iXNlY3AyNTZrMaEDafXZh594s4ft5El40JmGt1qVsOdW5gv2qzaVtC2LTLc"
</code></pre>

{% hint style="info" %}
Keep the `--withdrawal-addresses flag` as is because we want Obol to fund our testnet validators.
{% endhint %}

A `cluster-definition.json` file will be generated and saved in the `~/.charon` directory.

Distribute this `cluster-definition.json` file to each cluster member to place within their own `~/.charon` directories.

{% hint style="info" %}
You can use any messaging app for this because only the public part of the ENR key is exposed in this file.
{% endhint %}

## Run the DKG ceremony

```sh
cd
docker run --rm -v "$(pwd):/opt/charon" -u $(id -u):$(id -g) obolnetwork/charon:v1.1.0 dkg --publish
```

{% hint style="info" %}
All cluster members need to run the DKG service within 30 minutes of one another and keep it running until the ceremony is complete.
{% endhint %}

Once the DKG ceremony is completed, **back up the `.charon` folder containing the following important files:**&#x20;

* charon-enr-private-key
* cluster-lock.json
* cluster-definition.yml
* validator\_keys/
* deposit-data.json

**Back up using one of the 2 methods below.**

{% tabs %}
{% tab title="secure copy" %}
This is the most secure method but requires having SSH access to your server from your laptop's terminal (i.e., after manually adding SSH public keys to your server).&#x20;

```sh
scp -i PATH_TO_SSH_PRIVATE_KEY -r USER@EXTERNAL_IP_ADDRESS:~/.charon $HOME/Documents
```

Your .charon folder will now be found on your laptop's `Documents` folder. Note that `.charon` is a hidden folder so you will not see it being displayed in your file system.
{% endtab %}

{% tab title="base64" %}
This is an alternative method if you have not set up SSH access to your server from your laptop's terminal. It is less secure as you will expose your files temporarily on your terminal.

* Zip up the .charon folder and convert the zipped file into a base64 string. Then print out the resulting contents.

```sh
sudo tar -czvf - $HOME/.charon | base64 > dot_charon.tar.gz.b64
cat dot_charon.tar.gz.b64
```

* Copy the entire output carefully and save it in a text editor on your laptop.&#x20;
* Clear your terminal and remove the bash history of your server to minimise exposure of these important files

```sh
clear
history -c
```

#### Restoring the files

To restore base64 encoded files, we basically need to reverse the process above.

Convert the base64 string back into a zipped file and then unzip the resulting archive.

```sh
base64 -d dot_charon.tar.gz.b64 > dot_charon.tar.gz
tar xvf dot_charon.tar.gz
```

The `.charon` folder will be found in the folder you ran the above command in. Run `ls -la` to see it.
{% endtab %}
{% endtabs %}

Then, set the following permissions.&#x20;

```sh
sudo chmod +x ~/.charon
sudo chmod 755 ~/.charon
sudo chmod 600 ~/.charon/charon-enr-private-key
```

## Set up ETH Docker

Each cluster member needs to spin up a "vanilla" validator node.

{% content-ref url="/pages/c8hStsV6JG56qLSk8fhB" %}
[ETH Docker](/automation-tools/eth-docker)
{% endcontent-ref %}

**Changes to note:**

* Set the `Reward Address` to your cluster's Splitter contract.

### Edit the configuration file

Edit the `.env` file in the `eth-docker` folder.

```sh
cd 
nano ~/eth-docker/.env
```

* Append `:lido-obol.yml` in the `COMPOSE_FILE` line.

**Example:**

<figure><img src="/files/xE6ElKFFSvGb6zx96HSW" alt=""><figcaption></figcaption></figure>

* Change the `CL_NODE` line to **<http://charon:3600>** (from <http://consensus:5052>)

**Example:**

<figure><img src="/files/srPxoahinE0jLsbcEnvJ" alt=""><figcaption></figcaption></figure>

`CTRL+O`, `ENTER`, `CTRL+X` to save and exit.

## Start your Obol-enabled validator node

Migrate .charon contents into ETHDocker.

```sh
cd
sudo cp -r .charon/* eth-docker/.eth
```

Start ETH Docker.

```sh
ethd up
```

After all your services running via Docker "warmed up" for \~5 minutes, import your validator key shards.&#x20;

```
ethd keys import
```

## Monitoring Charon

Print Obol's Charon logs.

```sh
ethd logs charon -f --tail 20
```

Other monitoring commands under "View Logs" section of the overall ETH Docker page.

{% content-ref url="/pages/c8hStsV6JG56qLSk8fhB" %}
[ETH Docker](/automation-tools/eth-docker)
{% endcontent-ref %}

### Grafana Dashboards

Open up a browser webpage and enter the following URL.

```
http://<VM_external_IP>:3000
```

* Enter **"admin"** for both the username and password.
* Navigate to `Dashboards`. The 2 most common dashboards when running Obol DVTs are `Charon Log Dashboard` and `Charon Overview`&#x20;

## Register your cluster for funding

Cluster leader to fill up the Obol Techne Credentials registration form [here](https://airtable.com/apphbfJ552v5mHpo4/pag7JX1gSNIMzvELA/form).

Copy and paste the `cluster-lock.json` and `deposit-data.json` files from your node to a text editor your laptop so that you can upload them easily onto the form.

```sh
sudo cat ~/.charon/cluster-lock.json
```

```sh
sudo cat ~/.charon/deposit-data.json
```

## Add Obol monitoring credentials

You will receive your monitoring credentials after registrering your cluster with Obol Techne Credentials Progamme and you will need to add it into your ETH Docker configuration.

Open up the `obol-prom.yml` file for editing.

```sh
nano ~/eth-docker/prometheus/obol-prom.yml
```

Replace the `credentials` field with your actual monitoring credentials.

<figure><img src="/files/L4vVyiRhNjFVBjMJoyNN" alt=""><figcaption><p>e.g., Replace OBOL_PROM_REMOTE_WRITE_TOKEN</p></figcaption></figure>

`CTRL+O`, `ENTER`, `CTRL+X` to save and exit.

Copy the contents over into the `custom-prom.yml` file that is empty by default but already incorporated in the default ETH Docker configurations.&#x20;

```sh
cp ~/eth-docker/prometheus/obol-prom.yml ~/eth-docker/prometheus/custom-prom.yml
```

Then, restart your ETH Docker services.

```sh
ethd down
ethd up
```

## Securing your device

### Firewall Rules

```sh
sudo ufw default deny incoming
sudo ufw default allow outgoing
sudo ufw allow 22/tcp # for SSH
sudo ufw allow 30303 # for the EL
sudo ufw allow 9000 # for the CL
sudo ufw allow 3000 # for the native Grafana
sudo ufw allow 3610 # for Obol P2P
sudo ufw enable
```

Make sure to also configure port forwarding on the ports allowed above.&#x20;

{% content-ref url="/pages/tbZ1z2fKwHTUGm4dNmFj" %}
[Advanced networking](/tips/advanced-networking)
{% endcontent-ref %}

### Other Security SOPs

{% content-ref url="/pages/0cy4sNAS3WVzQgOT6Iaj" %}
[Networking & network security](/linux-os-networking-and-security/networking-and-network-security)
{% endcontent-ref %}

{% content-ref url="/pages/7JHbPUcfxcSFhooQGjlF" %}
[Device level security setup](/linux-os-networking-and-security/device-level-security-setup)
{% endcontent-ref %}

## Support

{% embed url="<https://t.me/stakesaurus>" %}

## Donations

#### If you found this helpful, consider supporting Stakesaurus in one of few ways [here](https://dvt-homestaker.stakesaurus.com/#if-you-found-this-helpful-consider-supporting-stakesaurus-in-one-of-two-ways-below)!


# Obol + Bonded Validators (Techne Silver)

The Obol Silver Techne Credentials require clusters to be operational on the Ethereum Mainnet. This can be prohibitive because splitting 32 ETH among 7 operators still requires 4.57 ETH per operator.

One good workaround is to combine your Obol setup with one of the bonded validator options available--splitting the reduced collateral amount instead of the full 32 ETH. &#x20;


# Obol + Lido CSM

## Credits

This guide references the ideas and work of one of the Lido Community Staking members, [@ivans\_music](https://x.com/ivans_music). ***Check out his original work below!***

{% embed url="<https://hackmd.io/@9u0cieIUT2Gsdm7YYOCKUg/S15o9sV20>" %}


# SSV


# SSV + Lido CSM (WIP)

This guide is used as reference material for in-person workshops with mainly non-technical audiences

## Credits

This guide references the ideas and work of one of the Lido Community Staking members, [@ivans\_music](https://x.com/ivans_music). ***Check out his original work below!***

{% embed url="<https://hackmd.io/@9u0cieIUT2Gsdm7YYOCKUg/HkEsIu4pR#Comprehensive-guide-to-setting-up-a-distributed-Lido-CSM-validator-cluster-with-SSV-Network>" %}

{% hint style="danger" %} <mark style="color:red;">**WIP. DO NOT USE YET**</mark>
{% endhint %}

## Hardware (Holesky)

Spin up a virtual machine on a cloud service with the following specifications using the reference page below.

* CPU: 4 cores
* RAM: 16GB
* SSD: 250GB
* OS: Ubuntu 24.04

{% content-ref url="/pages/68N04wxxW6k8PC4CHn8H" %}
[Google Cloud](/hardware-and-systems-setup/practicing-for-free-on-cloud-vms/google-cloud)
{% endcontent-ref %}

{% hint style="success" %}
**Tip:** Open these reference pages in a new tab/window so that you can switch between them easily
{% endhint %}

## Installing ETH Docker

Each cluster member will need to spin up an SSV node using ETH Docker. Refer to the page below to install it. Come back to this page right before the `ethd config` command is run,

{% content-ref url="/pages/c8hStsV6JG56qLSk8fhB" %}
[ETH Docker](/automation-tools/eth-docker)
{% endcontent-ref %}

```
ethd config
```

**Follow along the prompts in the terminal UI (TUI) to:**

* Choose `Holešovice Testnet` >> `SSV node - consensus, execution and ssv-node`
* Select `yes` for ***Do you want to participate in DKG ceremonies as an operator?***
* Once you see the screen below, select `<Cancel>` as we don't have our Operator ID yet.&#x20;

<figure><img src="/files/0g7ZZFSaPfubf2o6Hi2x" alt=""><figcaption></figcaption></figure>

* *<mark style="background-color:yellow;">**Then copy your SSV node public key from your terminal output and save it on a text editor**</mark>*

<figure><img src="/files/hUY1Xj8NnyX7YrEEbCXH" alt=""><figcaption></figcaption></figure>

<details>

<summary>ETH Docker TUI Navigation</summary>

* `Arrow keys & Tab key`: Cycle options
* `Space bar`: Select option
* `Enter`: Confirm option
* `CTRL+C`: Exit individual screen monitoring view
* `ESC`: Quit

</details>

## Register SSV Operator

1. Go to the [SSV webapp](https://app.ssv.network/join), connect your wallet, and set the network to Holesky.
2. Select `Join as Operator` >> `Register Operator`
3. Paste your SSV node public key into the `Operator Public Key` field. Make sure there are no whitespaces in your pasted string.
4. Keep `Operator Status` to ***Public***
5. Set the annual fee to **1.5 SSV** per validator key, representing \~1.5% staking rewards fee at current $ETH and $SSV prices ($2650 & $23).
6. Register operator and sign the transaction on your wallet
7. Your SSV Operator ID will then be generated. *<mark style="background-color:yellow;">**Copy it and save it in a text editor file.**</mark>*

<figure><img src="/files/KfZDIhfnLry7BZh3lICu" alt=""><figcaption></figcaption></figure>

{% hint style="info" %}
Setting your Operator Status to Public allows other stakers to select your SSV node as one of their DV operators, allowing them to pay you for your service. You can also easily net off the fees among your own DVT cluster members if you wish.&#x20;
{% endhint %}

## Complete ETH Docker Setup

Go back to the terminal of your VM.

```
ethd config
```

1. Choose `Holešovice Testnet` >> `SSV node - consensus, execution and ssv-node`
2. Select `yes` for ***Do you want to participate in DKG ceremonies as an operator?***
3. Because you now have your `SSV Operator ID`, you can paste it in the requested field
4. Select the **consensus** and **execution client** of your choice
5. Use the `provided URL` for **Checkpoint Sync**, select `yes` for **MEV Boost**, `yes` for **Grafana dashboards**
6. Set `Rewards Address` to an ERC-20 wallet address that you control (e.g., Metamask, hardware wallet)
7. `use default` **Graffiti**, `yes` for **generate validator keys**

### Customise ETH Docker Settings

Open up the ETH Docker `.env` file for editing.

```sh
nano ~/eth-docker/.env
```

#### Add all MEV Relays

Add `#`to the start of the `MEV_RELAYS=` line.

<figure><img src="/files/J4p2qAtOnOacpSdwt0Ye" alt=""><figcaption></figcaption></figure>

Copy the string below and paste it in the next line, under the current  `#MEV_RELAYS=` line.

```
MEV_RELAYS=https://0xafa4c6985aa049fb79dd37010438cfebeb0f2bd42b115b89dd678dab0670c1de38da0c4e9138c9290a398ecd9a0b3110@boost-relay-holesky.flashbots.net,https://0xaa58208899c6105603b74396734a6263cc7d947f444f396a90f7b7d3e65d102aec7e5e5291b27e08d02c50a050825c2f@holesky.titanrelay.xyz,https://0x821f2a65afb70e7f2e820a925a9b4c80a159620582c1766b1b09729fec178b11ea22abb3a51f07b288be815a1a2ff516@bloxroute.holesky.blxrbdn.com,https://0xb1559beef7b5ba3127485bbbb090362d9f497ba64e177ee2c8e7db74746306efad687f2cf8574e38d70067d40ef136dc@relay-stag.ultrasound.money,https://0xab78bf8c781c58078c3beb5710c57940874dd96aef2835e7742c866b4c7c0406754376c2c8285a36c630346aa5c5f833@holesky.aestus.live,http://0x821f2a65afb70e7f2e820a925a9b4c80a159620582c1766b1b09729fec178b11ea22abb3a51f07b288be815a1a2ff516@testnet.relay-proxy.blxrbdn.com:18552,https://0x833b55e20769a8a99549a28588564468423c77724a0ca96cffd58e65f69a39599d877f02dc77a0f6f9cda2a3a4765e56@relay-holesky.beaverbuild.org,https://0xb1d229d9c21298a87846c7022ebeef277dfc321fe674fa45312e20b5b6c400bfde9383f801848d7837ed5fc449083a12@relay-holesky.edennetwork.io,https://0xaa58208899c6105603b74396734a6263cc7d947f444f396a90f7b7d3e65d102aec7e5e5291b27e08d02c50a050825c2f@holesky.titanrelay.xyz
```

{% hint style="success" %}
This enables your SSV Node to use all MEV Relays which maximises MEV rewards for stakers using SSV.
{% endhint %}

#### Change SSV DKG Port

Change the `SSV_DKG_PORT=` to **443** (from 3030).

<figure><img src="/files/GbgOTcsUIqOsKsmEar0i" alt=""><figcaption></figcaption></figure>

`CTRL+O`, `ENTER`, `CTRL+X` to save and exit.

## Configure DKG endpoint

Find the external IP address of your VM on your Google Cloud account >> Console >> Compute Engine >> Look under "External IP".

Your **DKG endpoint** will be `<EXTERNAL_IP_ADDRESS>:443`,without the pointy brackets. *<mark style="background-color:yellow;">**Note that down and save it in a text editor file.**</mark>*

<details>

<summary>Configure DKG endpoint (for non-VMs)</summary>

On your laptop, create a Tailscale VPN account at <https://login.tailscale.com>.

On your VM, install Tailscale and run it.

```sh
curl -fsSL https://tailscale.com/install.sh | sh
sudo tailscale up
```

Copy the URL and paste it into a browser on your laptop to authenticate your VM. Sign-in and click `Connect` when prompted.

<img src="/files/sW5qXoPgIxJf8tvuZ1Ta" alt="" data-size="original">

On your VM, after successfully authenticating,

```sh
sudo tailscale funnel --bg https+insecure://localhost:3030
```

The highlighted part of the output is your DKG endpoint. *<mark style="background-color:yellow;">**Copy it and save it in your text editor.**</mark>*

<img src="/files/MbbwvN0LEQu3NqUcYvqr" alt="E.g., Your full DKG endpoint in this example is https://ssv-csm-test.tail147ca.ts.net" data-size="original">

</details>

Verify that your DKG endpoint is accessible from external sources.

```sh
cd ~/eth-docker
docker compose run --rm ssv-dkg ping --ip <DKG_ENDPOINT>
```

**Expected output:**

<figure><img src="/files/Wn0xwpOHUDlyH1I4QHx1" alt=""><figcaption></figcaption></figure>

## Start ETH Docker

```
ethd up
```

## Complete SSV Operator Metadata

Go back to the [SSV webapp](https://app.ssv.network/join) >> Connect your wallet >> Switch to Holesky network >> go to `My Account` and click on your SSV Operator.

<figure><img src="/files/xCCfVoA2oj1QO7Is3yDP" alt=""><figcaption></figcaption></figure>

Select the `...` drop down at the top right >> `Edit Details`

<figure><img src="/files/5SQBgs2epN8PKUzqe0Zi" alt=""><figcaption></figcaption></figure>

Select all options under MEV Relays.

<figure><img src="/files/2K1XfJBgpnvu2UOtPtmy" alt=""><figcaption></figcaption></figure>

The MEV Relays are actually set in your ETH Docker config and this is just to signal the relays that you are using.

{% hint style="danger" %}
All cluster members ***must use*** the same relays to avoid missing block proposals due to a lack of consensus!
{% endhint %}

Input your DKG endpoint and append `:443` at the end if you are using a Tailscale funnel.

<figure><img src="/files/oz1f1t8sXpk3a2yvd6Vz" alt=""><figcaption></figcaption></figure>

{% hint style="info" %}
The other fields are optional but fill them up to attract stakers to select your SSV Operator!
{% endhint %}

## Create a Safe Multi-Sig Wallet

Cluster leader collects the wallet addresses of all cluster members to assign each of them as signers of this multi-sig wallet

Next, create a Safe multi-sig wallet on Holesky for your cluster here: <https://holesky-safe.protofire.io/>

* Connect your wallet >> Input your cluster name & select Holesky network
* Add all wallet addresses of your cluster as signers. Choose any name for each signer. Select your signing threshold.

{% hint style="info" %}
The recommended signing thresholds are 3/4, 4/5, 5/6, 5/7, 6/8, 7/9, & 7/10.
{% endhint %}

## Create Splitter Contract

Create a Splitter contract for your cluster here: <https://app.splits.org/>

* Connect your wallet >> **Create new contract** >> Set the network to `Holesky` (you might need to zoom out on your browser to see testnets) >> Choose `Split`
* Add each cluster member's wallet address and set their respective percentage splits
* Set Controller to `None (immutable)`, Distribution bounty to `Off`, & choose whether you want to  sponsor the maintainer of Splits
* Optionally, set the name of your Splitter contract

## Create your SSV Cluster

After all cluster members have registered their operators one of the cluster members opens the[ SSV webapp](https://app.ssv.network/) and connects the cluster Safe wallet.

* Choose WalletConnect as the method (not Metamask or Coinbase Wallet)
* `Open` the WalletConnect modal >> Copy the link (look for the "Copy" icon)

<figure><img src="/files/vZCOjbLt9j4m8rhyuCfF" alt="" width="375"><figcaption></figcaption></figure>

* Go to you cluster's Safe multi-sig account and click on the WalletConnect icon >> Paste the copied link from the SSV Webapp here

<figure><img src="/files/wkLPaqmqgzb2CVCcDJWW" alt="" width="375"><figcaption></figcaption></figure>

* Go back to the SSV Webapp >> Distribute Validator >> Generate new key shares
* Select cluster size and the SSV Operators in your cluster >> Select `Offline` as your preferred DKG method
* Select `DKG - Generate from New Key,` number of keys you want to generate, & set the withdrawal address to `0xF0179dEC45a37423EAD4FaD5fCb136197872EAd9` (Lido **TESTNET** withdrawal vault)
  * Select `Linux (and WSL)` and copy the DKG command that will be generated for you

### Initiating the DKG Ceremony

Make sure all cluster members have confirmed that their DKG service is running and reachable.

Run `cd`, then run the generated DKG command on your VM and you should see ***"DKG ceremony completed"*** if the DKG ceremony completes successfully.&#x20;

<figure><img src="/files/Hzzu6chmgzkSaW2uo4T9" alt=""><figcaption></figcaption></figure>

Back up all DKG output files located in `$HOME/ceremony*` folder.

```sh
#run on your laptop
scp -r $USER@<EXTERNAL_IP_ADDRESS>:$HOME/ceremony* $HOME
```

Save this folder onto a USB drive and delete the copy on your laptop.

```sh
#run on your laptop
sudo rm -r $HOME/ceremony*
```

Return to the SSV Webapp and acknowledge **Step 2: Deposit Validator** (although this is not yet done at this point), then go to **Step 3** and click on Register Validator.

## Create CSM Operator

## Exiting CSM-SSV validators


# SSV Operator

## Credits

This guide references the ideas and work of one of the Lido Community Staking members, [@ivans\_music](https://x.com/ivans_music). ***Check out his original work below!***

{% embed url="<https://hackmd.io/@9u0cieIUT2Gsdm7YYOCKUg/HkEsIu4pR#Comprehensive-guide-to-setting-up-a-distributed-Lido-CSM-validator-cluster-with-SSV-Network>" %}

## Hardware (Holesky)

Spin up a virtual machine on a cloud service with the following specifications using the reference page below.

* CPU: 4 cores
* RAM: 16GB
* SSD: 250GB
* OS: Ubuntu 24.04

{% content-ref url="/pages/68N04wxxW6k8PC4CHn8H" %}
[Google Cloud](/hardware-and-systems-setup/practicing-for-free-on-cloud-vms/google-cloud)
{% endcontent-ref %}

{% hint style="success" %}
**Tip:** Open these reference pages in a new tab/window so that you can switch between them easily
{% endhint %}

## Installing ETH Docker

Each cluster member will need to spin up an SSV node using ETH Docker. Refer to the page below to install it. Come back to this page right before the `ethd config` command is run,

{% content-ref url="/pages/c8hStsV6JG56qLSk8fhB" %}
[ETH Docker](/automation-tools/eth-docker)
{% endcontent-ref %}

```
ethd config
```

**Follow along the prompts in the terminal UI (TUI) to:**

* Choose `Holešovice Testnet` >> `SSV node - consensus, execution and ssv-node`
* Select `yes` for ***Do you want to participate in DKG ceremonies as an operator?***
* Once you see the screen below, select `<Cancel>` as we don't have our Operator ID yet.&#x20;

<figure><img src="/files/0g7ZZFSaPfubf2o6Hi2x" alt=""><figcaption></figcaption></figure>

* *<mark style="background-color:yellow;">**Then copy your SSV node public key from your terminal output and save it on a text editor**</mark>*

<figure><img src="/files/hUY1Xj8NnyX7YrEEbCXH" alt=""><figcaption></figcaption></figure>

<details>

<summary>ETH Docker TUI Navigation</summary>

* `Arrow keys & Tab key`: Cycle options
* `Space bar`: Select option
* `Enter`: Confirm option
* `CTRL+C`: Exit individual screen monitoring view
* `ESC`: Quit

</details>

## Register SSV Operator

1. Go to the [SSV webapp](https://app.ssv.network/join), connect your wallet, and set the network to Holesky.
2. Select `Join as Operator` >> `Register Operator`
3. Paste your SSV node public key into the `Operator Public Key` field. Make sure there are no whitespaces in your pasted string.
4. Keep `Operator Status` to ***Public***
5. Set the annual fee to **1.5 SSV** per validator key, representing \~1.5% staking rewards fee at current $ETH and $SSV prices ($2650 & $23).
6. Register operator and sign the transaction on your wallet
7. Your SSV Operator ID will then be generated. *<mark style="background-color:yellow;">**Copy it and save it in a text editor file.**</mark>*

<figure><img src="/files/KfZDIhfnLry7BZh3lICu" alt=""><figcaption></figcaption></figure>

{% hint style="info" %}
Setting your Operator Status to Public allows other stakers to select your SSV node as one of their DV operators, allowing them to pay you for your service. You can also easily net off the fees among your own DVT cluster members if you wish.&#x20;
{% endhint %}

## Complete ETH Docker Setup

Go back to the terminal of your VM.

```
ethd config
```

1. Choose `Holešovice Testnet` >> `SSV node - consensus, execution and ssv-node`
2. Select `yes` for ***Do you want to participate in DKG ceremonies as an operator?***
3. Because you now have your `SSV Operator ID`, you can paste it in the requested field
4. Select the **consensus** and **execution client** of your choice
5. Use the `provided URL` for **Checkpoint Sync**, select `yes` for **MEV Boost**, `yes` for **Grafana dashboards**
6. Set `Rewards Address` to an ERC-20 wallet address that you control (e.g., Metamask, hardware wallet)
7. `use default` **Graffiti**, `yes` for **generate validator keys**

### Customise ETH Docker Settings

Open up the ETH Docker `.env` file for editing.

```sh
nano ~/eth-docker/.env
```

#### Add all MEV Relays

Add `#`to the start of the `MEV_RELAYS=` line.

<figure><img src="/files/J4p2qAtOnOacpSdwt0Ye" alt=""><figcaption></figcaption></figure>

Copy the string below and paste it in the next line, under the current  `#MEV_RELAYS=` line.

```
MEV_RELAYS=https://0xafa4c6985aa049fb79dd37010438cfebeb0f2bd42b115b89dd678dab0670c1de38da0c4e9138c9290a398ecd9a0b3110@boost-relay-holesky.flashbots.net,https://0xaa58208899c6105603b74396734a6263cc7d947f444f396a90f7b7d3e65d102aec7e5e5291b27e08d02c50a050825c2f@holesky.titanrelay.xyz,https://0x821f2a65afb70e7f2e820a925a9b4c80a159620582c1766b1b09729fec178b11ea22abb3a51f07b288be815a1a2ff516@bloxroute.holesky.blxrbdn.com,https://0xb1559beef7b5ba3127485bbbb090362d9f497ba64e177ee2c8e7db74746306efad687f2cf8574e38d70067d40ef136dc@relay-stag.ultrasound.money,https://0xab78bf8c781c58078c3beb5710c57940874dd96aef2835e7742c866b4c7c0406754376c2c8285a36c630346aa5c5f833@holesky.aestus.live,http://0x821f2a65afb70e7f2e820a925a9b4c80a159620582c1766b1b09729fec178b11ea22abb3a51f07b288be815a1a2ff516@testnet.relay-proxy.blxrbdn.com:18552,https://0x833b55e20769a8a99549a28588564468423c77724a0ca96cffd58e65f69a39599d877f02dc77a0f6f9cda2a3a4765e56@relay-holesky.beaverbuild.org,https://0xb1d229d9c21298a87846c7022ebeef277dfc321fe674fa45312e20b5b6c400bfde9383f801848d7837ed5fc449083a12@relay-holesky.edennetwork.io,https://0xaa58208899c6105603b74396734a6263cc7d947f444f396a90f7b7d3e65d102aec7e5e5291b27e08d02c50a050825c2f@holesky.titanrelay.xyz
```

{% hint style="success" %}
This enables your SSV Node to use all MEV Relays which maximises MEV rewards for stakers using SSV.
{% endhint %}

#### Change SSV DKG Port

Change the `SSV_DKG_PORT=` to **443** (from 3030).

<figure><img src="/files/GbgOTcsUIqOsKsmEar0i" alt=""><figcaption></figcaption></figure>

`CTRL+O`, `ENTER`, `CTRL+X` to save and exit.

## Configure DKG endpoint

Find the external IP address of your VM on your Google Cloud account >> Console >> Compute Engine >> Look under "External IP".

Your **DKG endpoint** will be `<EXTERNAL_IP_ADDRESS>:443`,without the pointy brackets. *<mark style="background-color:yellow;">**Note that down and save it in a text editor file.**</mark>*

<details>

<summary>Configure DKG endpoint (for non-VMs)</summary>

On your laptop, create a Tailscale VPN account at <https://login.tailscale.com>.

On your VM, install Tailscale and run it.

```sh
curl -fsSL https://tailscale.com/install.sh | sh
sudo tailscale up
```

Copy the URL and paste it into a browser on your laptop to authenticate your VM. Sign-in and click `Connect` when prompted.

<img src="/files/sW5qXoPgIxJf8tvuZ1Ta" alt="" data-size="original">

On your VM, after successfully authenticating,

```sh
sudo tailscale funnel --bg https+insecure://localhost:3030
```

The highlighted part of the output is your DKG endpoint. *<mark style="background-color:yellow;">**Copy it and save it in your text editor.**</mark>*

<img src="/files/MbbwvN0LEQu3NqUcYvqr" alt="E.g., Your full DKG endpoint in this example is https://ssv-csm-test.tail147ca.ts.net" data-size="original">

</details>

Verify that your DKG endpoint is accessible from external sources.

```sh
cd ~/eth-docker
sudo docker compose run --rm ssv-dkg ping --ip https://<DKG_ENDPOINT>:443
```

**Expected output:**

<figure><img src="/files/Wn0xwpOHUDlyH1I4QHx1" alt=""><figcaption></figcaption></figure>

## Start ETH Docker

```
ethd up
```

## Complete SSV Operator Metadata

Go back to the [SSV webapp](https://app.ssv.network/join) >> Connect your wallet >> Switch to Holesky network >> go to `My Account` and click on your SSV Operator.

<figure><img src="/files/xCCfVoA2oj1QO7Is3yDP" alt=""><figcaption></figcaption></figure>

Select the `...` drop down at the top right >> `Edit Details`

<figure><img src="/files/5SQBgs2epN8PKUzqe0Zi" alt=""><figcaption></figcaption></figure>

Select all options under MEV Relays.

<figure><img src="/files/2K1XfJBgpnvu2UOtPtmy" alt=""><figcaption></figcaption></figure>

The MEV Relays are actually set in your ETH Docker config and this step is just to signal the relays that you are using.

{% hint style="danger" %}
All cluster members ***must use*** the same relays to avoid missing block proposals due to a lack of consensus!
{% endhint %}

{% hint style="info" %}
Use all available MEV Relays so that it's easier for stakers to choose your SSV Node.&#x20;
{% endhint %}

Input your DKG endpoint and append `:443` at the end if you are using a Tailscale funnel.

<figure><img src="/files/oz1f1t8sXpk3a2yvd6Vz" alt=""><figcaption></figcaption></figure>

{% hint style="info" %}
The other fields are optional but fill them up to attract stakers to select your SSV Operator!
{% endhint %}

## Securing your device

### Firewall Rules

```sh
sudo ufw default deny incoming
sudo ufw default allow outgoing
sudo ufw allow 22/tcp # for SSH
sudo ufw allow 30303 # for the EL
sudo ufw allow 9000 # for the CL
sudo ufw allow 3000 # for the native Grafana
sudo ufw allow 3030 # for SSV DKG
sudo ufw allow 12001/udp # for SSV node UDP
sudo ufw allow 13001/tcp # for SSV node TCP
sudo ufw enable
```

Make sure to also configure port forwarding on the ports allowed above.&#x20;

{% content-ref url="/pages/tbZ1z2fKwHTUGm4dNmFj" %}
[Advanced networking](/tips/advanced-networking)
{% endcontent-ref %}

### Other Security SOPs

{% content-ref url="/pages/0cy4sNAS3WVzQgOT6Iaj" %}
[Networking & network security](/linux-os-networking-and-security/networking-and-network-security)
{% endcontent-ref %}

{% content-ref url="/pages/7JHbPUcfxcSFhooQGjlF" %}
[Device level security setup](/linux-os-networking-and-security/device-level-security-setup)
{% endcontent-ref %}

## Support

{% embed url="<https://t.me/stakesaurus>" %}

## Donations

#### If you found this helpful, consider supporting Stakesaurus in one of few ways [here](https://dvt-homestaker.stakesaurus.com/#if-you-found-this-helpful-consider-supporting-stakesaurus-in-one-of-two-ways-below)!


# SSV Staker

## Credits

This guide references the ideas and work of one of the Lido Community Staking members, [@ivans\_music](https://x.com/ivans_music). ***Check out his original work below!***

{% embed url="<https://hackmd.io/@9u0cieIUT2Gsdm7YYOCKUg/HkEsIu4pR#Comprehensive-guide-to-setting-up-a-distributed-Lido-CSM-validator-cluster-with-SSV-Network>" %}

## Pre-requisites&#x20;

1\) Get testnet SSV tokens via the official SSV faucet below.

{% embed url="<https://faucet.ssv.network/>" %}

2\) Install and configure ETH Docker only if you have not completed the **SSV Operator** section

{% content-ref url="/pages/c8hStsV6JG56qLSk8fhB" %}
[ETH Docker](/automation-tools/eth-docker)
{% endcontent-ref %}

* Choose `Holešovice Testnet` >> `Ethereum node - consensus, execution and validator client`
* Choose any configuration options for the subsequent steps. We only want to get to a point where you can use ETH Docker to generate validator keystores easily here.&#x20;

## Method 1: Distribute existing keystores

### Customise ETH Docker Settings

Open up the ETH Docker `.env` file for editing.

```sh
nano ~/eth-docker/.env
```

Add `:deposit-cli.yml` to the end of the `COMPOSE_FILE=` line.

### Generate validator keystores

First, generate your validator keystores.

```sh
ethd cmd run --rm deposit-cli-new --execution_address YOURHARDWAREWALLETADDRESS --uid $(id -u)
```

Copy the validator keystore onto your laptop. ***Open the terminal on your laptop and run:***

```sh
scp $USER@EXTERNAL_IP_ADDRESS:~/eth-docker/.eth/validators/keystore*.json $HOME/Documents
```

**Note:** Replace EXTERNAL\_IP\_ADDRESS with your actual VM's external IP

Your validator keystore will now be found in the `Documents` folder of your laptop.&#x20;

{% hint style="danger" %}
Delete this copy of your validator keystore on your laptop completely after splitting it on SSV in the next section.
{% endhint %}

### Split keystores on SSV

Open up the[ SSV webapp](https://app.ssv.network/) and your wallet wallet.

* Click on the **Operators** drop down and switch to **Validators**&#x20;

<figure><img src="/files/ez332rAXgjC8oZLheEzc" alt=""><figcaption></figcaption></figure>

* Add Cluster >> Go to Distribute Validator >> Generate new key shares
* Select cluster size and the SSV Operators in your cluster >> Select `Online` as your preferred method to split your validator keystore
* Upload your keystore.json file and provide your keystore password (set during keystroke generation)
* Choose the period you want to run your validator key for, accept the fees charged by your chosen SSV Operators, and read + acknowledge the warnings/disclaimers
* Approve the spending of your SSV tokens and register your validator&#x20;

{% hint style="danger" %}
Delete the copy of your validator keystore on your laptop completely after splitting it on SSV.
{% endhint %}

## Method 2: Distributed Key Generation (WIP)

Open up the[ SSV webapp](https://app.ssv.network/) and your wallet wallet.

* Go to Distribute Validator >> Generate new key shares
* Select cluster size and the SSV Operators in your cluster >> Select `Offline` as your preferred DKG method
* Select `DKG - Generate from New Key,` number of keys you want to generate, & set the withdrawal address to `0xF0179dEC45a37423EAD4FaD5fCb136197872EAd9` (Lido **TESTNET** withdrawal vault)
  * Select `Linux (and WSL)` and copy the DKG command that will be generated for you

### Initiating the DKG Ceremony

Make sure all cluster members have confirmed that their DKG service is running and reachable.

Run `cd`, then run the generated DKG command on your VM and you should see ***"DKG ceremony completed"*** if the DKG ceremony completes successfully.&#x20;

<figure><img src="/files/Hzzu6chmgzkSaW2uo4T9" alt=""><figcaption></figcaption></figure>

Back up all DKG output files located in `$HOME/ceremony*` folder.

```sh
#run on your laptop
scp -r $USER@<EXTERNAL_IP_ADDRESS>:~/ceremony* $HOME
```

Save this folder onto a USB drive and delete the copy on your laptop.

```sh
#run on your laptop
sudo rm -r $HOME/ceremony*
```

Return to the SSV Webapp and acknowledge **Step 2: Deposit Validator** (although this is not yet done at this point), then go to **Step 3** and click on Register Validator.


# Lido CSM

The [Community Staking Module (CSM)](https://operatorportal.lido.fi/modules/community-staking-module) is the [Lido protocol’s](https://lido.fi/) first module with permissionless entry, allowing any node operator to operate validators by providing an ETH-based bond as security collateral

## Workflow breakdown

Recall that running bonded validators via the Lido CSM does not require setting up a separate service on your hardware.

{% content-ref url="/pages/bIATcpTnnVzxafsFgLoV" %}
[Bonded Validators](/understanding-eth-validators/bonded-validators)
{% endcontent-ref %}

Instead, you simply tweak the parameters of the following steps of the native solo staking setup.

{% tabs %}
{% tab title="Existing Solo Stakers" %}

1. [Generate new validator keys](/bonded-validators-setup/lido-csm/generating-csm-keystores) while setting the `withdrawal_address` to the  [Lido withdrawal vault](https://holesky.etherscan.io/address/0xF0179dEC45a37423EAD4FaD5fCb136197872EAd9).
   * **Mainnet:** [`0xB9D7934878B5FB9610B3fE8A5e441e8fad7E293f`](https://etherscan.io/address/0xb9d7934878b5fb9610b3fe8a5e441e8fad7e293f)
   * **Hoodi:** [`0x4473dCDDbf77679A643BdB654dbd86D67F8d32f2` ](https://hoodi.etherscan.io/address/0x4473dcddbf77679a643bdb654dbd86d67f8d32f2)
2. For the validator client, set the `fee_recipient` flag to the Lido Execution Layer Rewards Vault either [on the validator key level](/bonded-validators-setup/lido-csm/set-fee-recipient-address/method-1-configure-on-validator-keys) or [configuring a separate validator client.](/bonded-validators-setup/lido-csm/set-fee-recipient-address/method-2-configure-on-separate-validator-client)
   * **Mainnet:** [`0x388C818CA8B9251b393131C08a736A67ccB19297`](https://etherscan.io/address/0x388C818CA8B9251b393131C08a736A67ccB19297)
   * **Hoodi :** [`0x9b108015fe433F173696Af3Aa0CF7CDb3E104258`](https://hoodi.etherscan.io/address/0x4473dcddbf77679a643bdb654dbd86d67f8d32f2)&#x20;
3. Import the newly generated CSM keystores1
4. For the [MEV-Boost service](/keystore-generation-and-mev-boost/set-up-and-configure-mev-boost),
   1. the`-min-bid` flag may be configured either at MEV-Boost level or at the CL client, the current acceptable maximum value for min-bid is `0.07` [based on community consensus](https://research.lido.fi/t/lido-node-operator-mev-boost-min-bid-guidance/3347) and may change.&#x20;
   2. On the consensus layer client, set the `builder-boost-factor` (or equivalent flags) to `100%.` i.e., local and builder payloads should be treated with equal weights.&#x20;
   3. The `-relay` flags should be set to a list of values only using relays from the the [list of Vetted MEV-Boost Relays for Lido CSM](https://enchanted-direction-844.notion.site/6d369eb33f664487800b0dedfe32171e?v=8e5d1f1276b0493caea8a2aa1517ed65) (refer to "***Key settings to note***" section).
      1. **Mainnet:** Select **"Mainnet Active + Vetted"** tab. *You can choose only from relays tagged with `(must use some)` and `(may use)`, and must choose at least one tagged with `(must use some)`.*&#x20;
      2. **Hoodi:** Select **"Hoodi Only"** tab
5. [Upload the newly generated deposit data file](/bonded-validators-setup/lido-csm/upload-remove-view-validator-keys) pertaining to your CSM keystores onto the Lido CSM Widget and provide the required bond amount in ETH/stETH/wstETH
   * **Mainnet:** <https://csm.lido.fi/>
   * **Hoodi :** <https://csm.testnet.fi/>
6. Wait for your CSM validator keys to be deposited by Lido and make sure your node remains online in the meantime!

{% hint style="info" %}
**DO NOT DEPOSIT 32 ETH** using the deposit data file generated this way as the Lido CSM will make the deposit for you. ***Doing so will result in a loss of funds.***
{% endhint %}
{% endtab %}

{% tab title="New Solo Stakers" %}

1. Follow this guide from [Setup Overview](/hardware-and-systems-setup/setup-overview) until you have your[ execution](/installing-and-configuring-your-el+cl-clients/set-up-and-configure-execution-layer-client) and [consensus client ](/installing-and-configuring-your-el+cl-clients/set-up-and-configure-consensus-layer-client)set up
2. [Generate new validator keys](/bonded-validators-setup/lido-csm/generating-csm-keystores) while setting the `withdrawal_address` to the  [Lido withdrawal vault](https://holesky.etherscan.io/address/0xF0179dEC45a37423EAD4FaD5fCb136197872EAd9).
   * **Mainnet:** [`0xB9D7934878B5FB9610B3fE8A5e441e8fad7E293f`](https://etherscan.io/address/0xb9d7934878b5fb9610b3fe8a5e441e8fad7e293f)
   * **Hoodi:** [`0x4473dCDDbf77679A643BdB654dbd86D67F8d32f2`](https://hoodi.etherscan.io/address/0x4473dcddbf77679a643bdb654dbd86d67f8d32f2#code)
3. For the validator client,
   1. Set the `fee_recipient` flag to the Lido Execution Layer Rewards Vault either [on the validator key level](/bonded-validators-setup/lido-csm/set-fee-recipient-address/method-1-configure-on-validator-keys) or [configuring a separate validator client.](/bonded-validators-setup/lido-csm/set-fee-recipient-address/method-2-configure-on-separate-validator-client)
      * **Mainnet:** [`0x388C818CA8B9251b393131C08a736A67ccB19297`](https://etherscan.io/address/0x388C818CA8B9251b393131C08a736A67ccB19297)
      * **Hoodi :** [`0x4473dCDDbf77679A643BdB654dbd86D67F8d32f2`](https://hoodi.etherscan.io/address/0x4473dcddbf77679a643bdb654dbd86d67f8d32f2#code)
   2. Import the newly generated CSM keystores
4. For the [MEV-Boost service](/keystore-generation-and-mev-boost/set-up-and-configure-mev-boost),&#x20;
   1. the`-min-bid` flag may be configured either at MEV-Boost level or at the CL client, the current acceptable maximum value for min-bid is `0.07` [based on community consensus](https://research.lido.fi/t/lido-node-operator-mev-boost-min-bid-guidance/3347) and may change.&#x20;
   2. On the consensus layer client, set the `builder-boost-factor` (or equivalent flags) to `100%.` i.e., local and builder payloads should be treated with equal weights.&#x20;
   3. The `-relay` flags should be set to a list of values only using relays from the the [list of Vetted MEV-Boost Relays for Lido CSM](https://enchanted-direction-844.notion.site/6d369eb33f664487800b0dedfe32171e?v=8e5d1f1276b0493caea8a2aa1517ed65) (refer to "***Key settings to note***" section).
      1. **Mainnet:** Select **"Mainnet Active + Vetted"** tab. *You can choose only from relays tagged with `(must use some)` and `(may use)`, and must choose at least one tagged with `(must use some)`.*&#x20;
      2. **Hoodi :** Select **"Hoodi Only"** tab
5. [Upload the newly generated deposit data file](/bonded-validators-setup/lido-csm/upload-remove-view-validator-keys) pertaining to your CSM keystores onto the Lido CSM Widget and provide the required bond amount in ETH/stETH/wstETH
   * **Mainnet:** <https://csm.lido.fi/>
   * **Hoodi:** <https://csm.testnet.fi/>
6. Wait for your CSM validator keys to be deposited by Lido and make sure your node remains online in the meantime!

{% hint style="info" %}
**DO NOT DEPOSIT 32 ETH** using the deposit data file generated this way as the Lido CSM will make the deposit for you. ***Doing so will result in a loss of funds.***
{% endhint %}
{% endtab %}
{% endtabs %}

### *\*Step-by-step guide in the following sub-sections*

## Get Support

{% tabs %}
{% tab title="Lido Discord Community" %}
**Join here:** [**https://discord.com/invite/lido**](https://discord.com/invite/lido)

#### Instructions

* Select the `Rules` channel and react

<figure><img src="/files/GpAgLbJ0MxOTfjn5ixsE" alt=""><figcaption></figcaption></figure>

* Select the `cs-get-started` channel and react with both emojis

<figure><img src="/files/kpSvJNUIhwXiyQhiAWWT" alt=""><figcaption></figcaption></figure>

* Drop your questions in the `csm-testnet` or  `csm-mainnet` channel
  {% endtab %}

{% tab title="Stakesaurus Telegram Community" %}
**Join here:** <https://t.me/stakesaurus>
{% endtab %}
{% endtabs %}

## How CSM works

As an overview, the Lido CSM deposits valid validator keys uploaded by node operators if the minimum bond required has also been provided.

{% hint style="info" %}
**"Valid validator keys"** in this case refers to validator keystores generated while setting the `withdrawalAddress` field to the Lido CSM contract.
{% endhint %}

### Rewards&#x20;

Solo stakers receive rewards from 2 sources:

1. **Bond rebase**: staking rewards generated from the bonded tokens ((w)stETH)--e.g., `90% * ETH PoS staking yield * total ETH bond provided`
2. **Node Operator rewards**: 6% share of rewards from the active validator keys deposited by the Lido Protocol with possible reductions for bad performance--e.g., `6% * ETH PoS staking yield * total validator keys deposited (32 ETH each) - poor performance penalties`

{% hint style="info" %}
**Note:** The share of rewards % above apply only on CSM V1. The values for CSM V2 may differ and will be set by DAO vote
{% endhint %}

Further, CSM operators will enjoy 2 additional rewards features described in more detail [here](https://operatorportal.lido.fi/modules/community-staking-module#block-6f17b30ed89d4b7eacc5d94a6a9a6095):

* **Rewards smoothing** across all Lido modules (e.g., block proposer rewards, sync committee rewards)
* **Rewards socialisation** among validators whose performance exceeds a certain threshold and underperforming validators will receive no node operator rewards for the given frame

<figure><img src="/files/I0LFZkDhJcdwC5o6C5Ax" alt="" width="375"><figcaption><p>Illustration on Rewards Socialisation</p></figcaption></figure>

### Bond mechanics

#### Providing the CSM bond

The required bond amounts can be provided by anyone, although it will most likely come from the node operator using the CSM (CSM operator) themselves.

#### Bond decrease

The bond provided serves as a deterrence against dishonest behaviours and poor performance by the node operator. e.g.,

1. **MEV theft:**  If detected, a fine will be imposed by burning part of the node operator's bond and an amount of bond equivalent to the stolen amount will be locked until it is made whole.
2. **Slashing events:** Slashing penalties will be deducted from the bond amount and burnt
3. **Sustained poor performance:** If the effective balance of any validators fall below 32 ETH, the shortfall will be deducted from the bond amount and burnt

These events will cause the net bond balance of the CSM operator to fall below the required threshold.&#x20;

In this scenario, the CSM node operator will cease to accrue rewards on their validator keys deposited by Lido CSM until:

* The CSM node operator tops up the shortage
* New rewards generated by the CSM node operator fills up the shortage--e.g., All new rewards will be used to replenish the bond shortage until it is back to the required level

#### Bond increase

On the other hand, because the bond is provided in stETH (which rebases in quantity), the bond balance of CSM operators will increase over time, above the required threshold.

Excess bond balance, together with accrued rewards, will be claimable by CSM operators from the CSM Web App.

{% hint style="info" %}
More details on bond mechanics [here](https://operatorportal.lido.fi/modules/community-staking-module#block-268ecefc0b37498badc1bf0baab04e0b).
{% endhint %}

### Rewards Address & Manager Address

There are 2 main addresses used by CSM operators.

1. **Rewards Address:** This is the address that all accrued rewards and excess bond amounts will go to when claimed. Rewards Addresses can change Manager Addresses but Rewards Addresses can only be changed by itself.
2. **Manager Address:** This is the address that can trigger the claiming of all accrued rewards and excess bond amounts to the Rewards Address. The Manager Address can also upload/remove new/existing deposit data files. The Manager Address cannot change the Rewards Address.

<figure><img src="/files/zVb8X9Dmh0GkJlNhM1RS" alt=""><figcaption><p>Break down of scope for each address. Source: <a href="https://operatorportal.lido.fi/modules/community-staking-module#block-c58d307283e942ecab5eeb96f9a89235">Lido CSM operator portal</a></p></figcaption></figure>

Upon creation of a Node Operator these addresses are set equal, but they can be changed afterwards.

It is recommended to use different addresses for security reasons. A hot wallet may be used for the Manager address to simplify daily operations, while a cold wallet is preferable for the Rewards address to enhance security. Node Operators are solely responsible for the security of the private keys related to these addresses.

{% hint style="success" %}
For example, CSM operators with their hot wallet addresses included in the Early Adoption list can change their Rewards Address to a more secure address
{% endhint %}

**More details on Rewards vs Manager addresses** [**here**](https://operatorportal.lido.fi/modules/community-staking-module#block-268ecefc0b37498badc1bf0baab04e0b)**.**

## Key settings to note

These settings are part of the expectations for all node operators participating in the CSM. Read more [here](https://operatorportal.lido.fi/modules/community-staking-module#block-c58d307283e942ecab5eeb96f9a89235).

### Keystore generation--Withdrawal address

During the validator key generation step, generate a number of validator keystores along with the deposit data file while setting the `withdrawalAddress` field to the Lido Withdrawal Vault.

* **Mainnet:** [`0xB9D7934878B5FB9610B3fE8A5e441e8fad7E293f`](https://etherscan.io/address/0xb9d7934878b5fb9610b3fe8a5e441e8fad7e293f)
* **Hoodi:** [`0x4473dCDDbf77679A643BdB654dbd86D67F8d32f2`](https://hoodi.cloud.blockscout.com/address/0x4473dCDDbf77679A643BdB654dbd86D67F8d32f2)&#x20;

{% hint style="info" %}
**DO NOT DEPOSIT 32 ETH** using the deposit data file generated this way as the Lido CSM will make the deposit for you. ***Doing so will result in a loss of funds.***
{% endhint %}

{% content-ref url="/pages/xKRzukcuy2WXF2GE7amh" %}
[Validator key generation](/keystore-generation-and-mev-boost/validator-key-generation)
{% endcontent-ref %}

You will then upload your `deposit data file` in the [next section](/bonded-validators-setup/lido-csm/upload-remove-view-validator-keys). Make sure you complete the remaining steps on this page before that.&#x20;

### **Validator Client Setup--Fee Recipient Address**

During the validator client setup step, set the `fee_recipient` flag to the Lido Execution Layer Rewards Vault.&#x20;

* **Mainnet:** [`0x388C818CA8B9251b393131C08a736A67ccB19297`](https://etherscan.io/address/0x388C818CA8B9251b393131C08a736A67ccB19297)
* **Hoodi:** [`0x9b108015fe433F173696Af3Aa0CF7CDb3E104258`](https://hoodi.cloud.blockscout.com/address/0x9b108015fe433F173696Af3Aa0CF7CDb3E104258)

{% content-ref url="/pages/yoh6eFpvKGFo82aqayhf" %}
[Validator client setup](/native-solo-staking-setup/validator-client-setup)
{% endcontent-ref %}

For existing solo stakers, you can set the `fee_recipient` address in one of 2 ways in [this sub-page](/bonded-validators-setup/lido-csm/set-fee-recipient-address):

* Method 1:  Set the `fee_recipient` address per validator key
* Method 2: Spin up a new validator client service specifically for your CSM validator keys so that you can retain your own `fee_recipient` address for your solo staking keys.&#x20;

### **MEV-Boost Setup**

### **Relay endpoints**

1. Set the `-min-bid` flag or set it to 0.07
2. During the MEV-Boost setup step, set the `-relay` flags only to the [list of designated MEV relays for Lido CSM](https://enchanted-direction-844.notion.site/6d369eb33f664487800b0dedfe32171e?v=8e5d1f1276b0493caea8a2aa1517ed65)
   * **Mainnet:** Select **"Mainnet Active + Vetted"** tab. *You can choose only from relays tagged with “must use some” and “may use”, and must choose at least one tagged with “must use some”.*&#x20;
   * **Hoodi:** Select **"Hoodi Only"** tab

#### Verifying your MEV Boost setup

To verify that your validator pubkeys have been successfully registered onto the builder network, look out for the following lines in your logs.

* **Validator client logs:** `Validator *** 1 out of 1 validator registration(s) were successfully sent to the builder network via the Beacon Node.`
* **Mev-boost logs:** `level=info msg="http: POST /eth/v1/builder/validators 200" duration=0.076901 method=POST`

{% hint style="info" %}
Make sure you are seeing **method=POST** instead of **method=GET** in the Mev-boost logs.
{% endhint %}

#### Verifying the MEV Relay List

You can verify the latest MEV Relay List for the Lido CSM below.

* **Hoodi:** <https://hoodi.etherscan.io/address/0x279d3a456212a1294daed0faee98675a52e8a4bf#readContract>
* **Mainnet:** <https://etherscan.io/address/0xf95f069f9ad107938f6ba802a3da87892298610e#readContract>

**Steps to verify list of approved MEV Relays:**&#x20;

1. Go to the Etherscan link above and it will bring you to the MEV Relay Inclusion List used by the Lido CSM
2. Under `Contract`>>`Read Contract`>>`4. get_relays`>>`Query`

   <figure><img src="/files/UxBnTAfgWZjlssc2BIRm" alt=""><figcaption></figcaption></figure>
3. A list of relay endpoints will appear under this section `4. get_relays`. Verify that you are only using relay endpoints from this list.

### Other MEV Boost Settings

<details>

<summary><em>How to configure Builder/Local Boost settings per CL/VC client</em> ❓</summary>

**Teku**

* Teku CL (action: set to 100), [Source](https://docs.teku.consensys.io/reference/cli#builder-bid-compare-factor)

```
--builder-bid-compare-factor
```

(Default: 90) For example, a builder bid comparison factor of 90 means the builder's payload is chosen when its value is at least 10% greater than what can be built locally.

**Prysm**

* Prysm CL (action: set to 0), [Source](https://docs.prylabs.network/docs/prysm-usage/parameters#client-stats-flags)

```
--local-block-value-boost
```

(Default: 10) Use builder block if: builder\_bid\_value \* 100 > local\_block\_value \* (local-block-value-boost + 100)

**Lighthouse**

* Lighthouse VC (action: set to 100), [Source](https://lighthouse-book.sigmaprime.io/help_vc.html)

```
--builder-boost-factor
```

(Default: 100)

**Nimbus**

For Nimbus, which setting has the priority:

**depends where the validators live (which component owns the private keys). If they're in the VC, then the VC determines it. if in the BN, then the BN does**

* Nimbus CL (action: set to 0), [Source](https://nimbus.guide/external-block-builder.html), [Source 2](https://nimbus.guide/options.html)

```
--local-block-value-boost
```

&#x20;(Default =10) Increase execution layer block values for builder bid comparison by a percentage.

* Nimbus VC (no action)

```
--builder-boost-factor
```

(Default: 100) Percentage multiplier to apply to the builder's payload value when choosing between a builder payload header and payload from the paired execution node.

**Lodestar**

Lodestar VC (action: --builder.selection = ‘maxprofit’), [Source](https://chainsafe.github.io/lodestar/run/validator-management/vc-configuration/#configure-your-builder-selection-andor-builder-boost-factor)

```
--builder.selection
```

(Default: "executiononly"). maxprofit: An alias of--builder.boostFactor=100, which will always choose the more profitable block.

</details>


# Generating CSM keystores

## Pre-flight checks for existing solo stakers

1. Make sure that you have the mnemonic (24-word seed phrase) of your existing validator keys in case you overwrite them by mistake while going through this process
2. Make sure you have removed duplicates of your existing solo staking validator keys on the `$HOME` directory of your node machine. Otherwise, remove them now.

```sh
# on your node machine
sudo rm -r ~/validator_keys
```

{% hint style="info" %}
This is to reduce the risk of importing your existing solo staking keystores by mistake into your CSM validator client, which can lead to slashing.&#x20;
{% endhint %}

## Generate CSM keystores

Visit the Validator key generation page and follow the steps accordingly to generate CSM-valid validator keystores.&#x20;

{% content-ref url="/pages/xKRzukcuy2WXF2GE7amh" %}
[Validator key generation](/keystore-generation-and-mev-boost/validator-key-generation)
{% endcontent-ref %}

{% hint style="info" %}
Recall that the steps for both native solo staking and CSM are the same except for the requirement to use a specific`withdrawal_address` of the `Lido Withdrawal Vault.`

* **Mainnet:** [`0xB9D7934878B5FB9610B3fE8A5e441e8fad7E293f`](https://etherscan.io/address/0xb9d7934878b5fb9610b3fe8a5e441e8fad7e293f)
* **Hoodi:** [`0x4473dCDDbf77679A643BdB654dbd86D67F8d32f2`](https://hoodi.cloud.blockscout.com/address/0x4473dCDDbf77679A643BdB654dbd86D67F8d32f2)&#x20;
  {% endhint %}


# Set Fee Recipient Address

There are 2 ways to set custom fee recipient addresses for your CSM validator keystores without overridding those of your own validator keystores.

**Method 1: Configure on validator keys** level is more complex but considered the more robust method as it minimises the risk of mistakes leading to double signing.

{% content-ref url="/pages/kWy63boyqdhqkTPI5Zcj" %}
[Method 1: Configure on validator keys](/bonded-validators-setup/lido-csm/set-fee-recipient-address/method-1-configure-on-validator-keys)
{% endcontent-ref %}

{% content-ref url="/pages/z2aBWHcpfLfuuyL5MnOh" %}
[Method 2: Configure on separate validator client](/bonded-validators-setup/lido-csm/set-fee-recipient-address/method-2-configure-on-separate-validator-client)
{% endcontent-ref %}

{% content-ref url="/pages/BrOmG1CErxDENAv53Jjn" %}
[Verifying Fee Recipient Registered on MEV Relays](/bonded-validators-setup/lido-csm/set-fee-recipient-address/verifying-fee-recipient-registered-on-mev-relays)
{% endcontent-ref %}


# Method 1: Configure on validator keys

## Validator Clients

{% tabs %}
{% tab title="Teku" %}
Assuming your Teku validator client is already set up, stop your Teku validator client.

```sh
sudo systemctl stop tekuvalidator.service
```

Find the pubkey values of your own <mark style="color:red;">**non-CSM**</mark> validator keystores generated.

```sh
sudo find /var/lib -name "keystore*.json"
```

For each `resulting filepath`, run:

```sh
grep -oP '"pubkey": *"\K[^"]+' RESULTING_FILEPATH
```

***You should now have a list of all your own\*\*\*\*&#x20;**<mark style="color:red;">**non-CSM**</mark>**&#x20;\*\*\*\*validator keystore pubkeys.***

Create a custom proposer configuration file.

```sh
sudo nano /var/lib/teku_validator/validator/proposer_configuration.json
```

Paste the following contents into the file.

```
{
  "proposer_config": {
    "YOUR_OWN_VALIDATOR_PUBKEY_(NOT_CSM)_01": {
      "fee_recipient": "YOUR_OWN_FEE_RECIPIENT_ADDRESS",
      "builder": {
        "enabled": true
      }
    },
    "YOUR_OWN_VALIDATOR_PUBKEY_(NOT_CSM)_02": {
      "fee_recipient": "YOUR_OWN_FEE_RECIPIENT_ADDRESS",
      "builder": {
        "enabled": true
      }
    },
    "YOUR_OWN_VALIDATOR_PUBKEY_(NOT_CSM)_03": {
      "fee_recipient": "YOUR_OWN_FEE_RECIPIENT_ADDRESS",
      "builder": {
        "enabled": true
      }
    }
  },
  "default_config": {
    "fee_recipient": "LIDO_EXECUTION_LAYER_REWARDS_VAULT",
    "builder": {
      "enabled": true
    }
  }
}
```

**Replace** `YOUR_OWN_VALIDATOR_PUBKEY_(NOT_CSM)` with your own actual validator pubkeys <mark style="color:red;">**(NOT CSM).**</mark>

**Replace** `YOUR_OWN_FEE_RECIPIENT_ADDRESS` with your desired wallet address.

**Replace** `LIDO_EXECUTION_LAYER_REWARDS_VAULT` with the following options.

* **Mainnet**

```
suggested_fee_recipient: "0x388C818CA8B9251b393131C08a736A67ccB19297"
```

* **Hoodi**

```
suggested_fee_recipient: "0x9b108015fe433F173696Af3Aa0CF7CDb3E104258"
```

`CTRL+O`, `ENTER`, `CTRL+X` to save and exit.

Set the permissions of the custom proposer configuration file.

```sh
sudo chown -R teku_validator:teku_validator /var/lib/teku_validator/validator
```

### Adding more <mark style="color:red;">non-CSM</mark> validator keystores:

If you want to add more of your own validator keystores, replicate the following segment, taking note of the indentation.

```
    "YOUR_OWN_VALIDATOR_PUBKEY_(NOT_CSM)_03": {
      "fee_recipient": "YOUR_OWN_FEE_RECIPIENT_ADDRESS",
      "builder": {
        "enabled": true
      }
    }
```

`CTRL+O`, `ENTER`, `CTRL+X` to save and exit.

Edit the Teku validator client service file.

```
sudo nano /etc/systemd/system/tekuvalidator.service
```

Add the `--validators-proposer-config` flag and point it to the `proposer_configuration.json` file. Then remove the `--validators-proposer-default-fee-recipient flag`. e.g.,

```
[Unit]
Description=Teku Validator Client
Wants=network-online.target
After=network-online.target

[Service]
User=teku_validator
Group=teku_validator
Type=simple
Restart=always
RestartSec=5
Environment="JAVA_OPTS=-Xmx6g"
Environment="TEKU_OPTS=-XX:-HeapDumpOnOutOfMemoryError"
ExecStart=/usr/local/bin/teku/bin/teku vc \
  --network=hoodi \
  --data-path=/var/lib/teku_validator \
  --validator-keys=/var/lib/teku_validator/validator_keystores:/var/lib/teku_validator/keystore_password \
  --beacon-node-api-endpoint=http://<Internal_IP_address>:5051 \
  --validators-proposer-config=/var/lib/teku_validator/validator/proposer_configuration.json \
  --validators-builder-registration-default-enabled=true \
  --validators-graffiti="<your_graffiti_of_choice>" \
  --metrics-enabled=true \
  --metrics-port=8108 \
  --doppelganger-detection-enabled=true 

[Install]
WantedBy=multi-user.target
```

`CTRL+O`, `ENTER`, `CTRL+X` to save and exit.

Restart your Teku validator client.

```sh
sudo systemctl daemon-reload
sudo systemctl start tekuvalidator.service
sudo systemctl status tekuvalidator.service
```

Monitor for errors.

```sh
sudo journalctl -fu tekuvalidator -o cat | ccze -A
```

{% endtab %}

{% tab title="Nimbus" %}
Configure a separate validator client and set the `fee_recipient` address to the Lido Execution Layer Rewards Vault there. Refer to the subpage below.

{% content-ref url="/pages/z2aBWHcpfLfuuyL5MnOh" %}
[Method 2: Configure on separate validator client](/bonded-validators-setup/lido-csm/set-fee-recipient-address/method-2-configure-on-separate-validator-client)
{% endcontent-ref %}
{% endtab %}

{% tab title="Lodestar" %}
{% hint style="info" %}
The `--proposerSettingsFile` feature of Lodestar and its format is in [alpha and subject to change](https://chainsafe.github.io/lodestar/run/validator-management/validator-cli#--proposersettingsfile). Hence we will fallback to running a separate validator client to customise the `fee_recipient` address.
{% endhint %}

Create a custom `proposer_settings.yml` file.

```
sudo nano /var/lib/lodestar_validator/proposer_settings.yml
```

Use the following template and make the necessary edits.

```
proposer_config:
  'YOUR_OWN_VALIDATOR_PUBKEY_(NOT_CSM)_01':
    graffiti: 'non-CSM graffiti'
    strict_fee_recipient_check: true
    fee_recipient: 'YOUR_OWN_FEE_RECIPIENT_ADDRESS'
    builder:
      enabled: true
      gas_limit: "30000000"
  'YOUR_OWN_VALIDATOR_PUBKEY_(NOT_CSM)_02':
    fee_recipient: 'YOUR_OWN_FEE_RECIPIENT_ADDRESS'
    builder:
      enabled: "true"
      gas_limit: "30000000"
default_config:
  graffiti: 'CSM graffiti'
  strict_fee_recipient_check: true
  fee_recipient: 'LIDO_EXECUTION_LAYER_REWARDS_VAULT'
  builder:
    enabled: true
    gas_limit: "30000000"
    selection: "maxprofit"
    boost_factor: "100"
```

**Replace** `YOUR_OWN_VALIDATOR_PUBKEY_(NOT_CSM)` with your own actual validator pubkeys <mark style="color:red;">**(NOT CSM).**</mark>

**Replace** `YOUR_OWN_FEE_RECIPIENT_ADDRESS` with your desired wallet address.

**Replace** `LIDO_EXECUTION_LAYER_REWARDS_VAULT` with the following options.

* **Mainnet**

```
suggested_fee_recipient: "0x388C818CA8B9251b393131C08a736A67ccB19297"
```

* **Hoodi**

```
suggested_fee_recipient: "0x9b108015fe433F173696Af3Aa0CF7CDb3E104258"
```

`CTRL+O`, `ENTER`, `CTRL+X` to save and exit.

Set the permissions of the custom proposer configuration file.

```sh
sudo chown -R lodestar_validator:lodestar_validator /var/lib/lodestar_validator
```

### Adding more <mark style="color:red;">non-CSM</mark> validator keystores:

If you want to add more of your own validator keystores, replicate the following segment and place them under the `proposer_config` section, taking note of the indentation.

```
proposer_config:


    'YOUR_OWN_VALIDATOR_PUBKEY_(NOT_CSM)':
    fee_recipient: 'YOUR_OWN_FEE_RECIPIENT_ADDRESS'
    builder:
      enabled: "true"
      gas_limit: "30000000"
```

`CTRL+O`, `ENTER`, `CTRL+X` to save and exit.

Edit the `docker-compose.yml` file in the Lodestar folder.

```sh
cd ~/lodestar_validator
sudo nano docker-compose.yml
```

Add the `--proposerSettingsFile` flag and point it to the `proposer_settings.yml` file.

```
      - --proposerSettingsFile
      - /var/lib/lodestar_validator/proposer_settings.yml
```

Then remove the following flags.

```
      - --suggestedFeeRecipient
      - "<your_designated_ETH_wallet_address>"
```

**New example:**

```yaml
services:
  validator_client:
    image: chainsafe/lodestar:latest
    container_name: lodestar_validator
    user: <UID>:<GID>
    restart: unless-stopped
    volumes:
      - /var/lib/lodestar_validator:/var/lib/lodestar_validator
    command:
      - validator
      - --dataDir
      - /var/lib/lodestar_validator
      - --importKeystores
      - /var/lib/lodestar_validator/validator_keystores
      - --importKeystoresPassword
      - /var/lib/lodestar_validator/keystore_password/<validator_signing_keystore_password_file_name>.txt
      - --network
      - hoodi
      - --beaconNodes
      - http://127.0.0.1:5052
      - --builder
      - --proposerSettingsFile
      - /var/lib/lodestar_validator/proposer_settings.yml
      - --doppelgangerProtection
      - --metrics
      - --metrics.port
      - "5064"
      - --graffiti
      - "your_graffiti_of_choice"
    environment:
      NODE_OPTIONS: --max-old-space-size=2048
    ports:
      - "5064:5064"
```

`CTRL+O`, `ENTER`, `CTRL+X` to save and exit.

Restart your Lodestar validator client.

```sh
docker compose down
docker compose up -d
```

Monitor for errors.

```sh
docker logs lodestar_validator -f
```

#### Method 2:

Alternatively, to configure a separate validator client and set the `fee_recipient` address to the Lido Execution Layer Rewards Vault there, refer to the following subpage.

{% content-ref url="/pages/z2aBWHcpfLfuuyL5MnOh" %}
[Method 2: Configure on separate validator client](/bonded-validators-setup/lido-csm/set-fee-recipient-address/method-2-configure-on-separate-validator-client)
{% endcontent-ref %}
{% endtab %}

{% tab title="Lighthouse" %}
Assuming you have set up your Lighthouse validator client and imported your CSM validator keystores. Stop your validator client.

```sh
sudo systemctl stop lighthousevalidator.service
```

Then, edit the `validator_definitions.yml` file with the designated `fee_recipeint` address.

```sh
sudo nano /var/lib/lighthouse_validator/validators/validator_definitions.yml
# Actual filepath might vary according to your configurations
```

Find the pubkeys of each of your CSM validator keystores.

```sh
sudo find /var/lib -name "keystore*.json"
```

For each `resulting filepath`, run:

```sh
grep -oP '"pubkey": *"\K[^"]+' RESULTING_FILEPATH
```

and add the following line under each keystore as a new line. **Note:** Take note of the exact indentation.&#x20;

* **Mainnet**

```
suggested_fee_recipient: "0x388C818CA8B9251b393131C08a736A67ccB19297"
```

* **Hoodi**

```
suggested_fee_recipient: "0x9b108015fe433F173696Af3Aa0CF7CDb3E104258"
```

#### Example with Mainnet fee recipient:

{% hint style="danger" %}
To be appended, not replacing your existing file contents
{% endhint %}

```
- enabled: true
  voting_public_key: CSM_VALIDATOR_PUBKEY_01
  description: ''
  type: local_keystore
  voting_keystore_path: /var/lib/lighthouse_validator/validators/0xa1a6d4a72db3fff3a81401cb9a80e1a7d18a96c3a6c3c9b50531e3b02e50b2baeba06e3a7c9fe24374e48091006b11f7/keystore-m>
  voting_keystore_password: password
  suggested_fee_recipient: "0x388C818CA8B9251b393131C08a736A67ccB19297"
  builder_boost_factor: 100
- enabled: true
  voting_public_key: CSM_VALIDATOR_PUBKEY_02
  description: ''
  type: local_keystore
  voting_keystore_path: /var/lib/lighthouse_validator/validators/0x8e2a8abfeeca058d757f6d6ff5c058c61ab1d40804c28298d44bfe4486265c96e5d30f781a2a3cee6e2b250a85c40e38/keystore-m>
  voting_keystore_password: password
  suggested_fee_recipient: "0x388C818CA8B9251b393131C08a736A67ccB19297"
  builder_boost_factor: 100
```

Restart your Lighthouse validator client.

```sh
sudo systemctl start lighthousevalidator.service
sudo systemctl status lighthousevalidator.service
```

Monitor for errors.

```sh
sudo journalctl -fu lighthousevalidator -o cat | ccze -A
```

{% endtab %}

{% tab title="Prysm" %}
Assuming your Prysm validator client is already set up, stop your Prysm validator client.

```sh
sudo systemctl stop prysmvalidator.service
```

Find the pubkey values of your own <mark style="color:red;">**non-CSM**</mark> validator keystores generated.

```sh
sudo find /var/lib -name "keystore*.json"
```

For each `resulting filepath`, run:

```sh
grep -oP '"pubkey": *"\K[^"]+' RESULTING_FILEPATH
```

***You should now have a list of all your own\*\*\*\*&#x20;**<mark style="color:red;">**non-CSM**</mark>**&#x20;\*\*\*\*validator keystore pubkeys.***

Create a custom proposer configuration file.

```sh
sudo nano /var/lib/prysm_validator/validator/proposer_configuration.json
```

Paste the following contents into the file.

```
{
  "proposer_config": {
    "YOUR_OWN_VALIDATOR_PUBKEY_(NOT_CSM)_01": {
      "fee_recipient": "YOUR_OWN_FEE_RECIPIENT_ADDRESS",
      "builder": {
        "enabled": true
      }
    },
    "YOUR_OWN_VALIDATOR_PUBKEY_(NOT_CSM)_02": {
      "fee_recipient": "YOUR_OWN_FEE_RECIPIENT_ADDRESS",
      "builder": {
        "enabled": true
      }
    },
    "YOUR_OWN_VALIDATOR_PUBKEY_(NOT_CSM)_03": {
      "fee_recipient": "YOUR_OWN_FEE_RECIPIENT_ADDRESS",
      "builder": {
        "enabled": true
      }
    }
  },
  "default_config": {
    "fee_recipient": "LIDO_EXECUTION_LAYER_REWARDS_VAULT",
    "builder": {
      "enabled": true
    }
  }
}
```

**Replace** `YOUR_OWN_VALIDATOR_PUBKEY_(NOT_CSM)` with your own actual validator pubkeys <mark style="color:red;">**(NOT CSM).**</mark>

**Replace** `YOUR_OWN_FEE_RECIPIENT_ADDRESS` with your desired wallet address.

**Replace** `LIDO_EXECUTION_LAYER_REWARDS_VAULT` with the following options.

* **Mainnet**

```
suggested_fee_recipient: "0x388C818CA8B9251b393131C08a736A67ccB19297"
```

* **Hoodi**

```
suggested_fee_recipient: "0x9b108015fe433F173696Af3Aa0CF7CDb3E104258"
```

`CTRL+O`, `ENTER`, `CTRL+X` to save and exit.

Set the permissions of the custom proposer configuration file.

```sh
sudo chown -R prysm_validator:prysm_validator /var/lib/prysm_validator/validator
```

### Adding more <mark style="color:red;">non-CSM</mark> validator keystores:

If you want to add more of your own validator keystores, replicate the following segment, taking note of the indentation.

```
    "YOUR_OWN_VALIDATOR_PUBKEY_(NOT_CSM)_03": {
      "fee_recipient": "YOUR_OWN_FEE_RECIPIENT_ADDRESS",
      "builder": {
        "enabled": true
      }
    }
```

`CTRL+O`, `ENTER`, `CTRL+X` to save and exit.

Edit the Prysm validator client service file.

```
sudo nano /etc/systemd/system/prysmvalidator.service
```

Add the `--proposer-settings-file` flag and point it to the `proposer_configuration.json` file. Then remove the `--suggested-fee-recipient` flag. e.g.,

```
[Unit]
Description=Prysm Validator Client
Wants=network-online.target
After=network-online.target

[Service]
User=prysmvalidator
Group=prysmvalidator
Type=simple
Restart=always
RestartSec=5
ExecStart=/usr/local/bin/prysmvalidator \
  --accept-terms-of-use \
  --<hoodi_or_mainnet> \
  --datadir=/var/lib/prysm_validator \
  --enable-builder \
  --beacon-rpc-provider=<Internal_IP_address>:4000 \
  --beacon-rpc-gateway-provider=<Internal_IP_address>:5051 \
  --wallet-dir=/var/lib/prysm_validator \
  --wallet-password-file=/var/lib/prysm_validator/password.txt \
  --monitoring-port=8108 \
  --proposer-settings-file=/var/lib/prysm_validator/validator/proposer_configuration.json \
  --graffiti="<your_graffiti>" \
  --enable-doppelganger

[Install]
WantedBy=multi-user.target
```

`CTRL+O`, `ENTER`, `CTRL+X` to save and exit.

Restart your Prysm validator client.

```sh
sudo systemctl daemon-reload
sudo systemctl start prysmvalidator.service
sudo systemctl status prysmvalidator.service
```

Monitor for errors.

```sh
sudo journalctl -fu prysmvalidator -o cat | ccze -A
```

{% endtab %}
{% endtabs %}

## Automation Tools

{% tabs %}
{% tab title="ETH Docker" %}
With ETH Docker running (i.e., `ethd up`), run&#x20;

```
./ethd keys list
```

then

```
./ethd keys set-recipient 0xPUBKEY 0xADDRESS 
```

with the public key of the key you wish to set a separate fee recipient for, and the Ethereum address fees should go to.
{% endtab %}

{% tab title="ETH Pillar" %}
Not straightforward. Designed to assign custom `fee_recipient` addresses by running a separate validator client. Refer to the subpage below, under **"Automation Tools"**

{% content-ref url="/pages/z2aBWHcpfLfuuyL5MnOh" %}
[Method 2: Configure on separate validator client](/bonded-validators-setup/lido-csm/set-fee-recipient-address/method-2-configure-on-separate-validator-client)
{% endcontent-ref %}
{% endtab %}
{% endtabs %}


# Method 2: Configure on separate validator client

## Pre-requisites

Make sure you have downloaded the necessary files according to your choice of validator client. Otherwise, revisit the following pages to download and move them into the `/usr/local/bin` directory.

{% tabs %}
{% tab title="Teku" %}
{% content-ref url="/pages/AKgUYUENlUB4t1pYnnmI" %}
[Teku BN](/installing-and-configuring-your-el+cl-clients/set-up-and-configure-consensus-layer-client/teku-bn)
{% endcontent-ref %}
{% endtab %}

{% tab title="Nimbus" %}
{% content-ref url="/pages/J13y2wNXbcJ5WQrAry47" %}
[Nimbus BN](/installing-and-configuring-your-el+cl-clients/set-up-and-configure-consensus-layer-client/nimbus-bn)
{% endcontent-ref %}
{% endtab %}

{% tab title="Lodestar" %}
As we will be using Docker to run the Lodestar VC, we only need to install Docker at this point, and the actual Lodestar binary files will be downloaded when spinning up the Docker container.

## Installing dependencies - Docker

The script below performs the following:

1. Download and run the official Docker installation script
2. Creates a new user group called "docker"
3. Adds your current Linux user account to this new docker group

```sh
curl -fsSL https://get.docker.com -o get-docker.sh
sudo sh get-docker.sh

sudo groupadd docker
sudo usermod -aG docker $USER
```

Log out and then back in again for the new user group settings to take effect.

```sh
exit
```

```sh
ssh <user>@<IP_address> -p <port_no.> -i <SSH_key> -v
```

{% endtab %}

{% tab title="Lighthouse" %}
{% content-ref url="/pages/SBhehJ2kGIL4O4mmG7gj" %}
[Lighthouse BN](/installing-and-configuring-your-el+cl-clients/set-up-and-configure-consensus-layer-client/lighthouse-bn)
{% endcontent-ref %}
{% endtab %}

{% tab title="Prysm" %}
{% content-ref url="/pages/gCsFmPBHv8OByGvPg3XQ" %}
[Prysm BN](/installing-and-configuring-your-el+cl-clients/set-up-and-configure-consensus-layer-client/prysm-bn)
{% endcontent-ref %}

{% hint style="info" %}
The Prysm validator client only works with a Prysm Consensus Client.
{% endhint %}
{% endtab %}
{% endtabs %}

{% hint style="info" %}
The Validator Client files are downloaded from the same sources as their respective Consensus Clients.
{% endhint %}

## Create new CSM user

{% tabs %}
{% tab title="Teku" %}

```sh
sudo useradd --no-create-home --shell /bin/false csm_teku_validator
```

{% endtab %}

{% tab title="Nimbus" %}

```sh
sudo useradd --no-create-home --shell /bin/false csm_nimbus_validator
```

{% endtab %}

{% tab title="Lodestar" %}

```sh
sudo useradd --no-create-home --shell /bin/false csm_lodestar_validator
```

{% endtab %}

{% tab title="Lighthouse" %}

```sh
sudo useradd --no-create-home --shell /bin/false csm_lighthouse_validator
```

{% endtab %}

{% tab title="Prysm" %}

```sh
sudo useradd --no-create-home --shell /bin/false csm_prysm_validator
```

{% endtab %}
{% endtabs %}

By clearly segregating the users and permissions for separate services in your workflow, this will provide additional safeguards against operational mistakes that can lead to slashing via double signing.

## Create new folders for CSM data & keys

Create separate folders, import the CSM validator keys, and set appropriate permissions.

{% tabs %}
{% tab title="Teku" %}

### Prepare the CSM validator keystores

1\) Create 3 new folders to store the validator client data, validator keystore, and the validator keystore password

2\) Copy the validator keystores and it's password file into their respective folders

3\) Change the owner of this folder to the teku user

4\) Restrict permissions on this new folder such that only the owner is able to read, write, and execute files in this folder

```sh
sudo mkdir -p /var/lib/csm_teku_validator/validator_keystores /var/lib/csm_teku_validator/keystore_password
sudo cp ~/validator_keys/<validator_keystore.json> /var/lib/csm_teku_validator/validator_keystores
sudo cp ~/validator_keys/<validator_keystore_password.txt> /var/lib/csm_teku_validator/keystore_password
sudo chown -R csm_teku_validator:csm_teku_validator /var/lib/csm_teku_validator
sudo chmod 700 /var/lib/csm_teku_validator
```

{% hint style="info" %}
**Aside from the file extension, the validator\_keystore\_password file will need to be named identically as the validator signing keystore file (e.g. keystore-m-123.json, keystore-m-123.txt)**
{% endhint %}
{% endtab %}

{% tab title="Nimbus" %}

### Prepare the CSM validator keystores

1\) Create a new folders to store the validator client data, validator keystore, and the validator keystore password

```sh
sudo mkdir -p /var/lib/csm_nimbus_validator
```

2\) Run the validator key import process.

<pre class="language-sh"><code class="lang-sh"><strong>sudo /usr/local/bin/nimbus_beacon_node deposits import --data-dir:/var/lib/csm_nimbus_validator/ ~/staking_deposit-cli*/validator_keys
</strong></code></pre>

3\) Change the owner of this new folder to the `csm_nimbus_validator` user

4\) Restrict permissions on this new folder such that only the owner is able to read, write, and execute files in this folder

```sh
sudo chown -R csm_nimbus_validator:csm_nimbus_validator /var/lib/csm_nimbus_validator
sudo chmod 700 /var/lib/csm_nimbus_validator
```

{% endtab %}

{% tab title="Lodestar" %}

## Prepare the validator data directory

1\) Create 3 new folders to store the validator client data, validator keystore, and the validator keystore password

2\) Copy the validator keystores and it's password file into their respective folders

3\) Change the owner of these new folders to the `csm_lodestar_validator`user

4\) Restrict permissions on this new folder such that only the owner is able to read, write, and execute files in this folder

5\) Retrieve the UID and GID of the `csm_lodestar_validator` user account to be used in your `docker-compose.yml` file in the next step

<pre class="language-sh"><code class="lang-sh">sudo mkdir -p /var/lib/csm_lodestar_validator/validator_keystores /var/lib/csm_lodestar_validator/keystore_password
<strong>sudo cp ~/validator_keys/&#x3C;validator_keystore.json> /var/lib/csm_lodestar_validator/validator_keystores
</strong>sudo cp ~/validator_keys/&#x3C;validator_keystore_password.txt> /var/lib/csm_lodestar_validator/keystore_password
sudo chown -R csm_lodestar_validator:csm_lodestar_validator /var/lib/csm_lodestar_validator
sudo chmod 700 /var/lib/csm_lodestar_validator
id csm_lodestar_validator
</code></pre>

{% hint style="info" %}
**Aside from the file extension, the validator\_keystore\_password file will need to be named identically as the validator signing keystore file (e.g. keystore-m-123.json, keystore-m-123.txt)**
{% endhint %}

***Expected output:***

```
uid=1004(csm_lodestar_validator) gid=1005(csm_lodestar_validator) groups=1005(csm_lodestar_validator)
```

***New folders created:***

```
/var/lib/csm_lodestar_validator/
/var/lib/csm_lodestar_validator/validator_keystores
/var/lib/csm_lodestar_validator/keystore_password
```

{% endtab %}

{% tab title="Lighthouse" %}

### Prepare the validator data directory

1\) Create a new folders to store the validator client data, validator keystore, and the validator keystore password

```sh
sudo mkdir -p /var/lib/csm_lighthouse_validator
```

2\) Run the validator key import process.

```sh
sudo lighthouse account validator import --network holesky --datadir /var/lib/csm_lighthouse_validator --directory=$HOME/staking_deposit-cli*/validator_keys
```

**Expected output:**

<figure><img src="/files/rDBi3v21yaLspgjluc6Q" alt=""><figcaption></figcaption></figure>

3\) Change the owner of this new folder to the `csm_lighthouse_validator` user

4\) Restrict permissions on this new folder such that only the owner is able to read, write, and execute files in this folder

```sh
sudo chown -R csm_lighthouse_validator:csm_lighthouse_validator /var/lib/csm_lighthouse_validator
sudo chmod 700 /var/lib/csm_lighthouse_validator
```

{% endtab %}

{% tab title="Prysm" %}
1\) Create a new folders to store the validator client data, validator keystore, and the validator keystore password

```sh
sudo mkdir -p /var/lib/csm_prysm_validator
```

2\) Run the validator key import process.

```sh
sudo /usr/local/bin/prysmvalidator accounts import --keys-dir=$HOME/staking_deposit-cli*/validator_keys --wallet-dir=/var/lib/csm_prysm_validator --holesky
```

**Note:** You will be prompted to accept the terms of use, create a new password for the Prysm wallet, and enter the password of your validator keystore.

**Expected output:**

<figure><img src="/files/HVnjlX2XIzsNl8tAxfIi" alt=""><figcaption></figcaption></figure>

3\) Create a plain text password file for the Prysm wallet

```sh
sudo nano /var/lib/csm_prysm_validator/password.txt
```

Enter the password you set during the validator keystore import process. Then, save + exit with `CTRL+O`, `ENTER`, `CTRL+C`.

4\) Change the owner of this new folder to the `csm_prysm_validator` user

5\) Restrict permissions on this new folder such that only the owner is able to read, write, and execute files in this folder

```sh
sudo chown -R csm_prysmvalidator:csm_prysmvalidator /var/lib/csm_prysm_validator
sudo chmod 700 /var/lib/csm_prysm_validator
```

{% endtab %}
{% endtabs %}

## Configure the separate VC service

Create a new configuration file for your separate validator client.

{% tabs %}
{% tab title="Teku" %}
Create a systemd configuration file for the Teku Validator Client service to run in the background.

```sh
sudo nano /etc/systemd/system/csm_tekuvalidator.service
```

Paste the configuration parameters below into the file:

```bash
[Unit]
Description=CSM Teku Validator Client
Wants=network-online.target
After=network-online.target
[Service]
User=csm_teku_validator
Group=csm_teku_validator
Type=simple
Restart=always
RestartSec=5
Environment="JAVA_OPTS=-Xmx8g"
Environment="TEKU_OPTS=-XX:-HeapDumpOnOutOfMemoryError"
ExecStart=/usr/local/bin/teku/bin/teku vc \
  --network=<hoodi_or_mainnet> \
  --data-path=/var/lib/csm_teku_validator \
  --validator-keys=/var/lib/csm_teku_validator/validator_keystores:/var/lib/csm_teku_validator/keystore_password \
  --beacon-node-api-endpoint=http://<Internal_IP_address>:5051 \
  --validators-proposer-default-fee-recipient=<hoodi_or_mainnet_fee_recipient_address> \
  --validators-builder-registration-default-enabled=true \
  --validators-graffiti="<your_graffiti>" \
  --metrics-enabled=true \
  --metrics-port=8108 \
  --doppelganger-detection-enabled=true 

[Install]
WantedBy=multi-user.target
```

Once you're done, save with `Ctrl+O` and `Enter`, then exit with `Ctrl+X`. Understand and review your configuration summary below, and amend if needed.

{% hint style="info" %}
**Important:** Recall that you will have to use designated fee recipient addresses as a CSM operator.\
**- Mainnet:** [`0x388C818CA8B9251b393131C08a736A67ccB19297`](https://etherscan.io/address/0x388C818CA8B9251b393131C08a736A67ccB19297)

**- Hoodi:** [`0x9b108015fe433F173696Af3Aa0CF7CDb3E104258`](https://hoodi.cloud.blockscout.com/address/0x9b108015fe433F173696Af3Aa0CF7CDb3E104258)&#x20;
{% endhint %}

Refer to the native Teku validator client setup section for more information on the other flags used. &#x20;

{% content-ref url="/pages/jFsmhqOlrDPrnUn6k3vt" %}
[Teku VC](/native-solo-staking-setup/validator-client-setup/teku-vc)
{% endcontent-ref %}
{% endtab %}

{% tab title="Nimbus" %}
Create a systemd configuration file for the Nimbus Validator Client service to run in the background.

```bash
sudo nano /etc/systemd/system/csm_nimbusvalidator.service
```

Paste the configuration parameters below into the file:

```
[Unit]
Description=CSM Nimbus Validator Client
Wants=network-online.target
After=network-online.target

[Service]
User=csm_nimbus_validator
Group=csm_nimbus_validator
Type=simple
Restart=always
RestartSec=5
ExecStart=/usr/local/bin/nimbus_validator_client \
  --data-dir=/var/lib/csm_nimbus_validator \
  --payload-builder=true \
  --beacon-node=http://<Internal_IP_address>:5051 \
  --metrics \
  --metrics-port=8108 \
  --suggested-fee-recipient=<hoodi_or_mainnet_fee_recipient_address> \
  --graffiti="<your_graffiti>" \
  --doppelganger-detection

[Install]
WantedBy=multi-user.target
```

Once you're done, save with `Ctrl+O` and `Enter`, then exit with `Ctrl+X`. Understand and review your configuration summary below, and amend if needed.

{% hint style="info" %}
**Important:** Recall that you will have to use designated fee recipient addresses as a CSM operator.\
**- Mainnet:** [`0x388C818CA8B9251b393131C08a736A67ccB19297`](https://etherscan.io/address/0x388C818CA8B9251b393131C08a736A67ccB19297)

**- Hoodi:** [`0x9b108015fe433F173696Af3Aa0CF7CDb3E104258`](https://hoodi.cloud.blockscout.com/address/0x9b108015fe433F173696Af3Aa0CF7CDb3E104258)&#x20;
{% endhint %}

Refer to the native Nimbus validator client setup section for more information on the other flags used.

{% content-ref url="/pages/NUMyAvDWdPNOQI5Z7DTx" %}
[Nimbus VC](/native-solo-staking-setup/validator-client-setup/nimbus-vc)
{% endcontent-ref %}
{% endtab %}

{% tab title="Lodestar" %}
Create a new folder for the CSM Lodestar validator client.&#x20;

```sh
cd
sudo mkdir csm_lodestar_validator
```

Create a `docker-compose.yml` file in the Lodestar folder.

```sh
cd ~/csm_lodestar_validator
sudo nano docker-compose.yml
```

Paste the following configuration into the `docker-compose.yml` file. **Note:** This is similar to the `systemd` configuration file used in the setup of other clients in this curriculum.

```yaml
services:
  validator_client:
    image: chainsafe/lodestar:latest
    container_name: csm_lodestar_validator
    user: <UID>:<GID> #replace with the actual UID and GID of the csm_lodestar_validator user
    restart: unless-stopped
    volumes:
      - /var/lib/csm_lodestar_validator:/var/lib/csm_lodestar_validator
    command:
      - validator
      - --dataDir
      - /var/lib/csm_lodestar_validator
      - --importKeystores
      - /var/lib/csm_lodestar_validator/validator_keystores
      - --importKeystoresPassword
      - /var/lib/csm_lodestar_validator/keystore_password/<validator_signing_keystore_password_file_name>.txt
      - --network
      - <hoodi_or_mainnet>
      - --beaconNodes
      - http://<Internal_IP_address>:5051
      - --builder
      - --builder.boostFactor
      - 100
      - --suggestedFeeRecipient
      - "<hoodi_or_mainnet_fee_recipient_address>"
      - --doppelgangerProtection
      - --metrics
      - --metrics.port
      - "5064"
      - --graffiti
      - "your_graffiti"
    environment:
      NODE_OPTIONS: --max-old-space-size=2048
    ports:
      - "5064:5064"
```

Once you're done, save with `Ctrl+O` and `Enter`, then exit with `Ctrl+X`.&#x20;

{% hint style="info" %}
**Important:** Recall that you will have to use designated fee recipient addresses as a CSM operator.\
**- Mainnet:** [`0x388C818CA8B9251b393131C08a736A67ccB19297`](https://etherscan.io/address/0x388C818CA8B9251b393131C08a736A67ccB19297)

**- Hoodi:** [`0x9b108015fe433F173696Af3Aa0CF7CDb3E104258`](https://hoodi.cloud.blockscout.com/address/0x9b108015fe433F173696Af3Aa0CF7CDb3E104258)
{% endhint %}

Refer to the native Lodestar validator client setup section for more information on the other flags used.

{% content-ref url="/pages/ToTN2ElnkRZKX7A77QvW" %}
[Lodestar VC](/native-solo-staking-setup/validator-client-setup/lodestar-vc)
{% endcontent-ref %}
{% endtab %}

{% tab title="Lighthouse" %}
Create a systemd configuration file for the Lighthouse Validator Client service to run in the background.

```bash
sudo nano /etc/systemd/system/csm_lighthousevalidator.service
```

Paste the configuration parameters below into the file:

```
[Unit]
Description=CSM Lighthouse Validator Client
Wants=network-online.target
After=network-online.target

[Service]
User=csm_lighthouse_validator
Group=csm_lighthouse_validator
Type=simple
Restart=always
RestartSec=5
ExecStart=/usr/local/bin/lighthouse vc \
  --network <hoodi_or_mainnet> \
  --datadir /var/lib/csm_lighthouse_validator \
  --builder-proposals \
  --builder-boost-factor 100 \
  --beacon-nodes http://<Internal_IP_address>:5051 \
  --metrics \
  --metrics-port 8108 \
  --suggested-fee-recipient <hoodi_or_mainnet_fee_recipient_address> \
  --graffiti="<your_graffiti>" \
  --enable-doppelganger-protection

[Install]
WantedBy=multi-user.target
```

Once you're done, save with `Ctrl+O` and `Enter`, then exit with `Ctrl+X`. Understand and review your configuration summary below, and amend if needed.

{% hint style="info" %}
**Important:** Recall that you will have to use designated fee recipient addresses as a CSM operator.\
**- Mainnet:** [`0x388C818CA8B9251b393131C08a736A67ccB19297`](https://etherscan.io/address/0x388C818CA8B9251b393131C08a736A67ccB19297)

**- Hoodi:** [`0x9b108015fe433F173696Af3Aa0CF7CDb3E104258`](https://hoodi.cloud.blockscout.com/address/0x9b108015fe433F173696Af3Aa0CF7CDb3E104258)
{% endhint %}

Refer to the native Lighthouse validator client setup section for more information on the other flags used.

{% content-ref url="/pages/c9Wa0RzqAGpZ7B3grnGF" %}
[Lighthouse VC](/native-solo-staking-setup/validator-client-setup/lighthouse-vc)
{% endcontent-ref %}
{% endtab %}

{% tab title="Prysm" %}
Create a systemd configuration file for the Prysm Validator Client service to run in the background.

```bash
sudo nano /etc/systemd/system/csm_prysmvalidator.service
```

Paste the configuration parameters below into the file:

```
[Unit]
Description=CSM Prysm Validator Client
Wants=network-online.target
After=network-online.target

[Service]
User=csm_prysm_validator
Group=csm_prysm_validator
Type=simple
Restart=always
RestartSec=5
ExecStart=/usr/local/bin/prysmvalidator \
  --accept-terms-of-use \
  --<hoodi_or_mainnet> \
  --datadir=/var/lib/csm_prysm_validator \
  --enable-builder \
  --beacon-rpc-provider=<Internal_IP_address>:4000 \
  --beacon-rpc-gateway-provider=<Internal_IP_address>:5051 \
  --wallet-dir=/var/lib/csm_prysm_validator \
  --wallet-password-file=/var/lib/csm_prysm_validator/password.txt \
  --monitoring-port=8108 \
  --suggested-fee-recipient=<hoodi_or_mainnet_fee_recipient_address> \
  --graffiti="<your_graffiti>" \
  --enable-doppelganger

[Install]
WantedBy=multi-user.target
```

Once you're done, save with `Ctrl+O` and `Enter`, then exit with `Ctrl+X`. Understand and review your configuration summary below, and amend if needed.

{% hint style="info" %}
**Important:** Recall that you will have to use designated fee recipient addresses as a CSM operator.\
**- Mainnet:** [`0x388C818CA8B9251b393131C08a736A67ccB19297`](https://etherscan.io/address/0x388C818CA8B9251b393131C08a736A67ccB19297)

**- Hoodi:** [`0x9b108015fe433F173696Af3Aa0CF7CDb3E104258`](https://hoodi.cloud.blockscout.com/address/0x9b108015fe433F173696Af3Aa0CF7CDb3E104258)
{% endhint %}

Refer to the native Lighthouse validator client setup section for more information on the other flags used.

{% content-ref url="/pages/NhnKRkyjSg8iuPjzaGI2" %}
[Prysm VC](/native-solo-staking-setup/validator-client-setup/prysm-vc)
{% endcontent-ref %}
{% endtab %}
{% endtabs %}

## Start the CSM Validator Client

Create a new configuration file for your separate validator client.

{% tabs %}
{% tab title="Teku" %}
Reload the systemd daemon to register the changes made, start the Teku Validator Client, and check its status to make sure its running.

```bash
sudo systemctl daemon-reload
sudo systemctl start csm_tekuvalidator.service
sudo systemctl status csm_tekuvalidator.service
```

The output should say the Teku Validator Client is **“active (running)”.** Press CTRL-C to exit and the Teku Validator Client will continue to run.

Use the following command to check the logs for any warnings or errors:

```bash
sudo journalctl -fu csm_tekuvalidator -o cat | ccze -A
```

**Expected output:**

<figure><img src="/files/q7mhPZ3xmUQWT2CrC2mZ" alt=""><figcaption><p>Example output of the Teku VC running on the Goerli testnet. Look out for Hoodi in your output.</p></figcaption></figure>

Press `CTRL-C` to exit.

If the Teku Validator Client service is running smoothly, we can now enable it to fire up automatically when rebooting the system.

```bash
sudo systemctl enable csm_tekuvalidator
```

**Expected output:**

```
Created symlink /etc/systemd/system/multi-user.target.wants/csm_tekuvalidator.service → /etc/s
```

### Remove duplicates of validator keystores

To prevent configuration mistakes leading to double signing in the future, remove duplicate copies of the validator signing keystores once everything is running smoothly.

```sh
sudo rm -r ~/staking_deposit-cli*/validator_keys
```

{% endtab %}

{% tab title="Nimbus" %}
Reload the systemd daemon to register the changes made, start the Nimbus Validator Client, and check its status to make sure its running.

```bash
sudo systemctl daemon-reload
sudo systemctl start csm_nimbusvalidator.service
sudo systemctl status csm_nimbusvalidator.service
```

The output should say the Nimbus Validator Client is **“active (running)”.** Press CTRL-C to exit and the Nimbus Validator Client will continue to run.

Use the following command to check the logs for any warnings or errors:

```bash
sudo journalctl -fu csm_nimbusvalidator -o cat | ccze -A
```

**Expected output:**

<figure><img src="/files/k0HjUt2rIpsJe1QVwaKM" alt=""><figcaption></figcaption></figure>

Press `CTRL-C` to exit.

If the Nimbus Validator Client service is running smoothly, we can now enable it to fire up automatically when rebooting the system.

```bash
sudo systemctl enable csm_nimbusvalidator
```

**Expected output:**

```
Created symlink /etc/systemd/system/multi-user.target.wants/csm_nimbusvalidator.service → /etc/systemd/system/csm_nimbusvalidator.service.
```

### Remove duplicates of validator keystores

To prevent configuration mistakes leading to double signing in the future, remove duplicate copies of the validator signing keystores once everything is running smoothly.

```sh
sudo rm -r ~/staking_deposit-cli*/validator_keys
```

{% endtab %}

{% tab title="Lodestar" %}
1\) Make sure you are in the same folder as the `docker-compose.yml` file you created earlier.

```sh
cd ~/csm_lodestar_validator
```

&#x20;2\) Start the docker container.

```sh
docker compose up -d
```

**Expected output:**

<figure><img src="/files/Na3e8ThYycKk6QafdMwS" alt=""><figcaption></figcaption></figure>

3\) Make sure there are no error messages by monitoring the logs for a few minutes.

```sh
docker logs csm_lodestar_validator -f
```

<figure><img src="/files/1cfWn9FO3WiEugURXwZy" alt=""><figcaption></figcaption></figure>

## Remove duplicates of validator keystores

To prevent configuration mistakes leading to double signing in the future, remove duplicate copies of the validator signing keystores once everything is running smoothly.

```sh
sudo rm -r ~/staking_deposit-cli*/validator_keys
```

{% endtab %}

{% tab title="Lighthouse" %}
Reload the systemd daemon to register the changes made, start the Lighthouse Validator Client, and check its status to make sure its running.

```bash
sudo systemctl daemon-reload
sudo systemctl start csm_lighthousevalidator.service
sudo systemctl status csm_lighthousevalidator.service
```

The output should say the Lighthouse Validator Client is **“active (running)”.** Press CTRL-C to exit and the Lighthouse Validator Client will continue to run.

Use the following command to check the logs for any warnings or errors:

```bash
sudo journalctl -fu csm_lighthousevalidator -o cat | ccze -A
```

**Expected output:**

<figure><img src="/files/BQDFFNbD95VzqUv0Wvgx" alt=""><figcaption></figcaption></figure>

{% hint style="info" %}
You will see some warnings if your beacon node (consensus client) is not yet synced.
{% endhint %}

Press `CTRL-C` to exit.

If the Lighthouse Validator Client service is running smoothly, we can now enable it to fire up automatically when rebooting the system.

```bash
sudo systemctl enable csm_lighthousevalidator
```

**Expected output:**

```
Created symlink /etc/systemd/system/multi-user.target.wants/csm_lighthousevalidator.service → /etc/systemd/system/csm_lighthousevalidator.service.
```

### Remove duplicates of validator keystores

To prevent configuration mistakes leading to double signing in the future, remove duplicate copies of the validator signing keystores once everything is running smoothly.

```sh
sudo rm -r ~/staking_deposit-cli*/validator_keys
```

{% endtab %}

{% tab title="Prysm" %}
Reload the systemd daemon to register the changes made, start the Prysm Validator Client, and check its status to make sure its running.

```bash
sudo systemctl daemon-reload
sudo systemctl start csm_prysmvalidator.service
sudo systemctl status csm_prysmvalidator.service
```

The output should say the Prysm Validator Client is **“active (running)”.** Press CTRL-C to exit and the Prysm Validator Client will continue to run.

Use the following command to check the logs for any warnings or errors:

```bash
sudo journalctl -fu csm_prysmvalidator -o cat | ccze -A
```

**Expected output:**

<figure><img src="/files/sVkbP1IfqFbsyosMqVEa" alt=""><figcaption></figcaption></figure>

{% hint style="info" %}
You will see some warnings if your beacon node (consensus client) is not yet synced.
{% endhint %}

Press `CTRL-C` to exit.

If the Prysm Validator Client service is running smoothly, we can now enable it to fire up automatically when rebooting the system.

```bash
sudo systemctl enable csm_prysmvalidator
```

**Expected output:**

```
Created symlink /etc/systemd/system/multi-user.target.wants/csm_prysmvalidator.service → /etc/systemd/system/csm_prysmvalidator.service.
```

### Remove duplicates of validator keystores

To prevent configuration mistakes leading to double signing in the future, remove duplicate copies of the validator signing keystores once everything is running smoothly.

```sh
sudo rm -r ~/staking_deposit-cli*/validator_keys
```

{% endtab %}
{% endtabs %}

## Automation Tools

{% tabs %}
{% tab title="ETH Pillar" %}
{% hint style="warning" %}
Only 1 instance of ETH Pillar can be running per device. If you are already using ETH Pillar for your own validator node setup, then you will need to use any of the other methods (e.g., ETH Docker) listed in this subpage to import your CSM validator keystores.
{% endhint %}

Select `4 - Lido CSM Validator Client Only`.

<figure><img src="/files/e2Koz9sFu8R5zvrfffYj" alt=""><figcaption></figcaption></figure>

Enter your consensus client (beacon node) address. **Example:** <http://127.0.0.1:5052>

Verify the `fee_recipient` address is set to the `Lido Execution Layer Rewards Vault`.

* **Mainnet:** [`0x388C818CA8B9251b393131C08a736A67ccB19297`](https://etherscan.io/address/0x388C818CA8B9251b393131C08a736A67ccB19297)
* **Hoodi:** [`0x9b108015fe433F173696Af3Aa0CF7CDb3E104258`](https://hoodi.cloud.blockscout.com/address/0x9b108015fe433F173696Af3Aa0CF7CDb3E104258)

Generate and import CSM validator keys.
{% endtab %}

{% tab title="ETH Docker" %}
ETH Docker sets the `fee_recipient` address on the validator key level. Refer to the subpage below, under **"Automation Tools".**

{% content-ref url="/pages/kWy63boyqdhqkTPI5Zcj" %}
[Method 1: Configure on validator keys](/bonded-validators-setup/lido-csm/set-fee-recipient-address/method-1-configure-on-validator-keys)
{% endcontent-ref %}
{% endtab %}
{% endtabs %}

## Resources

{% tabs %}
{% tab title="Teku" %}

* Releases: <https://github.com/Consensys/teku/releases>
* Documentation: <https://docs.teku.consensys.io/introduction>
* Discord: <https://discord.gg/consensys> (Select the Teku channel)
  {% endtab %}

{% tab title="Nimbus" %}

* Releases: <https://github.com/status-im/nimbus-eth2/releases>
* Documentation: <https://nimbus.guide/install.html>
* Discord: <https://discord.gg/BWKx5Xta>
  {% endtab %}

{% tab title="Lodestar" %}

* Git repository: <https://github.com/ChainSafe/lodestar-quickstart.git>
* Documentation: <https://chainsafe.github.io/lodestar/>
* Discord: <https://discord.gg/7Gdb4nFh>
  {% endtab %}

{% tab title="Lighthouse" %}

* Releases: <https://github.com/sigp/lighthouse/releases>
* Documentation: <https://lighthouse-book.sigmaprime.io/intro.html>
* Discord: <https://discord.com/invite/TX7HKfgJN3>
  {% endtab %}

{% tab title="Prysm" %}

* Releases: <https://github.com/prysmaticlabs/prysm/releases>
* Documentation: <https://docs.prylabs.network/docs/getting-started>
* Discord: <https://discord.gg/prysmaticlabs>
  {% endtab %}
  {% endtabs %}


# Verifying Fee Recipient Registered on MEV Relays

## Checker Script

### Mainnet

Install dependencies and activate a Python virtual environment.

```sh
sudo apt update
sudo apt install git python3-venv python3-full python3-requests
# Activate Python virtual environment
python3 -m venv ~/check_relay_env
source ~/check_relay_env/bin/activate
pip install web3 requests
```

Download the Fee Recipient checker script ([Source](https://gist.github.com/skhomuti/bc188884f6bdc1ce2c65a949e84b0dc5)).

```sh
git clone https://gist.github.com/bc188884f6bdc1ce2c65a949e84b0dc5.git check_no_relays
cd check_no_relays
```

Set the RPC endpoint using your local execution client or one of the free publicly available ones here: <https://ethereumnodes.com/>

```sh
export RPC_URL="http://127.0.0.1:8545"
```

**or;**

```sh
export RPC_URL="https://eth.llamarpc.com"
```

Run the Checker Script and enter your CSM Node Operator ID when prompted.

```sh
python3 check_no_relays.py
```

**Expected output:**

<figure><img src="/files/YN9SFeXtaEGhPh4NukOv" alt=""><figcaption><p>Example output using dummy pubkeys</p></figcaption></figure>

Once done, you can deactivate the Python virtual environment.

```sh
deactivate
```

### **Troubleshooting:**

```
ConnectionRefusedError: [Errno 111] Connection refused
```

If you face a "connection refused" error as seen above, it either means the RPC endpoint of your Execution Client is not enabled or the `RPC_URL` used is incorrect

**How to fix?**

{% tabs %}
{% tab title="Eth Docker" %}
Edit the `.env` file.

```
nano ~/eth-docker/.env
```

Add **`:el-shared.yml`** to the back of the `COMPOSE_FILE=` line.

Save and exit with `CTRL+O`, `ENTER`, `CTRL+X`.

Restart the Eth Docker stack with `ethd down` then `ethd up`.
{% endtab %}

{% tab title="systemd" %}
Enable RPC or HTTP endpoint on your Execution Client.

```sh
sudo nano /etc/systemd/system/EXECUTION_CLIENT.service
# replace EXECUTION_CLIENT with the actual file name
```

Make sure the following flags are added.

1. Geth, Reth, Erigon: `--http`
2. Nethermind: `--JsonRpc.Enabled`
3. Besu: `--rpc-http-enabled`

Save and exit with `CTRL+O`, `ENTER`, `CTRL+X`.

Restart your execution client.

```sh
sudo systemctl daemon-reload
sudo systemctl restart EXECUTION_CLIENT
# replace EXECUTION_CLIENT with the actual file name
```

{% endtab %}

{% tab title="Eth Pillar" %}
Enabled by default.
{% endtab %}
{% endtabs %}

### Testnet

<mark style="color:red;">WIP</mark>

## Manual Check

For each MEV Relay you have configured, replace `<VALIDATOR_PUBKEY>` for each of the commands below and run them on your terminal.&#x20;

Then verify that the Fee Recipient Address matches with the Lido Execution Layer Rewards Vaults on Mainnet or Holesky depending on your setup ([Source](https://operatorportal.lido.fi/modules/community-staking-module)).&#x20;

**Example output:**

> {"message":{"fee\_recipient":"<mark style="background-color:yellow;">0x388C818CA8B9251b393131C08a736A67ccB19297</mark>","gas\_limit":"30000000","timestamp":"1739938746","pubkey":"0x...."},"signature":"0x...."}

{% hint style="info" %}
Lido Execution Layer Rewards Vault Address&#x20;

* **Mainnet** = [`0x388C818CA8B9251b393131C08a736A67ccB19297`](https://etherscan.io/address/0x388C818CA8B9251b393131C08a736A67ccB19297)
* **Hoodi** = [`0x9b108015fe433F173696Af3Aa0CF7CDb3E104258`](https://hoodi.cloud.blockscout.com/address/0x9b108015fe433F173696Af3Aa0CF7CDb3E104258)
  {% endhint %}

{% tabs %}
{% tab title="Mainnet" %}
**1) Titan Relay Global (Mainnet) (Non-filtering):**

```
curl https://0x8c4ed5e24fe5c6ae21018437bde147693f68cda427cd1122cf20819c30eda7ed74f72dece09bb313f2a1855595ab677d@global.titanrelay.xyz/relay/v1/data/validator_registration?pubkey=<VALIDATOR_PUBKEY>
```

**2) Titan Relay Regional (Mainnet) (Filtering):**

```
curl https://0x8c4ed5e24fe5c6ae21018437bde147693f68cda427cd1122cf20819c30eda7ed74f72dece09bb313f2a1855595ab677d@regional.titanrelay.xyz/relay/v1/data/validator_registration?pubkey=<VALIDATOR_PUBKEY>
```

**3) Agnostic Relay (Mainnet)**

```
curl https://0xa7ab7a996c8584251c8f925da3170bdfd6ebc75d50f5ddc4050a6fdc77f2a3b5fce2cc750d0865e05d7228af97d69561@agnostic-relay.net/relay/v1/data/validator_registration?pubkey=<VALIDATOR_PUBKEY>
```

**4) Ultrasound Relay (Mainnet)**

```
curl https://0xa1559ace749633b997cb3fdacffb890aeebdb0f5a3b6aaa7eeeaf1a38af0a8fe88b9e4b1f61f236d2e64d95733327a62@relay.ultrasound.money/relay/v1/data/validator_registration?pubkey=<VALIDATOR_PUBKEY>
```

**5) Aestus Relay (Mainnet)**

```
curl https://0xa15b52576bcbf1072f4a011c0f99f9fb6c66f3e1ff321f11f461d15e31b1cb359caa092c71bbded0bae5b5ea401aab7e@aestus.live/relay/v1/data/validator_registration?pubkey=<VALIDATOR_PUBKEY>
```

**6) Manifold SecureRPC (Mainnet)**

```
curl https://0x98650451ba02064f7b000f5768cf0cf4d4e492317d82871bdc87ef841a0743f69f0f1eea11168503240ac35d101c9135@mainnet-relay.securerpc.com/relay/v1/data/validator_registration?pubkey=<VALIDATOR_PUBKEY>
```

**7) Flashbots (Mainnet)**

```
curl https://0xac6e77dfe25ecd6110b8e780608cce0dab71fdd5ebea22a16c0205200f2f8e2e3ad3b71d3499c54ad14d6c21b41a37ae@boost-relay.flashbots.net/relay/v1/data/validator_registration?pubkey=<VALIDATOR_PUBKEY>
```

**8) bloXroute Max-Profit (Mainnet)**

```
curl https://0x8b5d2e73e2a3a55c6c87b8b6eb92e0149a125c852751db1422fa951e42a09b82c142c3ea98d0d9930b056a3bc9896b8f@bloxroute.max-profit.blxrbdn.com/relay/v1/data/validator_registration?pubkey=<VALIDATOR_PUBKEY>
```

**9) bloXroute Regulated (Mainnet)**

```
curl https://0xb0b07cd0abef743db4260b0ed50619cf6ad4d82064cb4fbec9d3ec530f7c5e6793d9f286c4e082c0244ffb9f2658fe88@bloxroute.regulated.blxrbdn.com/relay/v1/data/validator_registration?pubkey=<VALIDATOR_PUBKEY>
```

{% endtab %}

{% tab title="Hoodi" %} <mark style="color:red;">WIP</mark>
{% endtab %}
{% endtabs %}

## What to do if Fee Recipient is wrong? <a href="#verify-your-fee-recipient" id="verify-your-fee-recipient"></a>

It’s important to **verify your fee recipient configuration before your validator proposes a block**, as incorrect settings may result in protocol penalties.

#### Check your local configuration[​](https://docs.lido.fi/staking-modules/csm/guides/fee-recipient/#check-your-local-configuration) <a href="#check-your-local-configuration" id="check-your-local-configuration"></a>

Make sure the fee recipient address is set to the following.

{% hint style="info" %}

* **Mainnet** = [`0x388C818CA8B9251b393131C08a736A67ccB19297`](https://etherscan.io/address/0x388C818CA8B9251b393131C08a736A67ccB19297)
* **Hoodi** = [`0x9b108015fe433F173696Af3Aa0CF7CDb3E104258`](https://hoodi.cloud.blockscout.com/address/0x9b108015fe433F173696Af3Aa0CF7CDb3E104258)
  {% endhint %}

Check this in your setup as follows:

* **Dappnode:** open the `Staking Brain` and review the `Fee Recipient` field for each validator.
* **Stereum:** open the UI and check the fee recipient field in the validator client settings.
* **Eth-Docker / Sedge:** inspect your `.env` file and confirm the `FEE_RECIPIENT` variable is set correctly.
* **SSV:** log in to [app.ssv.network](https://app.ssv.network/), click on **Fee Address**, and verify the address.
* **Obol:** check your cluster definition file or Launchpad configuration *before* deploying.
* **systemd (separate VC):** inspect your validator service file (`/etc/systemd/system/<validator-client>.service`) and confirm the correct `--fee-recipient` or equivalent flag is set.

{% hint style="danger" %}
Note for systemd users, make sure you **do not** set the Fee Recipient for your Solo Staking validator keys to the Lido Execution Layer Rewards Vault.
{% endhint %}

#### Check client logs[​](https://docs.lido.fi/staking-modules/csm/guides/fee-recipient/#check-client-logs) <a href="#check-client-logs" id="check-client-logs"></a>

Most validator clients log the configured fee recipient address during startup.\
Check your startup logs and confirm that the fee recipient is set to the **Lido Execution Layer Rewards Vault**.

### Seek Lido's help[​](https://docs.lido.fi/staking-modules/csm/guides/fee-recipient/#seek-lidos-help) <a href="#seek-lidos-help" id="seek-lidos-help"></a>

If you're running a validator client or using a custom setup not covered in this guide, and need help setting the correct fee recipient address, the **Lido Community Validator Specialists (Chimera)** are here to help.

Join the [Lido Discord](https://discord.gg/lido) and tag:

`@community-validator-support`

We’ll assist you in configuring your setup correctly to avoid penalties.


# Upload/Remove/View validator keys

## Upload keys

* Go to the Lido CSM Widget and connect your wallet. <mark style="color:red;">**MAKE SURE THAT YOU ARE ON THE CORRECT NETWORK (i.e., Hoodi or Mainnet).**</mark>
  * **Mainnet:** <https://csm.lido.fi/>
  * **Hoodi:** <https://csm.testnet.fi/>
* Select `Become a Node Operator` and then `Create a Node Operator`
* On the Lido CSM Widget, upload your `deposit data file` and select the corresponding bond type (ETH, stETH, wstETH), and provide the desired bond amount

<figure><img src="/files/MrVevb8otaVsBM0zVHSm" alt=""><figcaption></figcaption></figure>

{% tabs %}
{% tab title="Copy & Paste" %}
Print the contents of the `deposit_data.json` file on your node machine, then copy & paste the contents into CSM Widget directly.

* Identify the actual file name of your `deposit_data.json` file on your node

```sh
ls ~/ethstaker_deposit-cli*/validator_keys
```

* **Print the contents:**

```sh
cat ~/ethstaker_deposit-cli*/validator_keys/deposit_data-<timestamp>.json
#replace <timestamp> with the actual numbers in your file name
```

{% endtab %}

{% tab title="Upload File" %}
Transfer the deposit\_data-\<timestamp>.json file from the USB used in the validator key generation step onto your working device (e.g., laptop with Metamask), then upload the file.
{% endtab %}
{% endtabs %}

* Finally, select `Submit`, sign the transaction with your connected wallet, and you are all set.
* Now you just need to wait for the Lido CSM to deposit your validator keys (using your `deposit data file`). This is a first-in, first-out process so expect a queue when demand is high. More details on this process [here](https://operatorportal.lido.fi/modules/community-staking-module#block-25614a13674b465f875db871081091f9)

{% hint style="info" %}
**DO NOT DEPOSIT 32 ETH** using the deposit data file generated this way as the Lido CSM will make the deposit for you. ***Doing so will result in a loss of funds.***
{% endhint %}

## Remove keys

The Node Operator can delete uploaded keys voluntarily (e.g., duplicate keys) if it has not been deposited yet.&#x20;

A fee is confiscated from the Node Operator's bond on each deleted key to cover maximal possible operational costs associated with the queue processing. Keys (via the deposit data file) can be deleted in continuous batches (e.g., from index 5 to 10).

More details [here](https://operatorportal.lido.fi/modules/community-staking-module#block-051fceb673504a489e541e3615984084).

* Go to the Lido CSM Widget, under the `KEYS` header
* Select the `REMOVE` tab on the widget
* Select the keys you want to remove--

<figure><img src="/files/svKfQnIsAB9HVkMJKOx2" alt="" width="375"><figcaption></figcaption></figure>

Once your keys have been removed, the associated bond amounts that you deposited earlier will be available for claiming under the `Bond & Rewards` tab.

<figure><img src="/files/VtxupMyxc6dEgBCv5j8p" alt="" width="375"><figcaption></figcaption></figure>

{% hint style="warning" %}
Keys that have been deposited cannot be deleted and only can be exited.
{% endhint %}

## View keys

You can also view the status of the keys pertaining to your uploaded deposit data file and take the necessary actions.

<figure><img src="/files/ctugGlB3G9w0Pdryya1f" alt=""><figcaption></figcaption></figure>

<table><thead><tr><th width="145">Status</th><th>What it means</th><th>What to do?</th></tr></thead><tbody><tr><td><mark style="color:green;"><strong>Active</strong></mark></td><td>Key has been deposited &#x26; is either pending activation or active on the <a href="https://holesky.beaconcha.in/">beacon chain</a></td><td>Make sure your validator node is online to perform its duties</td></tr><tr><td><strong>Depositable</strong></td><td>Key is valid and bond is sufficient. Pending deposit from Lido Protocol</td><td>Maintain sufficient bond amounts</td></tr><tr><td><strong>Exited</strong></td><td>Key has been exited</td><td>None</td></tr><tr><td><mark style="color:orange;"><strong>Unbonded</strong></mark></td><td>Bond is insufficient for this key, which can be Active or otherwise </td><td>- Active key: Top up bond or exit key<br>- Non-active key: Top up bond or do nothing</td></tr><tr><td><mark style="color:red;"><strong>Duplicated</strong></mark></td><td>Key has been uploaded twice</td><td>Remove duplicate key</td></tr><tr><td><mark style="color:red;"><strong>Invalid</strong></mark></td><td>Uploaded key has an invalid signature</td><td>Remove key</td></tr><tr><td><mark style="color:red;"><strong>Stuck</strong></mark></td><td>Exit request for Active Key was not fulfilled within 96 hours</td><td>Exit key</td></tr></tbody></table>


# Rewards & bonds

## Dashboard

<figure><img src="/files/MzXpYUCRhN0XLAnJhb6O" alt=""><figcaption></figcaption></figure>

### How to get here

* Go to the Lido CSM Widget
  * **Mainnet:** <https://csm.lido.fi/>
  * **Hoodi:** <https://csm.testnet.fi/>
* Select the `BOND & REWARDS` section in the navigation bar

### `CLAIM` tab

Here, you will see your net rewards and bond claimable in aggregate and broken down into it's individual parts. Notice that `Locked bond` is also deducted from your aggregate rewards here.

You will also be able to claim your net rewards + bond in total or in individual parts if you wish, and select among 3 token types to receive--ETH/stETH/wstETH.

### `ADD BOND` tab

<figure><img src="/files/UNo1hlRaWRHzfvMWCK8i" alt=""><figcaption></figcaption></figure>

There are 2 activities you can perform here:

1. Review the balance of your total bond provided and the excess/insufficient bond amounts
2. Add more bond so that you can get more of your uploaded validator keys deposited by the CSM or top up any shortages due to poor performance or slashing events. **Read more on bond penalties** [**here**](https://operatorportal.lido.fi/modules/community-staking-module#block-3951aa72ba1e471bafe95b40fef65d2b)**.**

Once your excess bond amount is sufficient for new validator keys to be deposited, the `Keys available to upload` will increase.

<figure><img src="/files/ncE2rNxaHnbCwv1PyJ5W" alt=""><figcaption></figcaption></figure>

On the other hand, if your bond falls below the required minimum, the unbonded keys count will increase.

<figure><img src="/files/OaSJEsJbNmAICjv0Rt74" alt=""><figcaption></figcaption></figure>

{% hint style="info" %}
The required minimum bond amount is based on how many of your uploaded validator keys have been deposited by the CSM.
{% endhint %}

**At this point, there are 2 options you can take:**

1. Top up your bond amount under the `ADD BOND` tab
2. Wait for new rewards to replenish the bond amount until it is back to the required level

{% hint style="info" %}
You cannot replenish `Locked bonds` using the `ADD BOND` feature.
{% endhint %}

### `UNLOCK BOND` tab

<figure><img src="/files/TwhPBrV41uHF8P2RS77W" alt=""><figcaption></figcaption></figure>

This tab allows you to replenish your `Locked bonds` due to MEV theft and resume the accruing of your CSM operator rewards.

Exiting your CSM-deposited keys will not unlock your `Locked bonds`.

## Resources

<table><thead><tr><th width="202">Category</th><th>Navigation</th></tr></thead><tbody><tr><td><a href="https://operatorportal.lido.fi/modules/community-staking-module#block-88e6d7eca6364a758541dc1ee66a278f">Bond &#x26; Rewards</a></td><td> CSM Operator Portal: "Economics" section</td></tr><tr><td><a href="https://operatorportal.lido.fi/modules/community-staking-module#block-3951aa72ba1e471bafe95b40fef65d2b">Bond Penalties</a></td><td>CSM Operator Portal: "Penalties" sub-section</td></tr></tbody></table>


# Exiting CSM validators

## Monitoring for exit requests

The `DASHBOARD` header provides a consolidated view of any exit requests issued to you in the form of `Unbonded` and `Stuck` keys.

<figure><img src="/files/2B4TscWT8QevoTWxcbnC" alt=""><figcaption></figcaption></figure>

## How to Exit Keys and Withdraw Your Bond

1\) Sign & broadcast an exit message for each validator key you want to exit. Refer to sub-sections/pages below.

2\) Wait for validator key to be fully exited on the beacon chain. Check your validator ID pubkey on [beaconcha.in](https://beaconcha.in/)

3\) Connect your wallet address to the Lido CSM Widget ([Mainnet](https://csm.lido.fi/)) ([Testnet](https://csm.testnet.fi/))

4\) Navigate to `Keys`>>`View Keys` to verify that the status of your validator key is marked as `Withdrawn`

<figure><img src="/files/orZvG0UFiKCDe3qpsbD7" alt="" width="375"><figcaption></figcaption></figure>

5\) Navigate to `Bond & Rewards`>>`Claim` to claim your deposited bond and any accumulated rewards

<figure><img src="/files/NEcLFYuQWaF4LgR314Zg" alt="" width="375"><figcaption></figcaption></figure>

{% hint style="warning" %}
The 32 ETH deposited to activate each validator key will return to the Lido Protocol. Meanwhile, CSM Operators get their ETH-based bond deposits back from the Lido CSM Contract.
{% endhint %}

## Exit requests from Lido

There are 3 reasons why CSM operators can receive exit requests from the Lido Protocol:

1. The node operator's bond amounts fall below the minimum threshold for the number of validator keys deposited by the CSM
2. To cover withdrawal requests from stETH holders
3. By DAO decision in some exceptional cases. This will require an on-chain vote and public discussion on the [Lido Research forum](https://research.lido.fi/).

Exit requests can be observed in the number `Unbonded` keys on the operator dashboard of the CSM Web App.

<figure><img src="/files/nhDW64K7UCPu221YSjyW" alt="" width="375"><figcaption></figcaption></figure>

When this happens, CSM operators must initiate an exit on the requested number of validator keys as soon as possible (within 96 hours) to avoid penalty measures from having `Stuck Keys`.

## Stuck Keys

`Stuck Keys` accrue when CSM operators do not perform timely (within 96 hours) exits on the required number of CSM-deposited validator keys when requested by the Lido Protocol.&#x20;

**Penalties of having `Stuck Keys` include:**

1. New validator keys of the CSM operator will not be deposited&#x20;
2. New staking rewards stop accruing for the CSM operator

Penalties are lifted when there are no more `Stuck Keys`.  More details [here](https://operatorportal.lido.fi/modules/community-staking-module#block-0ed61a4c0a5a439bbb4be20e814b4e38).


# "Lazy" exits (TESTNET ONLY)

{% hint style="info" %}
This page is only used for Lido CSM testnet participants who want to rapidly exit their validator keys so that they can shut down their testnet services and transition onto Mainnet. For Mainnet exits, please follow all OpSec SOPs in the main **"Existing CSM validators"** section.
{% endhint %}

## Video guide

{% embed url="<https://www.youtube.com/watch?v=fuAI4aXDhyg>" %}

## Preparing to exit

**On your validator node:**

Download the latest version of the `ethdo` tool [here](https://github.com/wealdtech/ethdo/releases).

<pre class="language-sh"><code class="lang-sh"><strong>cd
</strong><strong>wget https://github.com/wealdtech/ethdo/releases/download/v1.35.2/ethdo-1.35.2-linux-amd64.tar.gz
</strong>wget https://github.com/wealdtech/ethdo/releases/download/v1.35.2/ethdo-1.35.2-linux-amd64.tar.gz.sha256
</code></pre>

Verify the checksums by ensuring the outputs of the following 2 commands are the same.

```sh
sha256sum ethdo-1.35.2-linux-amd64.tar.gz
cat ethdo-1.35.2-linux-amd64.tar.gz.sha256
```

Extract the `ethdo` executable file.

```sh
tar xvf ethdo-1.35.2-linux-amd64.tar.gz
```

Download the latest Offline Preparation file from the [Ethstaker github subpage](https://github.com/eth-educators/ethstaker-guides/blob/main/docs/voluntary-exit.md). These are regenerated every day at 0:00 UTC

```sh
wget https://files.ethstaker.cc/offline-preparation-hoodi.tar.gz
wget https://files.ethstaker.cc/offline-preparation-hoodi.tar.gz.sha256
```

Verify the checksums by ensuring the outputs of the following 2 commands are the same.

```sh
sha256sum offline-preparation-hoodi.tar.gz
cat offline-preparation-hoodi.tar.gz.sha256 
```

Extract the `offline-preparation.json` file.

```sh
tar xvf offline-preparation-hoodi.tar.gz
```

Find your validator keystores on your machine.

```sh
sudo find /var/lib -name "keystore*.json"
```

**Example output:**

<figure><img src="/files/TDNvHtFzpPOYxyGFU8MR" alt=""><figcaption></figcaption></figure>

Copy the keystores you want to exit into the $HOME folder. The exact command will depend on your actual file paths.

**Example:**

```
sudo cp -r /var/lib/nimbus_validator/validators $HOME
```

Then change the owner of this copied `validators`folder to your current user.

```sh
sudo chown -R $USER:$USER validators
```

Copy the offline-preparation.json and ethdo files into each validator keystore folders in $HOME.

```sh
cd

for folder in validators/0x*; do
    cp offline-preparation.json ethdo "$folder"
done
```

## Generate exit message

### Method 1: Using validator keystores + password

List all your validator keys.

```sh
ls validators
```

Change directory into the validator key you want to exit.

**Example:**

```sh
cd ~/validators/0x807b70918fe987bf5bde5ac0fb7c5620bbe9aad6a4754a17db52c73ed7208a5ffb9f5fa78d1b7c11e827d71b3ccc03ce 
```

List the actual file name of your validator key.

```sh
ls
```

**Example:**

<figure><img src="/files/H5TBcrsPbuhXS9143Jvf" alt=""><figcaption></figcaption></figure>

Generate the validator exit message for each of that key.

```sh
./ethdo validator exit --validator="KEYSTORE_FILENAME" --passphrase='KEYSTORE_PASSWORD' --json --offline > exit_message.json
```

**Note:** Replace `KEYSTORE_FILENAME` and `KEYSTORE_PASSWORD` with actual values without removing the quotation marks.

If successful, no output will be generated by the terminal.

### Method 2: Using validator mnemonic

Prepare your 24-word mnemonic and identify your validator index on hoodi.beaconcha.in using the validator public keys found in the **"Preparing to Exit"** section earlier.

Run the following replacing VALIDATOR\_INDEX and MNEMONIC with your actual values.

```sh
./ethdo validator exit --validator=VALIDATOR_INDEX --json --offline --mnemonic="MNEMONIC" > exit_message.json
```

## Broadcast exit message

Print out the exit message.

```sh
cat exit_message.json
```

**Example:**

<figure><img src="/files/NJueoqFCPc5emINSN6LQ" alt=""><figcaption></figcaption></figure>

Copy the entire output and go to the [message broadcasting tool of hoodi.beaconcha.in](https://hoodi.beaconcha.in/tools/broadcast) to broadcast your exit message.

Paste your exit message in the text field and hit submit.

<figure><img src="/files/xbHPzo0UhPj7P2u5Gq1P" alt=""><figcaption></figcaption></figure>

Congratulations! Your validator key will be exited soon but in the meantime, you will have to keep your validator node running until your key is fully exited.&#x20;

Repeat the **"Generate Exit Message"** section for all other keys you want to exit.&#x20;

## Feedback & Support

{% embed url="<https://t.me/stakesaurus>" %}

## Supporting Stakesaurus

#### If you found this helpful, consider following me below!

* [Twitter](https://twitter.com/stakesaurus)
* [Newsletter](https://stakesaurus.beehiiv.com/)


# Proper Exits

## Manual exit

Exiting CSM-deposited validator keys works the same way as exiting solo staking validator keys.

Refer to this dedicated guide for exiting validators put together by Remy Roy.

{% embed url="<https://github.com/eth-educators/ethstaker-guides/blob/main/voluntary-exit.md>" %}

You can also follow the steps extracted from Remy's guide below (Linux only).

### Overview of the validator exit process

The whole process can feel daunting so we will break it down into 3 phases.

<figure><img src="/files/ij0Btf0cl6Mi5I2iOpI8" alt=""><figcaption></figcaption></figure>

### Phase 1: Prepare the necessary files

* Ensure that you have either your **24-word mnemonic** or your **validator keystores + the password to decrypt it.**&#x20;

{% hint style="info" %}
If you have neither, you will likely never be able to exit your validators, so keep both items secure!
{% endhint %}

* Download the latest version of [`ethdo`](https://github.com/wealdtech/ethdo/releases)&#x20;

```sh
cd
wget https://github.com/wealdtech/ethdo/releases/download/v1.35.3/ethdo-1.35.3-linux-amd64.tar.gz
wget https://github.com/wealdtech/ethdo/releases/download/v1.35.3/ethdo-1.35.3-linux-amd64.tar.gz.sha256
```

* Print the sha256 checksum

```
cat ethdo-1.35.3-linux-amd64.tar.gz.sha256
```

* Verify the checksum of the downloaded zipped file using the output of the previous command.

```sh
echo "<sha256_checksum> ethdo-1.35.3-linux-amd64.tar.gz" | sha256sum --check
```

**Expected output:**

```
ethdo-1.35.3-linux-amd64.tar.gz: OK
```

{% hint style="info" %}
Do not proceed if the checksum verification fails, and reach out for help on the Lido or Ethstaker discord.&#x20;
{% endhint %}

* Generate the `offline-preparation.json` file using `ethdo`

```sh
tar xvf ethdo-1.35.3-linux-amd64.tar.gz
./ethdo validator exit --prepare-offline
```

**Expected output:**

```
offline-preparation.json generated
```

### Phase 2: Transfer files into an air-gapped machine

Recall the steps in the **Install and prepare the OS** section, but instead of installing Ubuntu as the OS, we will install TailsOS for extra security.

* Prepare 2 brand new USB drives
* Plug the ***first*** USB drive into your validator node machine and identify the USB drive on your terminal&#x20;

```sh
lsblk
# Look for your USB drive in the output list. 
# It will take a name similar to "sdx1". 
```

* After you find it, you can proceed to mount this ***first*** USB drive onto the `/media` folder

```sh
sudo mount /dev/sda1 /media 
#Replace sda1 with the actual name of your USB drive.
```

* Load your validator keystores, the downloaded ethdo zipped file, the sha256 checksum, and the offline-preparation.json file into the ***first*** USB drive

```
sudo cp <file_path_to_validator_keystores> /media
sudo cp ~/offline-preparation.json ~/ethdo-1.35.3-linux-amd64.tar.gz ~/ethdo-1.35.3-linux-amd64.tar.gz.sha256 /media
```

* Download the latest version of TailsOS into your laptop from the [website](https://tails.net/install/mac/index.en.html#download) and follow the instructions to upload the downloaded file for checksum verification
* **This step creates the airgapped machine:** Unplug any wired connections from your laptop. Then, follow the steps in the [**Install and prepare the OS**](/linux-os-networking-and-security/install-and-prepare-the-os) section to flash the ***second*** USB drive with TailsOS and boot up TailsOS on your laptop. Stop just before *"**Install the SSH server"***
* Plug the ***first*** USB drive into your laptop that is now running TailsOS and transfer all the files into the home folder

### Phase 3: Signing the exit message

**Loading the files onto TailsOS**

* Open up the terminal on TailsOS
* Print the sha256 checksum

```sh
cd
cat ethdo-1.35.3-linux-amd64.tar.gz.sha256
```

* Verify the checksum of the downloaded zipped file using the output of the previous command.

```sh
echo "<sha256_checksum> ethdo-1.35.3-linux-amd64.tar.gz" | sha256sum --check
```

**Expected output:**

```
ethdo-1.35.3-linux-amd64.tar.gz: OK
```

{% hint style="info" %}
Do not proceed if the checksum verification fails, and seek help on the Lido or Ethstaker discord.&#x20;
{% endhint %}

* Extract the ethdo file

```sh
tar xvf ethdo-1.35.2-linux-amd64.tar.gz
```

**Generate the exit message (Choose your method)**

* **Method 1:** Using the validator keystores + password

```sh
./ethdo validator exit --validator="KEYSTORE_FILENAME" --passphrase='KEYSTORE_PASSWORD' --json --offline > RESULTING_FILENAME

#Example:
#./ethdo validator exit --validator="KEYSTORE_FILENAME" --passphrase='KEYSTORE_PASSWORD' --json --offline > RESULTING_FILENAME
```

* **Method 2:** Using the 24-word mnemonic

```sh
./ethdo validator exit --validator=VALIDATOR_INDEX --json --offline --mnemonic="MNEMONIC" > RESULTING_FILENAME

#Example:
#./ethdo validator exit --validator=459921 --json --offline --mnemonic="silent hill auto ability front sting tunnel empower venture once wise local suffer repeat deny deliver hawk silk wedding random coil you town narrow" > 459921-exit.json
```

Copy the resulting file (e.g., 459921-exit.json) into your ***first*** USB (currently plugged into your TailsOS laptop). This is the `exit message`.

{% hint style="danger" %}
**WARNING:** Do not enter your 24-word mnemonic into any machine that is not air-gapped *(i.e., never was and never will be online)*
{% endhint %}

**Broadcasting the exit message**

* Restart your TailsOS laptop and unplug the ***second*** USB flashed with TailsOS to revert to your normal operating system

{% hint style="info" %}
All files that were previously copied onto TailsOS will be wiped automatically upon restart or shut down
{% endhint %}

* Browse to <https://beaconcha.in/tools/broadcast>, upload your `exit message` into the widget and broadcast it

Your validator will now enter the exit queue. You must keep your validator node running until it is fully exited, or you will suffer offline penalties.

<details>

<summary>Automated exit (WIP, do not use)</summary>

Because exit requests need to be fulfilled within 96 hours, CSM operators can choose to run a service called the `validator-ejector` to automate this process.

#### Using the `validator-ejector` package

Download the [latest git repository](https://github.com/lidofinance/validator-ejector) of `validator-ejector`.

```sh
cd
git clone https://github.com/lidofinance/validator-ejector.git
cd validator-ejector
```

Create the environment file and open it up for editing.

```sh
sudo cp sample.env .env
sudo nano .env
```

Replace the following environment variables in the .env file with the details below.

```
EXECUTION_NODE=http://<Internal_IP_Address>:<RPC_Port>
CONSENSUS_NODE=http://<Internal_IP_Address>:<REST_Port>
LOCATOR_ADDRESS=0x1eDf09b5023DC86737b59dE68a8130De878984f5
STAKING_MODULE_ID=1
OPERATOR_ID=123

MESSAGES_LOCATION=messages
MESSAGES_PASSWORD=pass


```

</details>


# Role/Address management

## Lido CSM Widget URLS

* **Mainnet:** <https://csm.lido.fi/>
* **Hoodi:** <https://csm.testnet.fi/>

## Changing Rewards & Manager Address

Node operators can change the Rewards and Manager Address in the `REWARDS ADDRESS` & `MANAGER ADDRESS` tab under the `ROLES` header of the Lido CSM Widget.

<figure><img src="/files/hV5lKXXcbbiBXjN1X3bR" alt=""><figcaption></figcaption></figure>

The process of changing the Manager and Rewards addressed is two-phased:

* Propose new address from the existing one
* Accept the change from the new address

This process helps Node Operators to avoid incorrect changes to the non-existing address.

### Accept Rewards/Manager Address Assignments

Node operators can view their Address assignments in the `INBOX REQUESTS` tab under the `ROLES` header of the [CSM Widget](https://csm.testnet.fi/).

<figure><img src="/files/DJ5EAOKljfEgqmUNMBxc" alt=""><figcaption></figcaption></figure>

### Reset Reward/Manager Address Change

There will also be a method to reset Manager address to Reward Address from the Rewards address in case the Manager Address was compromised or lost.

<figure><img src="/files/hUNtwzmMBRnw0nFCxrLR" alt=""><figcaption></figcaption></figure>

{% hint style="info" %}
More details on Rewards vs Manager addresses [here](https://operatorportal.lido.fi/modules/community-staking-module#block-268ecefc0b37498badc1bf0baab04e0b).
{% endhint %}

### Step-by-Step to Change Rewards/Manager Address

1. Connect your current Rewards Address to the Lido CSM Widget
2. Propose a change to the Rewards or Manager Address&#x20;
   1. Navigate to the `REWARDS ADDRESS` or `MANAGER ADDRESS` tab under the `ROLES` header of the Lido CSM Widget
   2. Paste your new addresses for the change
   3. Submit the onchain transaction

      <figure><img src="/files/OdmQQKqPd2r5moIAau8T" alt="" width="563"><figcaption></figcaption></figure>
3. &#x20;Disconnect your current Rewards Address from the Lido CSM Widget
4. Connect your new Rewards or Manager Address to the Lido CSM Widget
5. &#x20;Accept the Rewards or Manager Address assignment

   1. Navigate to the `REWARDS ADDRESS` or `MANAGER ADDRESS` tab under the `ROLES` header of the Lido CSM Widget
   2. Select the address assignments you want to accept&#x20;
   3. Submit the onchain transaction

   <figure><img src="/files/8GnLYwRFIeJisgywrTBJ" alt="" width="563"><figcaption></figcaption></figure>

{% hint style="danger" %}
**Changing the Rewards Address:** All of your uploaded validator keys, deposited bond, and accrued rewards will now be owned by the new Rewards Address after the change
{% endhint %}

{% hint style="warning" %}
**Changing the Manager Address:** All of your uploaded validator keys, deposited bond, and accrued rewards will still be owned by current Rewards Address after the change
{% endhint %}


# Monitoring

## On-chain Monitoring

Basic on-chain monitoring can be done using the following tools found on the CSM Widget directly. Under the `Dashboard` navbar tab scroll all the way down to the `External Dashboards` expandable list.

<figure><img src="/files/IWlwNw67mEsTXOrxMdBf" alt=""><figcaption></figcaption></figure>

### Beaconcha.in V2

Shows a wide range of performance data for all of the validator keys under your CSM Operator.

<figure><img src="/files/OM8KMViJLQNCKDysVtKB" alt=""><figcaption></figcaption></figure>

To receive notifications on when your validators go offline, open up the Validators pop-up window, click into each key, and add them to your  watchlist. You will need to create a free account on Beaconcha.in in order to use this.

<figure><img src="/files/8WCaSnJgOppmbHhmrr3f" alt="" width="563"><figcaption></figcaption></figure>

<figure><img src="/files/SvP4MHqk3xagZNlEasVw" alt="" width="563"><figcaption></figcaption></figure>

### Rated Explorer

Provides more details on performance of all validator keys under your CSM Operator in aggregate. No built-in notifications available.

<figure><img src="/files/3nv85SKcCGXUfonPjfqp" alt="" width="375"><figcaption></figcaption></figure>

### Lido Operators

Provides an overall view of validator keys uploaded onto the CSM Widget. Mouse over each category for a description of each metric.

<figure><img src="/files/uMYvwmn3Q65xut6MAyCA" alt=""><figcaption></figcaption></figure>

### Lido MEV Monitoring

Provides details on blocks proposed by the validators under your CSM Operator over a period. If the Fee recipient is not equal to the designated fee recipient addresses for the respective networks, "[MEV Stealing](https://docs.lido.fi/staking-modules/csm/guides/mev-stealing/)" will be detected.

<figure><img src="/files/VvGHAsAkvyZZDgN78efL" alt="" width="563"><figcaption></figcaption></figure>

## Off-Chain Monitoring: Grafana

For more detailed monitoring, refer to the section below.

{% content-ref url="/pages/4ka9wydEySjR92LGWG7F" %}
[Monitoring, Maintenance, and Updates](/monitoring-maintenance-and-updates/set-up-monitoring-suite)
{% endcontent-ref %}

## CSM Performance Threshold

Staying above the Lido CSM `Performance Threshold` enables CSM Operators to qualify for the socialized node operator rewards.

<figure><img src="/files/p9LTFVWRwOaaXUoZpbGs" alt="" width="563"><figcaption></figcaption></figure>

Lido CSM uses the following parameters to measure the Performance Threshold, where `Performance Threshold = Average Validator Network Performance - Performance Leeway`.

* Performance of each validator = `Successful Attestations / Total Attestations Assigned`
* Average Validator Network Performance = A good proxy to use will be the `Average Participation Rate` found on [Rated Network](https://explorer.rated.network/network?network=mainnet\&timeWindow=1d\&rewardsMetric=average\&geoDistType=all\&hostDistType=all\&soloProDist=stake).
* Performance Leeway = `500 Basis Points (5%)`
* Frame = `28 days`

e.g., For a 28 day period, if the Average Validator Network Performance is 99.6%, then your validators will need to achieve a 94.6% Performance level in order to qualify for the socialized node operator rewards.

### Tips to improve performance

{% content-ref url="/pages/nrNI53ofvtW1ZJ7ip8xj" %}
[Maximising uptime and performance](/best-practices/maximising-uptime-and-performance)
{% endcontent-ref %}


# Automations


# CSM with ETHPillar

## VM/Hardware Setup

You will need to prepare your virtual machine (VM) or home staking hardware for all options below. Step-by-step guide below.

{% content-ref url="/pages/68N04wxxW6k8PC4CHn8H" %}
[Google Cloud](/hardware-and-systems-setup/practicing-for-free-on-cloud-vms/google-cloud)
{% endcontent-ref %}

{% content-ref url="/pages/9LdUYtk0W53bf9DYg5dT" %}
[Assemble your hardware](/hardware-and-systems-setup/assemble-your-hardware)
{% endcontent-ref %}

## Lido CSM testnet workflow

### Video guide

{% embed url="<https://www.youtube.com/watch?v=aZLPACj2oPI>" %}

### Prepare your VM/Hardware

Create a new Google Cloud account to unlock $300 of free cloud credits.

Create a VM on the Google Cloud Console (or any other cloud provider) with the following machine specifications.

* CPU: 2 vCPU
* RAM: 8GB
* Disk: 350GB SSD
* OS: Ubuntu 24.04 LTS
* Enable HTTP & HTTPS traffic

{% hint style="info" %}
Estimated cost per month on Google Cloud = $84, or ***3.5 months of free practice time*** with $300 of cloud credits&#x20;
{% endhint %}

### Install ETHPillar

**SSH into your VM/hardware:** Click on the dropdown beside the **"SSH"** column and select **"Open in browser window".** Click on **"Authorize"** when prompted.

<figure><img src="/files/EzZIr9IdsPi64bvqlcxe" alt=""><figcaption></figcaption></figure>

Go to the [Coincashew website](https://www.coincashew.com/coins/overview-eth/ethpillar) and copy the latest 1-line installation command and paste it into your terminal.

```sh
/bin/bash -c "$(curl -fsSL https://raw.githubusercontent.com/coincashew/EthPillar/main/install.sh)"
```

Then, type + enter `ethpillar` and follow along the prompts in the terminal UI (TUI) to:

1. Sync a Nethermind execution client and a Nimbus Consensus + Validator Client
2. Generate suitable validator keys to participate in the Lido CSM
   * Verify the fee recipient and withdrawal address on the [CSM Operator Portal](https://operatorportal.lido.fi/modules/community-staking-module)
3. Import the generated validator keys onto your validator client

Copy the deposit data generated by the command below for uploading onto the Lido CSM Widget.

* **Mainnet:** <https://csm.lido.fi/>
* **Hoodi:** <https://csm.testnet.fi/>

```sh
cat ~/staking-deposit-cli/validator_keys2024-08-23-063857/deposit*json
```

### Get Hoodi ETH

Run through the first 3 faucets below.

{% content-ref url="/pages/n061Pua9FlPNOxbGPLgc" %}
[Hoodi Faucets](/useful-resources/hoodi-faucets)
{% endcontent-ref %}

### Upload deposit data & provide bond

{% content-ref url="/pages/DfraBrzXWC6wa1ewAUGA" %}
[Upload/Remove/View validator keys](/bonded-validators-setup/lido-csm/upload-remove-view-validator-keys)
{% endcontent-ref %}

### ETHPillar TUI Navigation

1. `Arrow keys & Tab key`: Cycle options
2. `Space bar`: Select option
3. `Enter`: Confirm option
4. `CTRL+B`, then `D`: Exit split-screen monitoring view
5. `CTRL+C`: Exit individual screen monitoring view
6. `exit` command (type "exit" and `enter` in terminal) : Exit current terminal

## Mainnet workflow

ETHPillar has an inbuilt TUI workflow for Mainnet setups. Simply follow along but **verify the withdrawal and fee recipient addresses.**

* **Mainnet withdrawal\_address:** [`0xB9D7934878B5FB9610B3fE8A5e441e8fad7E293f`](https://etherscan.io/address/0xb9d7934878b5fb9610b3fe8a5e441e8fad7e293f)
* **Mainnet fee recipient address:** [`0x388C818CA8B9251b393131C08a736A67ccB19297`](https://etherscan.io/address/0x388C818CA8B9251b393131C08a736A67ccB19297)

## Support

{% embed url="<https://t.me/stakesaurus>" %}

## Donations

#### If you found this helpful, consider supporting Stakesaurus in one of few ways [here](https://dvt-homestaker.stakesaurus.com/#if-you-found-this-helpful-consider-supporting-stakesaurus-in-one-of-two-ways-below)!


# CSM with ETH Docker

## VM/Hardware Setup

You will need to prepare your virtual machine (VM) or home staking hardware for all options below. Step-by-step guide below.

{% content-ref url="/pages/68N04wxxW6k8PC4CHn8H" %}
[Google Cloud](/hardware-and-systems-setup/practicing-for-free-on-cloud-vms/google-cloud)
{% endcontent-ref %}

{% content-ref url="/pages/9LdUYtk0W53bf9DYg5dT" %}
[Assemble your hardware](/hardware-and-systems-setup/assemble-your-hardware)
{% endcontent-ref %}

## Lido CSM testnet workflow

### Video guide

{% embed url="<https://www.youtube.com/watch?v=PQ5qLfbBeTI>" %}

### Prepare your VM/Hardware

Create a new Google Cloud account to unlock $300 of free cloud credits.

Create a VM on the Google Cloud Console (or any other cloud provider) with the following machine specifications.

* **CPU:** 2 vCPU
* **RAM:** 8GB
* **Boot Disk:** Ubuntu 24.04 LTS, Balanced persistent disk, 250GB SSD,
* **Identity & API access:** No service account
* **Firewall:** Enable HTTP & HTTPS traffic

{% hint style="info" %}
Estimated cost per month on Google Cloud = $84, or ***3.5 months of free practice time*** with $300 of cloud credits&#x20;
{% endhint %}

### SSH into your machine

**SSH into your VM/hardware:** Click on the dropdown beside the **"SSH"** column and select **"Open in browser window".** Click on **"Authorize"** when prompted.

<figure><img src="/files/UkpnmVcL4pkUYUrMXCAU" alt=""><figcaption></figcaption></figure>

### Install Docker

```sh
curl -fsSL https://get.docker.com -o get-docker.sh
sudo sh get-docker.sh

sudo groupadd docker
sudo usermod -aG docker $USER
```

### Download & configure ETH Docker

Go to the [ETH Docker repository ](https://github.com/lidofinance/eth-docker)and to get and run the installation commands. Run the next 2 commands in sequence.

```sh
cd ~ && git clone https://github.com/eth-educators/eth-docker.git && cd eth-docker
```

```sh
sudo usermod -aG sudo $USER
```

Exit your virtual machine/hardware and re-login to add your host user into the docker user group.

```
exit
```

After logging in again, install ETH Docker.

```sh
cd eth-docker
./ethd install
```

After the installation is complete, run:

```sh
source ~/.profile
```

You will now be able to call `ethd` from anywhere in your terminal. Next, configure the ETH Docker service.

```sh
ethd config
```

**Follow along the prompts in the terminal UI (TUI) to:**

1. Choose `Hoodi Testnet` >> `Lido-compatible node (Community Staking / Simple DVT)` >> `[Community Staking] CSM node`
2. Select the **Nimbus** (Consensus) and **Nethermind** (Execution) for the client choices
3. Use the default **Checkpoint Sync URL**, select `yes` for **MEV Boost**, `select all` **relays**, `yes` for **Grafana dashboards**, `default` **Graffiti**, `yes` for **generate validator keys**
4. Generate suitable validator keys to participate in the Lido CSM
   * Generate `1` validator key and set the encryption password for the key
   * Save your 24-word mnemonic
   * Verify the fee recipient and withdrawal address on the [CSM Operator Portal](https://operatorportal.lido.fi/modules/community-staking-module)

{% tabs %}
{% tab title="Withdrawal Address" %}

* **Mainnet:** [`0xB9D7934878B5FB9610B3fE8A5e441e8fad7E293f`](https://etherscan.io/address/0xb9d7934878b5fb9610b3fe8a5e441e8fad7e293f)&#x20;
* **Hoodi:** [`0x4473dCDDbf77679A643BdB654dbd86D67F8d32f2`](https://hoodi.cloud.blockscout.com/address/0x4473dCDDbf77679A643BdB654dbd86D67F8d32f2)
  {% endtab %}

{% tab title="Fee Recipient Address" %}

* **Mainnet:** [`0x388C818CA8B9251b393131C08a736A67ccB19297`](https://etherscan.io/address/0x388C818CA8B9251b393131C08a736A67ccB19297)&#x20;
* **Hoodi:** [`0x9b108015fe433F173696Af3Aa0CF7CDb3E104258`](https://hoodi.cloud.blockscout.com/address/0x9b108015fe433F173696Af3Aa0CF7CDb3E104258)
  {% endtab %}
  {% endtabs %}

#### ETH Docker TUI Navigation

1. `Arrow keys & Tab key`: Cycle options
2. `Space bar`: Select option
3. `Enter`: Confirm option
4. `CTRL+C`: Exit individual screen monitoring view

### Start ETH Docker

```
ethd start
```

### Import validator keys

{% hint style="info" %}
You will need to wait around 5 minutes from starting the ETH Docker stack before importing keys without errors.&#x20;
{% endhint %}

Change the user permissions of the folder containing your validator keys. Replace \<user> with your actual username of your VM.

```sh
sudo chown -R $USER:$USER ~/eth-docker/.eth/validator_keys
```

**Tip:** To find username, look to the terminal of your sever/node. Every character before the `@` is your username

Next, import the generated validator keys onto your validator client

```
ethd keys import
```

### Upload deposit data

Copy the deposit data generated by the command below for uploading onto the Lido CSM Widget.

* **Mainnet:** <https://csm.lido.fi/>
* **Hoodi:** <https://csm.testnet.fi/>

```
cat ~/eth-docker/.eth/validator_keys/deposit*json
```

Example:

{% hint style="success" %}
\[{"pubkey": "b72e61268081e28b583d78876cc1687d72be4c3592de1f9d585c96b4c64b25b49174f04ae6e55eb1e59247cb575c0157", "withdrawal\_credentials": "010000000000000000000000f0179dec45a37423ead4fad5fcb136197872ead9", "amount": 32000000000, "signature": "8bb6e8838d15ea0ea23ed5151436ea07b65a0530ccfa9f5154b1fa394827df5add81510cf3463b79a387b0dffbe43ae417ea53b844b43d6a249fbc153fa1deda9fc089f218a845e382aa7455d804650e0e03232d3dad36b180bbdacd908f286c", "deposit\_message\_root": "8dbda15641eb7be3573f7377d10634c93c2b1dceb9fb6e519ec54ae0286d04c7", "deposit\_data\_root": "43f215ce19df49591db322bd4966667afc2a226a0a9812e5d60e31c60223991c", "fork\_version": "01017000", "network\_name": "hoodi", "deposit\_cli\_version": "2.7.0"}]
{% endhint %}

{% content-ref url="/pages/DfraBrzXWC6wa1ewAUGA" %}
[Upload/Remove/View validator keys](/bonded-validators-setup/lido-csm/upload-remove-view-validator-keys)
{% endcontent-ref %}

### View logs

Monitor the logs of your validator node to make sure that it is syncing (or synced) with no errors while you wait for Lido to provision your validator deposit with 32 ETH.

View logs of each docker container.

```
ethd logs <container_name> -f --tail 20
```

**Flags:**

* `-f`: Follow along the logs in real time. `CTRL+C` to exit monitoring view
* `--tail`: Print the last N lines of the logs.

Choose one to replace the `<container_name>` above.

```
blackbox-exporter          consensus                  execution                  json-exporter              node-exporter              promtail
cadvisor                   ethereum-metrics-exporter  grafana                    loki                       prometheus                 validator
```

**Grafana Dashboards:**

Bring down all ETH Docker containers.

```
ethd down
```

Edit the `.env` file of ETH Docker.

```
nano ~/eth-docker/.env
```

Scroll down to the **`GRAFANA_PORT=3000`** line and change the number to **`443`**.

`CTRL+O`, `ENTER`, `CTRL+X` to save and exit.

Bring ETH Docker back up.

```
ethd up
```

To access your Grafana dashboard, navigate to `PUBLIC_IP:443` on your web browser.&#x20;

### Useful commands

Run `ethd help` to print all available command line options. Common options:

* Update all clients & ETH Docker stack: `ethd update`
* Stop ETH Docker: `ethd down`
* Restart ETH Docker: `ethd restart`
* Restart from scratch: `ethd terminate`&#x20;

## Mainnet workflow

ETH Docker has an inbuilt TUI workflow for Mainnet setups. Simply follow along but **verify the withdrawal and fee recipient addresses.**

* **Mainnet withdrawal\_address:** [`0xB9D7934878B5FB9610B3fE8A5e441e8fad7E293f`](https://etherscan.io/address/0xb9d7934878b5fb9610b3fe8a5e441e8fad7e293f)
* **Mainnet fee recipient address:** [`0x388C818CA8B9251b393131C08a736A67ccB19297`](https://etherscan.io/address/0x388C818CA8B9251b393131C08a736A67ccB19297)

## Support

{% embed url="<https://t.me/stakesaurus>" %}


# CSM with Dappnode

## Accessing your Dappnode

Connect your Dappnode to your home router using a LAN cable and turn it on.

There are 3 different ways to access your dappnode.

1. **Dappnode's own WiFi hotspot:** Connect your working computer/laptop to the Dappnode WiFi hotspot and paste `http://my.dappnode` in your browser
2. **Local network access:** Connect your working computer/laptop to the same WiFi network as the router the Dappnode is connected to and paste `http://dappnode.local` in your browser
3. **VPN access:** This method requires additional configuration after initially logging in to your Dappnode using either of the above 2 methods. This is covered in the video guide below.

**Video Guide by Dappnode**

{% embed url="<https://www.youtube.com/watch?v=Z1uDv_J7wlg>" %}

## Overall guide

The Dappnode team has put together a guide for using Dappnode to setup and run ETH validators via Lido CSM.

{% embed url="<https://docs.dappnode.io/docs/user/staking/ethereum/lsd-pools/lido/overview>" %}
(Open this link in a new tab)
{% endembed %}

## Validator Key Generation

Note that the steps for [**Generate Keystores and Deposit Data**](https://docs.dappnode.io/docs/user/staking/ethereum/lsd-pools/lido/register) on testnet and mainnet will differ.&#x20;

## Testnet KeyGen Process

Follow along the Dappnode CSM guide in the embedded link above and simply generate your testnet validator keystores + deposit data on your working laptop.

## Mainnet KeyGen Process

Because the keystore generation process for Mainnet needs to be a lot more secure, we will have to perform additional steps as detailed in the section linked below.

{% content-ref url="/pages/xKRzukcuy2WXF2GE7amh" %}
[Validator key generation](/keystore-generation-and-mev-boost/validator-key-generation)
{% endcontent-ref %}

Refer back to the [**Dappnode CSM guide for Steps 3 & 4**](https://docs.dappnode.io/docs/user/staking/ethereum/lsd-pools/lido/register#3-install-the-lido-csm-package) once your **validator keystores** and **deposit data** have been generated.


# Puffer


# Non-Enclave: 2 ETH

## Installing dependencies

Rust

```sh
curl --proto '=https' --tlsv1.2 -sSf https://sh.rustup.rs | sh
```

Cargo

```sh
sudo apt install cargo
```

OpenSSL & pkg-config

```sh
sudo apt-get install libssl-dev pkg-config
```

Set the `PKG_CONFIG_PATH` Environment Variable

```sh
export PKG_CONFIG_PATH=/usr/lib/x86_64-linux-gnu/pkgconfig:$PKG_CONFIG_PATH
```

Exit your VM and re-login.

```sh
exit
```

## Installing Puffer

Download the latest Coral repository and enter into this directory.

```sh
git clone https://github.com/PufferFinance/coral
cd coral
```

Build the Coral image ("install").

```sh
cargo build --release
```

## Generate validator keys and Puffer registration file

First, make sure you are in the `coral` folder.

```
cd ~/coral
```

Create a password file to encrypt your validator keys.

```
mkdir output
nano output/password.txt
```

Enter your password in the plain text file and use `CTRL+O`, `ENTER`, `CTRL+X` to save and exit.

### Retrieve latest Module name

Visit [puffer.fi](https://www.puffer.fi/) and select "Become a validator".

Connect your wallet. Disable the "Enclave" option. Then, copy + paste the command on a text editor and set the`--password-file` and `--output-file` to `output/password.txt` and `output/registration_001.json`.

<figure><img src="/files/9K5AUa3hlVEfRvnX0iIN" alt=""><figcaption></figcaption></figure>

{% hint style="info" %}
Validator enclaves using Intel SGX is not live on mainnet yet and the current version on testnet will be deprecated in favour of the upcoming V2 SGX.
{% endhint %}

**Example Command:**

```
cargo run --bin coral-cli validator keygen --guardian-threshold 1 --module-name <0xXXX...> --withdrawal-credentials <0x0100...> --guardian-pubkeys 0x04097a98928ed79c443d03714d4073baecf21928102c7f8d1b34420d358c9b625da61d237034919de8c690cf4992e098311a449e41e655ee0b270486b7bc613fa2 --fork-version 0x01017000 --password-file output/password.txt --output-file output/registration_docker_001.json
```

Follow the prompts to select the number of validator keys to generate.

If successful, you should see the following files in your `~/coral/output`  and `~/coral/etc/keys/bls_keys` folders.

```sh
ls ~/coral/output
```

**Expected output:**

```
password.txt    registration_docker_001.json
```

```sh
ls ~/coral/etc/keys/bls_keys
```

**Expected output:**

*\*Example only. You should see a file with it's validator public key as its file name.*

```
800000b3884235f70b06fec68c19642fc9e81e34fbe7f1c0ae156b8b45860dfe5ac71037ae561c2a759ba83401488e18
```

## Transfer Puffer registration file

Open up your terminal/powershell on your Mac/Windows laptop and run:

```
ssh-keygen -t ed25519 -C <google_cloud_username>
```

Your `<google_cloud_username>` can be found in the email you used to sign up for Google Cloud. e.g., if `sam@gmail.com` is the email used, then `sam` is your username.&#x20;

Print the ssh public key.

```
cat ~/.ssh/id_ed25519.pub
```

Copy the output, click into your Google Cloud instance>>`EDIT`, scroll down to `SSH Keys`>>`ADD ITEM`, and paste it here. Then `Save`.

Open up the terminal app on your laptop and run the secure copy command to retrieve your Puffer registration file. We will upload this file onto the Puffer launchpad in the next step to register your validator.

```sh
cd ~
scp -i .ssh/id_ed25519 <username>@<IP_address>:~/coral/output/registration_docker_001.json Downloads/registration_docker_001.json
```

**Tip:** Replace `<username>` & `<IP_address>` with the actual username & IP address of your server/node.

* To find username, look to the terminal of your sever/node. Every character before the `@` is your username
* To find IP address of a virtual machine (VM), go to your cloud service console, click into your VM and find the "Public IP"&#x20;
* To find IP address of a self-hosted machine, SSH into the machine and run `ip a`on the terminal. The IP address will take the form of `192.168.xx.xx`

{% hint style="info" %}
Do not use any other method to transfer the registration.json file onto your laptop as the data might be corrupted during transfer. Uploading invalid registration files will result in penalties which will be deducted from your Validator Tickets.
{% endhint %}

## Mint pufETH and Validator Tickets (VTs)

Purchase 2 ETH worth of pufETH and at least 28 days worth of validator tickets.

<figure><img src="/files/D1aj7SgjYlllJ89Ysgv2" alt=""><figcaption></figcaption></figure>

* Non-enclave users must deposit 2 ETH worth of pufETH to register
* A minimum of 28 Validator Tickets (VTs) are required to be deposited when registering a validator. The Guardians will exit validators if their VTs expire after 28 days without being refilled.

## Validator Registration

Upload the registration.json file that you retrieved from your server/node onto your laptop here.&#x20;

<figure><img src="/files/jTbIrRpdfb2LzwmaNqHe" alt=""><figcaption></figcaption></figure>

You will then be prompted to sign 3 transactions on your wallet.

* Sign a `Permit` message to deposit your VTs to the PufferProtocol contract
* Sign a `Permit` message to deposit your pufETH bond to the PufferProtocol contract
* Sign the final transaction to register your validator

### Await deposit by Puffer

The Guardians will provision pending validators when there is 32 ETH of liquidity in the PufferVault.

Invalid registrations will be skipped by the Guardians. Your bond will be returned but your VTs are penalized to prevent griefing.

## Import validator keys

Now that your validator is registered with Puffer, you will need to import the validator key into your validator client.

### ETH Docker users

Follow the steps in the page below until before the **"Import validator keys"** section.&#x20;

{% content-ref url="/pages/c8hStsV6JG56qLSk8fhB" %}
[ETH Docker](/automation-tools/eth-docker)
{% endcontent-ref %}

Move your validator key(s) into the `~/eth-docker/.eth/validator_keys` folder.

```sh
cd ~/coral/etc/keys/bls_keys
sudo cp * ~/eth-docker/.eth/validator_keys
```

Import validator keys into your validator client

<pre class="language-sh"><code class="lang-sh"><strong>ethd keys import
</strong></code></pre>

Alternatively,

```sh
~/eth-docker/./ethd keys import
```

{% hint style="info" %}
If you have not configured your validator node go to the eth-docker page to complete the setup.
{% endhint %}

#### Monitor logs

Monitor the logs of your validator node to make sure that it is syncing (or synced) with no errors while you wait for Puffer to provision your validator deposit with 32 ETH.

View logs of each docker container.

```sh
ethd logs <container_name> -f
```

Choose one to replace the `<container_name>` above.

```
blackbox-exporter          consensus                  execution                  json-exporter              node-exporter              promtail
cadvisor                   ethereum-metrics-exporter  grafana                    loki                       prometheus                 validator
```

### Systemd users (WIP)

## Support

{% embed url="<https://t.me/stakesaurus>" %}

## Donations

#### If you found this helpful, consider supporting Stakesaurus in one of few ways [here](https://dvt-homestaker.stakesaurus.com/#if-you-found-this-helpful-consider-supporting-stakesaurus-in-one-of-two-ways-below)!


# Enclave: 1 ETH (WIP)

## Create VM

Create an SGX-enabled VM on Azure.

```
ResourceType	 Locations    Name	            Zones	Restrictions
virtualMachines  japaneast    Standard_DC1ds_v3       1          None
```

### Azure resources with SGX enabled

Open up your Azure console.

<figure><img src="/files/8RKdUw3AT2Tr4ZLTU1zw" alt=""><figcaption></figcaption></figure>

Print out all resources with SGX enabled.

```
az vm list-skus --size Standard_DC --all --output table

```

#### List updated as at 19/08/2024 [here](https://docs.google.com/spreadsheets/d/1CyvMuyvTzpgCJdc8Tu5dA98l-z00GPQ78mC3FjMJ_tQ/edit?usp=sharing).

## Checks

### Update packages

```
sudo apt update
sudo apt install cpuid
```

### Dependencies

Rust

```
curl --proto '=https' --tlsv1.2 -sSf https://sh.rustup.rs | sh
```

Cargo

```
sudo apt install cargo
```

OpenSSL & pkg-config

```
sudo apt-get install libssl-dev pkg-config
```

#### **Set the `PKG_CONFIG_PATH` Environment Variable**

```
export PKG_CONFIG_PATH=/usr/lib/x86_64-linux-gnu/pkgconfig:$PKG_CONFIG_PATH
```

## Non scp registration file transfer

&#x20;

### Method 1: Manual copy-paste

Print out the contents of the `registration_docker_001.json` file.

```
cd
cat ~/coral/output/registration_docker_001.json
```

Copy the entire output starting from the opening curly brackets `{` to the closing curly brackets `}` and paste it onto a text editor / notepad on your laptop.

**Example:**

<figure><img src="/files/O752w37Te98TKVJiz5CG" alt=""><figcaption></figcaption></figure>

Save this plain text file as `registration_docker_001.json`.&#x20;

{% hint style="info" %}
On Windows notepad, select `"All file types"` before saving.
{% endhint %}


# Ether.fi


# Receive distributed validator keyshares

## GPG Key Exchange

This Public key cryptography process is used to transfer the distributed validator keyshares from Ether.Fi to participating node operators securely.

### Overview of steps

1. Receive EtherFi GPG public key from the programme coordinator
2. Generate your own GPG public-private key pair and the public key fingerprint
3. Export your GPG public key and send it to the programme coordinator via Telegram or Discord
4. Export your GPG <mark style="color:red;">**fingerprint**</mark> and send it to the programme coordinator via <mark style="color:red;">**email**</mark>
5. Receive EtherFi GPG fingerprint from the programme coordinator via email
6. Import EtherFi GPG public key into your GPG keyring and verify the fingerprint with the one you received via email
7. Decrypt the encrypted keyshare files after you receive them from EtherFi

### Receive EtherFi public key

You will receive this `.asc` file from EtherFi's programme coordinator via Telegram or Discord after you have been onboarded onto a testnet or mainnet cohort.

### Generate your own GPG key pair&#x20;

```
gpg --full-generate-key
```

* Choose the key type (e.g., RSA and RSA).
* Set the key size (e.g., 4096 bits for high security).
* Define the expiration date (or set it to never expire).
* Provide your name and email address when prompted.
* Set a secure passphrase to protect the private key.

### Export your GPG public key

```
gpg --armor --export <your-email@example.com> > my-public-key.asc
```

* This creates an ASCII-armored file called `my-public-key.asc`.
* Copy the contents of this file and send it to the EtherFi coordinator in the Telegram or Discord chat.

### Export your GPG **fingerprint**

```
gpg --fingerprint <your-email@example.com>
```

* You’ll see the fingerprint printed as a series of hex digits. e.g., `B365 BB56 85E2 2A50 540A 12C6 E42C FC8D 577E 83F5`
* Copy this fingerprint and email it to the EtherFi programme coordinator

### Receive EtherFi GPG fingerprint

You will then receive the EtherFi GPG fingerprint as an email response.

### Import EtherFi GPG public key & verify fingerprint

* Import EtherFi GPG public key into your GPG keyring

```
gpg --import <etherfi-public-key.asc>
```

* Verify the fingerprint using the email sent to you

```
gpg --fingerprint <etherfi-email@example.com>
```

### Decrypt encrypted keyshare files

After receiving the encrypted keyshare files from EtherFi, move them into the same machine that you generated your GPG key pairs in and decrypt them.

```
gpg --decrypt <encrypted-file.gpg> > decrypted-file.zip
```

## Extract your keyshare files

```
unzip decrypted-file.tar.gz
```


# Stader (WIP)


---

[Next Page](/llms-full.txt/1)